
Hello everyone! In this episode, I want to talk about Microsoft Defender for Endpoint. It’s not a well-known free Defender antivirus built in Windows 10, but an enterprise level solution with the similar name. Yes, the naming is pretty confusing.
I will not repeat Microsoft’s marketing thesis. Just the basic idea. The Windows endpoints on your network have built-in agents that can send some data to the Microsoft cloud. In the cloud, they process this data into security events. Users can see these events in the web interface on the Microsoft website.
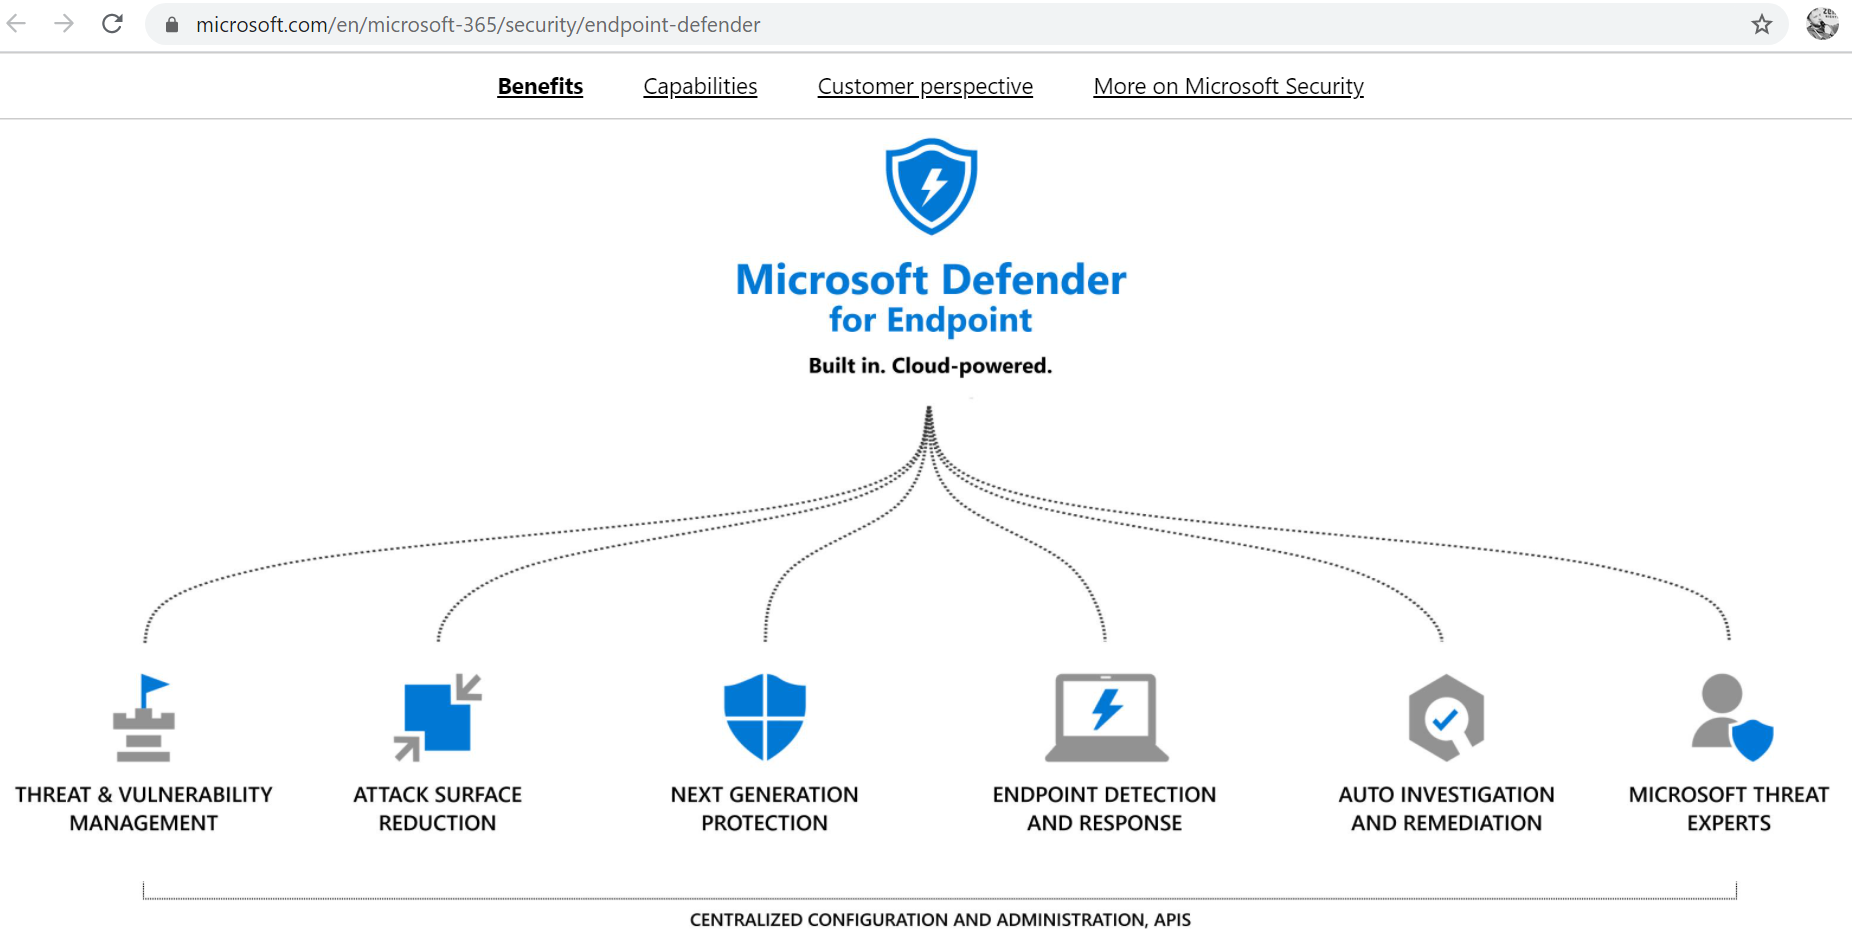
What can it actually do? Many shiny security marketing things:
- Threat and Vulnerability Management
- Attack Surface Reduction
- Next Generation Protection
- Endpoint Detection and Response
- Auto Investigation and Remediation
- Microsoft Threat Experts
But the most important for me is that Microsoft Defender for Endpoint can
- Detect malware, so it can replace the Antivirus solutions like Kaspersky or McAfee
- Detect vulnerabilities, so it can replace Vulnerability Management systems such as Tenable Nessus or Qualys
- Detect attacks, so it can replace Endpoint Protection systems, such as FireEye HX
Of course, this is not a silver bullet and the competition will never stop, but still the fact that Microsoft controls the OS is an enormous boost to their corporate security products.
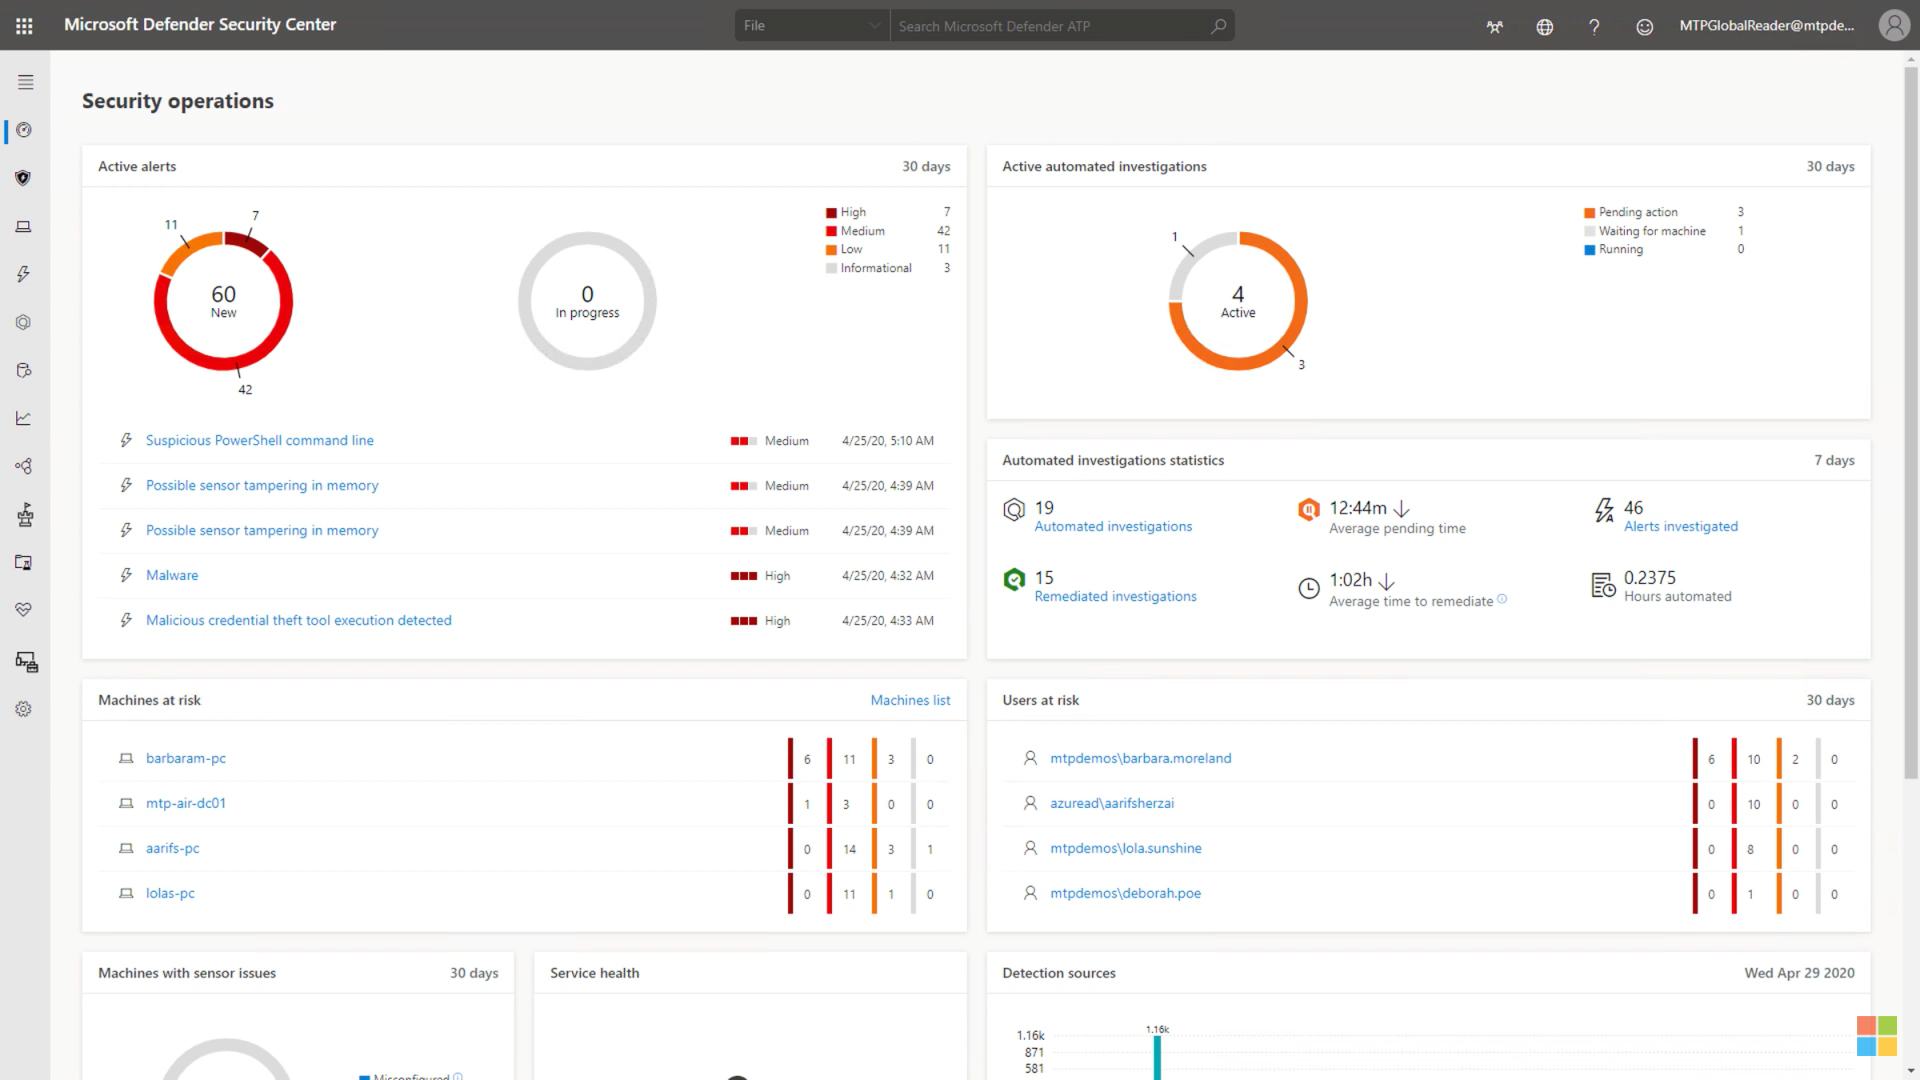
So, when you log into the GUI https://securitycenter.windows.com/ using a domain account like john.smith@corporation.com, you will see many tabs and specialized dashboards.
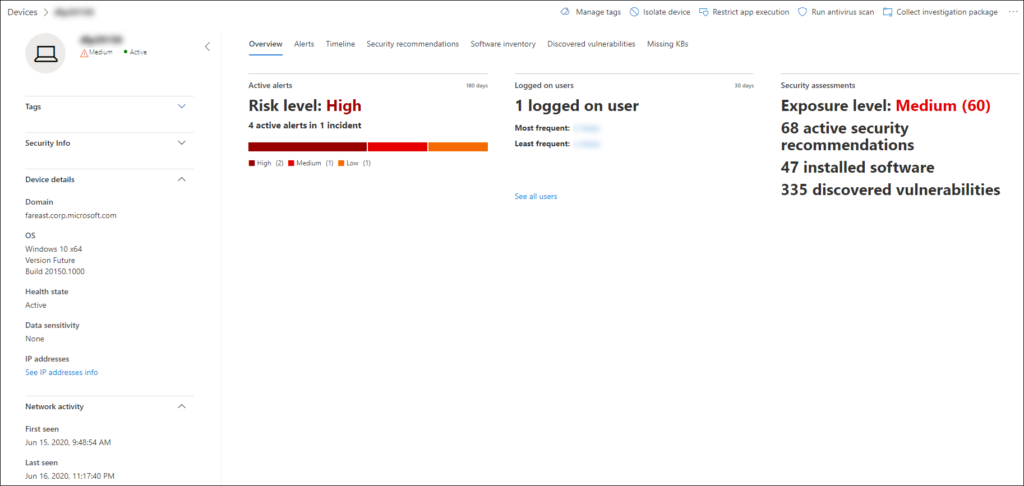
For example, the Security operations dashboard with Active alerts, Active automated investigations, Machines at risk, Users at risk, and so on.
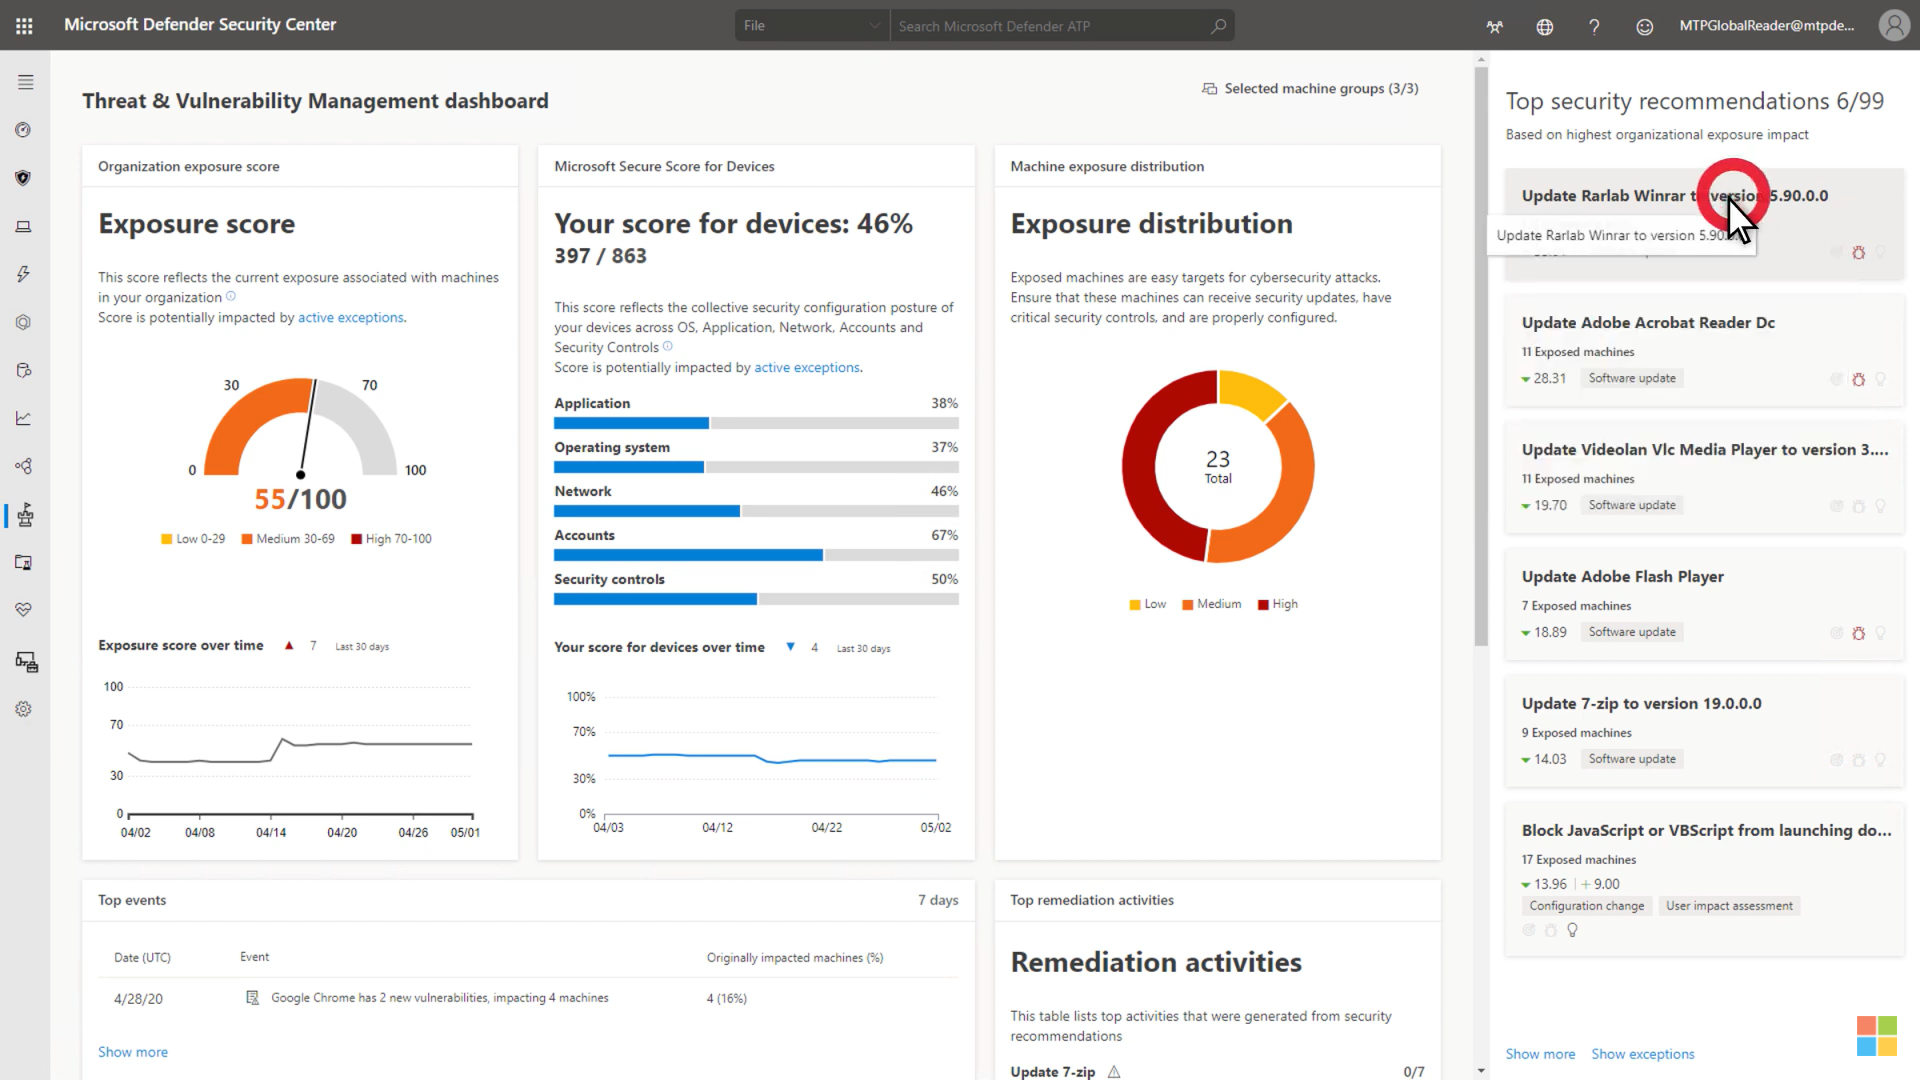
Or Treat & Exposure dashboard with different scores for devices and security recommendations.
But I think the most useful is the Device Inventory where you can see a list of all assets and information related to asset (Device name, Domain, Risk Level, Exposure level, OS platform and version, Health state, Last device update and tags).
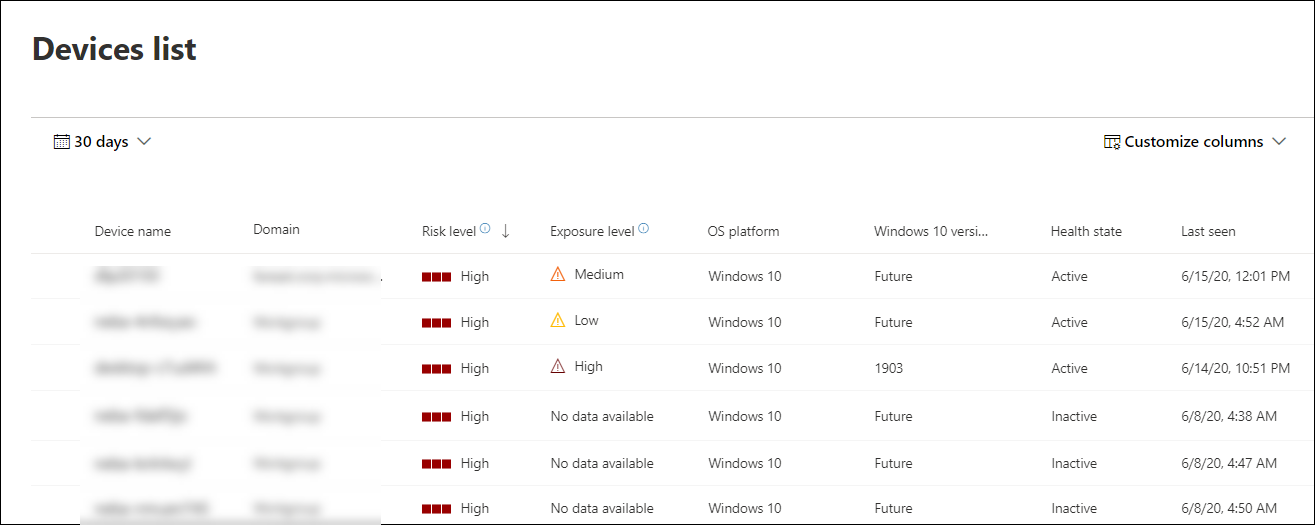
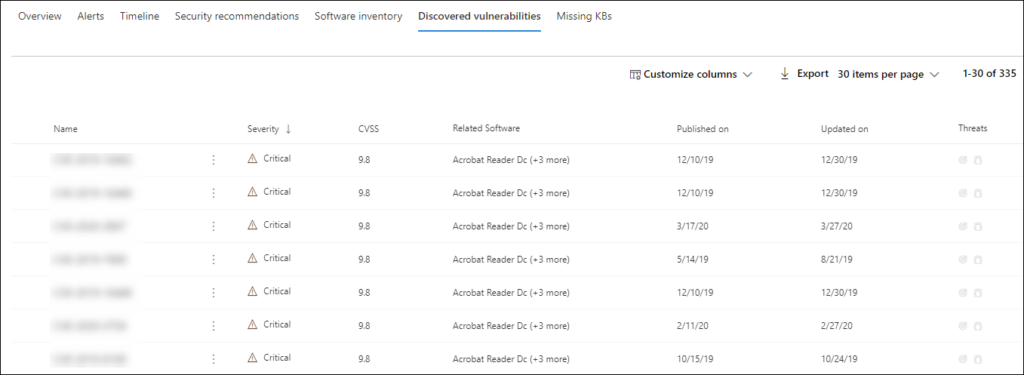
And then you can click on the host and get the detailed information, including the list of Alerts, Installed software, Vulnerabilities, Missing KBs, etc.
What is very important, the vulnerabilities are not only in Microsoft products.
Here I would like to stop talking about GUI. For those who are interested in all capabilities, I recommend the official marketing video by Microsoft and related articles from the manual “View and organize the Microsoft Defender for Endpoint Devices list“ and “Investigate devices in the Microsoft Defender for Endpoint Devices list“.
How to get data from the Defender for endpoint
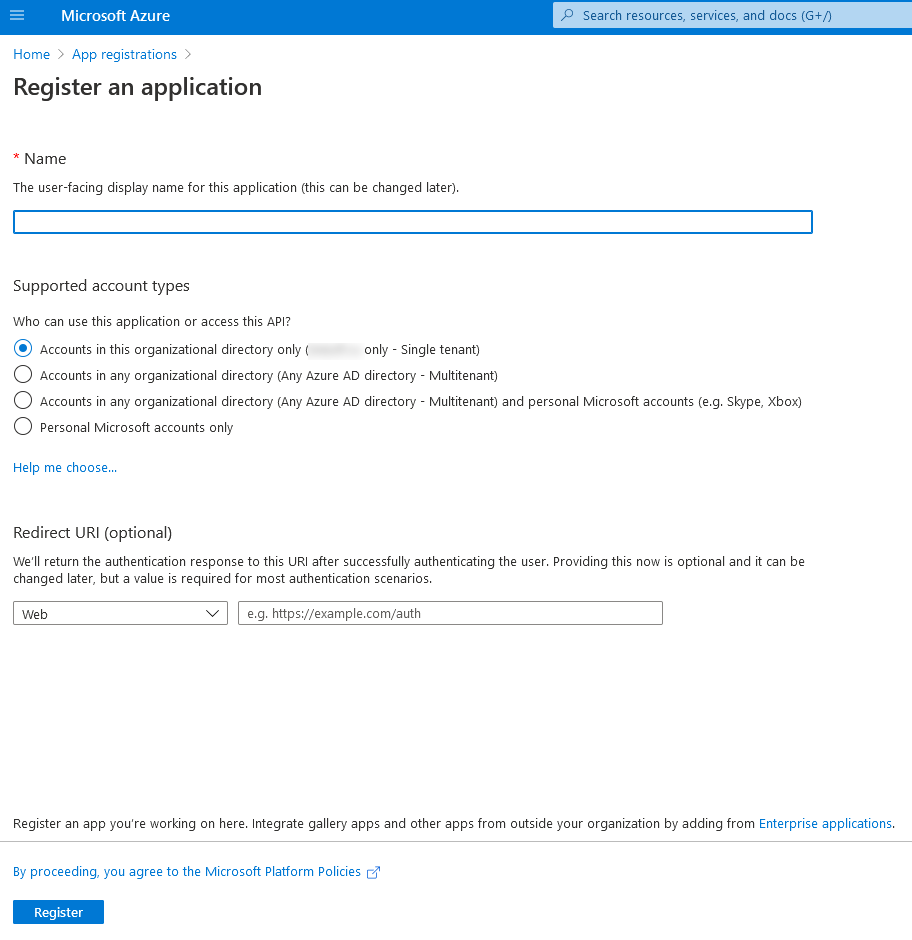
So let’s talk how to get data from the Defender for endpoint in an automated manner. You may think that there should be some tab where you can issue the token to access Microsoft Defender for endpoint automatically. No, not that simple! Actually, you should go to Microsoft Azure and create a new application. There is a video about this on Microsoft site but it is outdated.
So go to https://portal.azure.com, login and search for “App registrations”. Register a new application.
Then go to the app permissions tab and request API permissions for MicrosoftDefenderATP. Well, I chose everything related to reading.
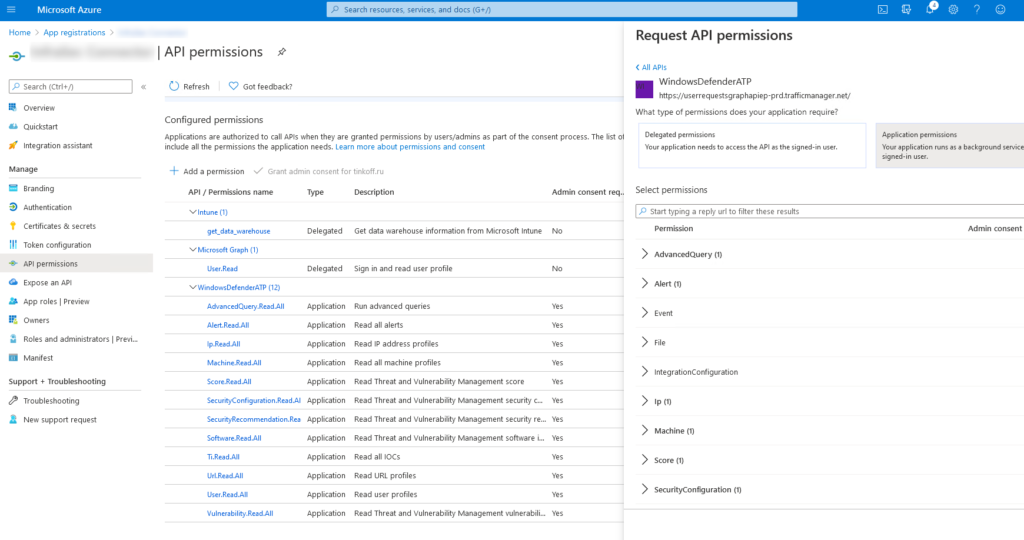
Then you need someone who can approve these permissions for you, your Microsoft Azure system administrator, probably.
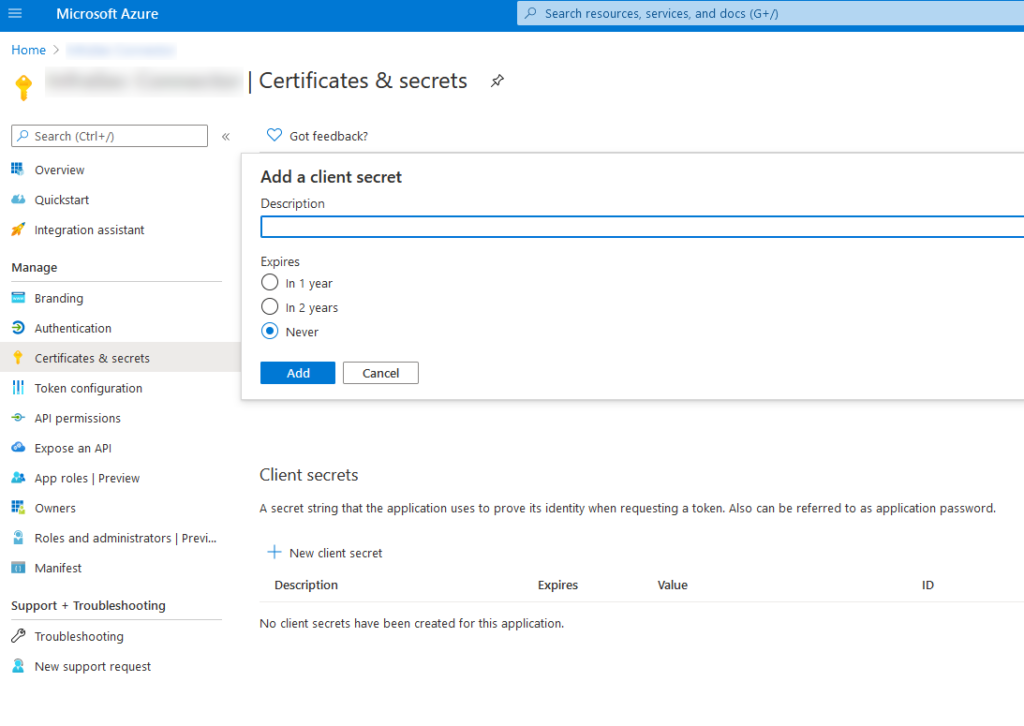
Then you go to the Secrets tab and add a new client’s Secret. And that’s it.
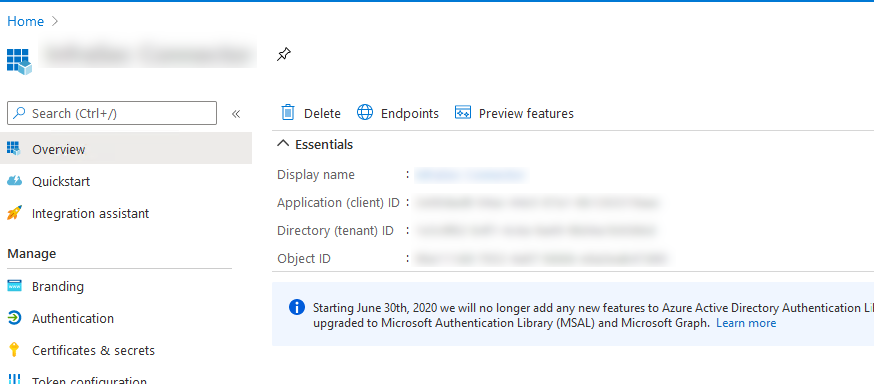
To work with Microsoft Defender for endpoint API you need the Secret, Application ID and Tenant ID in the Overview tab.
How to Export Hosts via API in Python
Now let’s see the example of API usage. The script will get the host list, so we could count the percentage of the hosts that are covered by Microsoft Defender for Endpoint. The documentation is available on the Microsoft website.
First of all, we need to get a token using tenantId, appId and appSecret. Then we can make get requests to /api/machines. The only tricky moment is how to make pagination. It is not documented, but we can find it in OData documentation: parameters $skip and $top.
import requests
tenantId = ""
appId = ""
appSecret = ""
def get_token():
    body = {
        "resource": "https://api.securitycenter.windows.com",
        "client_id": appId,
        "client_secret": appSecret,
        "grant_type": "client_credentials"
    }
    response = requests.post("https://login.windows.net/" + tenantId + "/oauth2/token", data=body)
    return response.json()["access_token"]

def list_machines(auth_token):
    headers = {
        'Content-Type': 'application/json',
        'Accept': 'application/json',
        'Authorization': "Bearer " + auth_token
    }
    skip = 0
    top = 1000
    results = list()
    processing_machines_continue = True
    while processing_machines_continue:
        url = "https://api.securitycenter.windows.com/api/machines?$skip= " + str(skip) + " &$top=" + str(top)
        response = requests.get(url, headers=headers)
        if response.json()['value'] != list():
            results += response.json()['value']
            skip += top
        else:
            processing_machines_continue = False
    return results

token = get_token()

import json
for machine in list_machines(token):
    print(machine['computerDnsName'])
    print(json.dumps(machine, indent=4))
In the output we can see the hostname in computerDnsName, osPlatform, osVersion, agentVersion, riskScore, exposureLevel and other basic parameters.
host1.corportation.com
{
    "id": "f4aaa66e6651d710c202a186d0c92e8707598dad",
    "computerDnsName": "host1.corportation.com",
    "firstSeen": "2020-07-21T14:49:54.5715711Z",
    "lastSeen": "2021-02-08T11:02:19.9002914Z",
    "osPlatform": "Windows10",
    "osVersion": null,
    "osProcessor": "x64",
    "version": "20H2",
    "lastIpAddress": "###IP_value###",
    "lastExternalIpAddress": "###IP_value1###",
    "agentVersion": "10.7431.19041.746",
    "osBuild": 19042,
    "healthStatus": "Active",
    "deviceValue": "Normal",
    "rbacGroupId": 2551,
    "rbacGroupName": "UnassignedGroup",
    "riskScore": "Medium",
    "exposureLevel": "Medium",
    "isAadJoined": false,
    "aadDeviceId": null,
    "machineTags": [],
    "ipAddresses": [
        {
            "ipAddress": "###IP_value1###",
            "macAddress": "E0D55E43E452",
            "operationalStatus": "Up"
        },
        {
            "ipAddress": "###IP_value2###",
            "macAddress": "005056C00000",
            "operationalStatus": "Up"
        },
        {
            "ipAddress": "###IP_value3###",
            "macAddress": "005056C00007",
            "operationalStatus": "Up"
        }
    ]
}
...
Hope that’s enough for a start. Again, full documentation with examples is available on the Microsoft website.

Hi! My name is Alexander and I am a Vulnerability Management specialist. You can read more about me here. Currently, the best way to follow me is my Telegram channel @avleonovcom. I update it more often than this site. If you haven’t used Telegram yet, give it a try. It’s great. You can discuss my posts or ask questions at @avleonovchat.
А всех русскоязычных я приглашаю в ещё один телеграмм канал @avleonovrus, первым делом теперь пишу туда.
Pingback: AM Live Vulnerability Management Conference Part 2: What was I talking about there | Alexander V. Leonov
Pingback: Getting Hosts from Microsoft Intune MDM using Python | Alexander V. Leonov
Pingback: Vulnerability Management news and publications #2 | Alexander V. Leonov
Pingback: И тут было бы справедливо спросить: "А не ты ли, Александр, совсем недавно топил за эти самые облачные ИБ сервисы Microsoft, а теперь получаетс