When I wrote about vulnerability scanning in Nessus, I described there in detail how Nessus scan profile looks like. And when I wrote about VM scanning in Qualys, I did not mentioned scan profiles at all. But it’s also an interesting topic. In Qualys scan profile you can’t specify which vulnerability check will run during the scan, as in Nessus (Upd. Actually yes you can, but in some different manner; I added how to do it in “Scan” section). However, you can also see some options that can affect the way you do the vulnerability scanning with Qualys.
The main option for me – the lists of scanning ports. By default Qualys does not check all the ports and that could negatively affect host detection during unauthenticated scanning.
Creating new scan profile: Vulnerability Management -> Option Profiles -> New

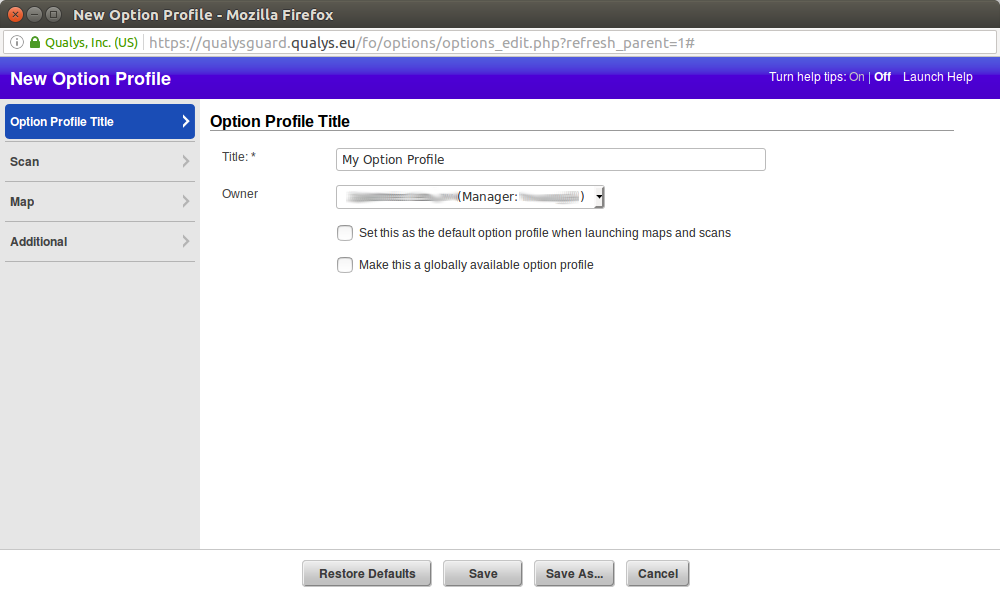
Title
Setting title and owner of the profile. We can use this profile as a default for launching maps and scans or share it with other Qualys users in our organization ( “Make this a globally available option profile”).
Scan
Setting options for TCP and UPD ports to “Full” is the only change I have done in the profile.
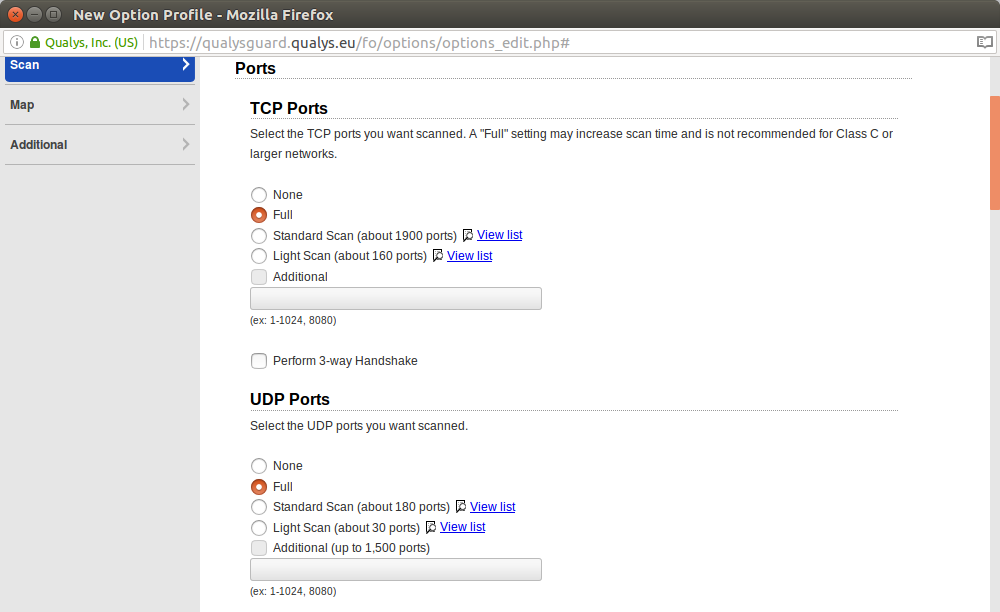
Here are all available configuration options:
Ports
TCP Ports. Select the TCP ports you want scanned. A “Full” setting may increase scan time and is not recommended for Class C or larger networks.
- None
- Full
- Standard Scan (about 1900 ports) View list
- Light Scan (about 160 ports) View list
- Additional (ex: 1-1024, 8080)
Perform 3-way Handshake
UDP Ports. Select the UDP ports you want scanned.
- None
- Full
- Standard Scan (about 180 ports) View list
- Light Scan (about 30 ports) View list
- Additional (up to 1,500 ports) (ex: 1-1024, 8080)
Authoritative Option
Full and Standard port scans affect the vulnerability status for all vulnerabilities on target hosts. Partial port scans, by default, only affect the vulnerability status for vulnerabilities detected on those specific ports. Vulnerability status is reported in tickets, host information, auto scan reports and other UI views.
By selecting the option below, partial port scans affect the vulnerability status for all vulnerabilities on the target hosts, not just vulnerabilities on the scanned ports.
[] Update the status for all vulnerabilities on target hosts
Scan Dead Hosts
By default dead hosts are ignored. Including them may increase scan time, and is not suggested for Class C or larger networks.
Include dead hosts in scans
Performance
Configure performance options for scanning your network.
Overall Performance: Normal
Load Balancer Detection
With this option enabled, the scanner will attempt to identify load balancers and the number of Web servers behind them.
Search for load balancers during scan
Password Brute Forcing
Select the level of password brute forcing performed by scans. An “Exhaustive” setting will increase scan time.
- System
- Custom
Vulnerability Detection
- Complete
- Custom
- Select at runtime
Include
- Basic host information checks View list
- OVAL checks
Exclude
- Excluded QIDs
Authentication
Authentication enables the scanner to log into hosts at scan time to extend detection capabilities. See the online help to learn how to configure this option.
- Windows
- Unix/Cisco IOS
- Oracle
- Oracle Listener
- SNMP
- VMware
- DB2
- HTTP
- MySQL
Additional Certificate Detection
We’ll find certificates on ports/services with full port scans by default. Enable this option to find certificates in more locations using authentication, for example in Apache, Tomcat, Java KeyStore and Windows IIS. Authentication is required.
Enable additional certificate detection
Dissolvable Agent
A Manager must first accept the Dissolvable Agent for your subscription. Once accepted, you can select it for this profile, and select the Windows Share Enumeration feature (requires the Agent).
- Enable the Dissolvable Agent
- Enable Windows Share Enumeration
Lite OS Scan
Only interested in OS detection? Select this option and include QID 45017 in the scan (under Vulnerability Detection).
Enable lite OS detectionAdd a Custom HTTP Header value
Set a custom value in order to drop defenses (such as logging, IPs, etc) when authorized scans are being run.
Dissolvable Agents are interesting feature. It’s different from the agents I wrote last time in “Dealing with Qualys Cloud Agents”. Dissolvable agent must be installed on Windows devices to conduct the some special scan capabilities. It will remove itself when scan is complete.
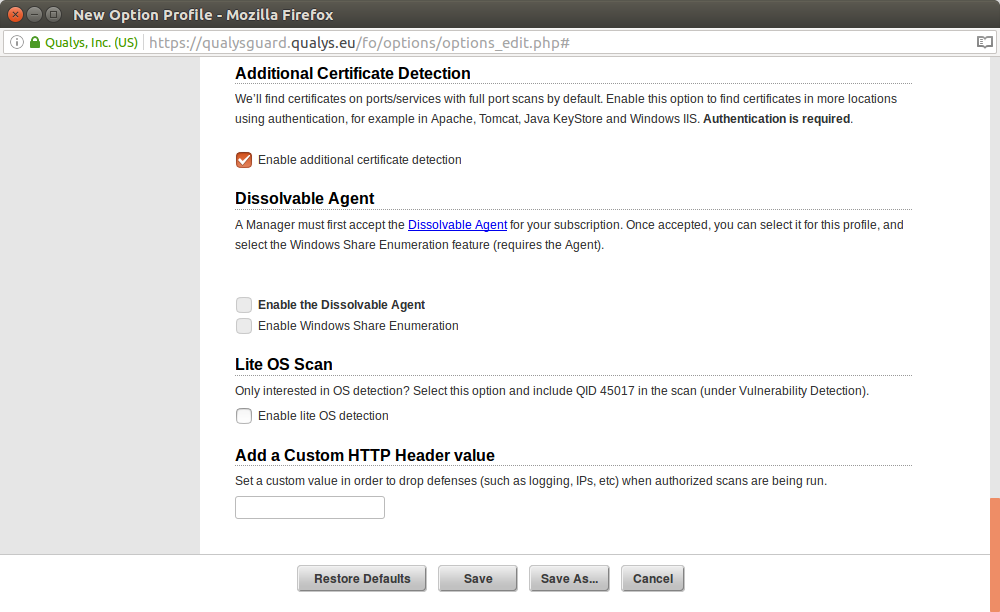
Upd. Setting checks you want to run during the scan
In this Scan section you can specify what plugins will run during the scan. In Vulnerability Detection you can set Lists of QIDs that should be enabled or disabled.
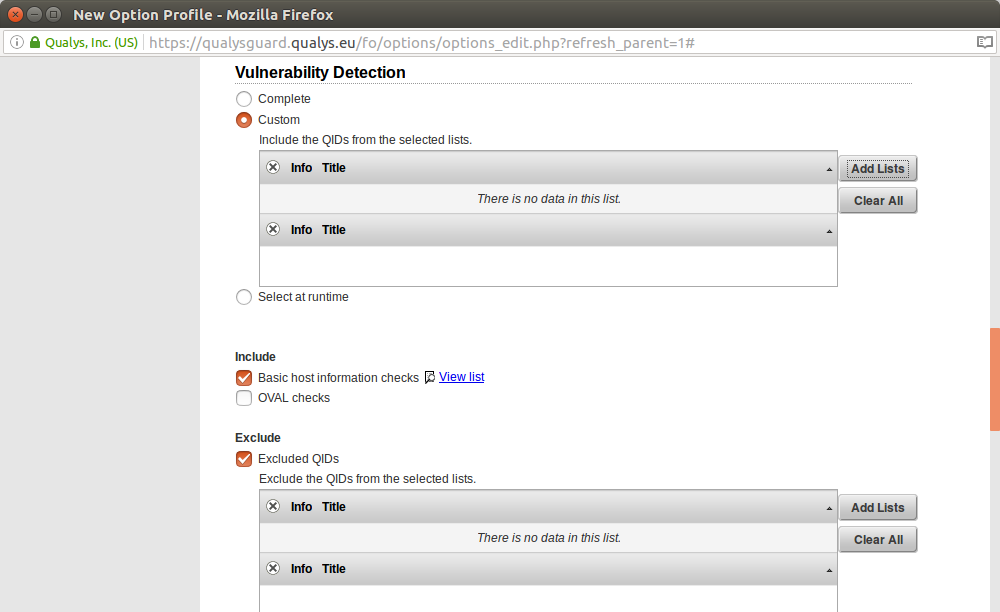
If you press on Add list you will see menu like this. You can choose available Search List or import it from Search List Library.
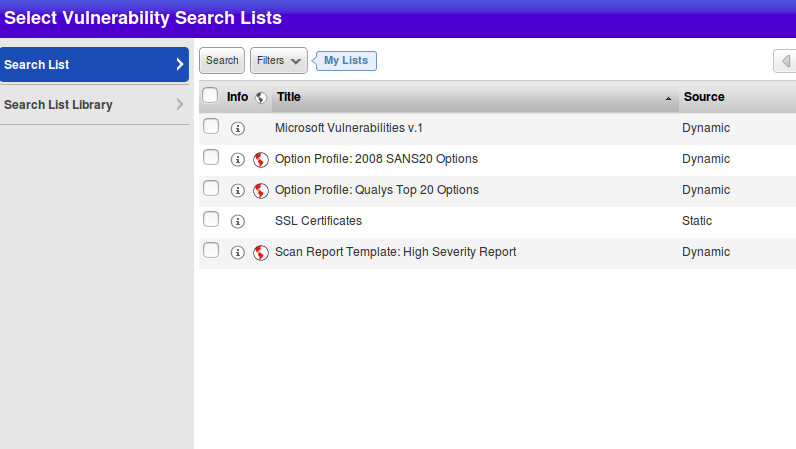
Search list is quite an extensive collection:
- Adobe Vulnerabilities v.1
- CVSS Critical Vulnerabilities v.1
- Confirmed Severity 4+5 Vulnerabilities v.1
- Critical Vulnerabilities with Associated Malware v.1
- Critical Vulnerabilities with Vendor Patches v.1
- Critical Vulnerabilities with Virtual Patches v.1
- Database Vulnerabilities v.1
- Enhanced Bash ShellShock HTTP-CGI Only Detection
- Exploited Systems v.1
- Heartbleed Detection
- Inventory Results v.1
- Microsoft Vulnerabilities v.1
- Obsolete Software v.1
- Patchable Severity 4+5 Vulnerabilities v.1
- Remotely Exploitable Vulnerabilities v.1
- SSL Certificates
- Unix Authentication Results v.1
- Web Server Vulnerabilities v.1
- Windows Authentication Results v.1
And you can see which QIDs this Search List contain by pressing on (?) icon:
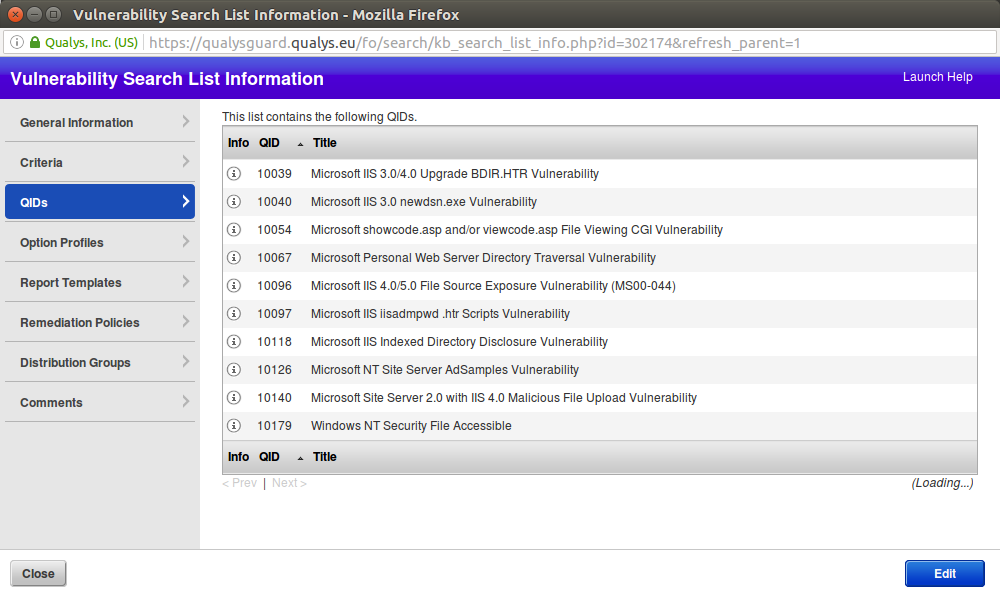
You may ask, what if I would like to create my own Search List? It’s possible.
You need to go “Vulnerability Management -> KnowledgeBase -> Search List” and create static or dynamic list.
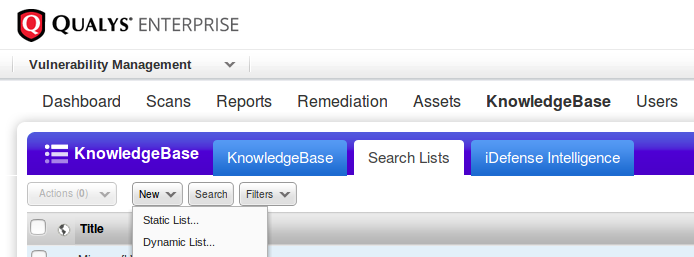
Is Static List you just select QID from the Qualys Knowledge Base, in Dinamic List you set the criterias. Search mechanism is the same for both options and it is pretty advanced:
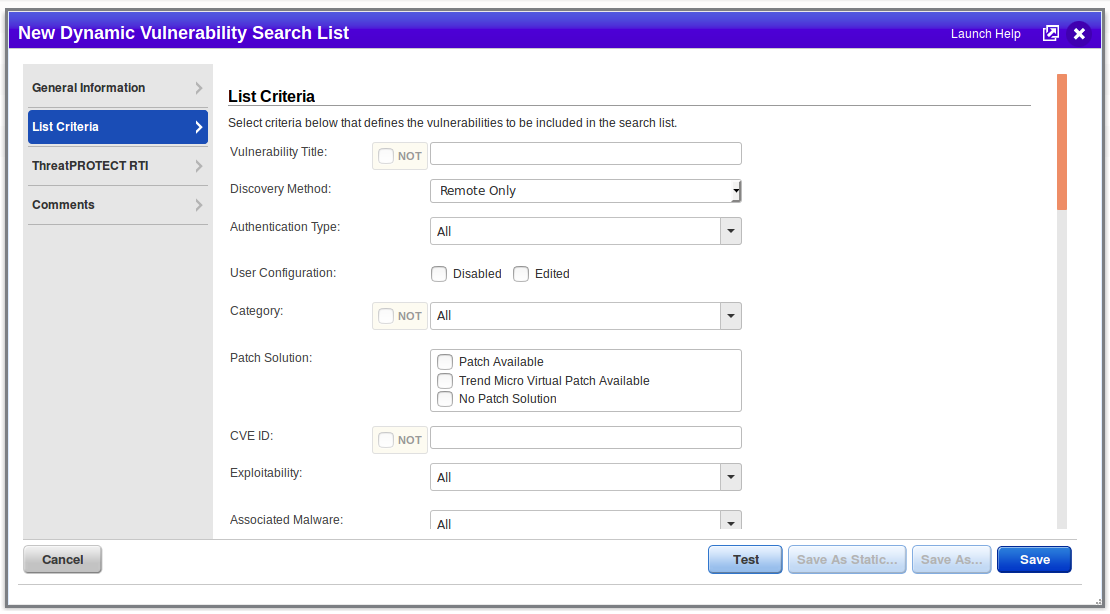
When you save your Search List you can use it in Option Profile.

Now let’s go to the next section of Option Profile – Map.
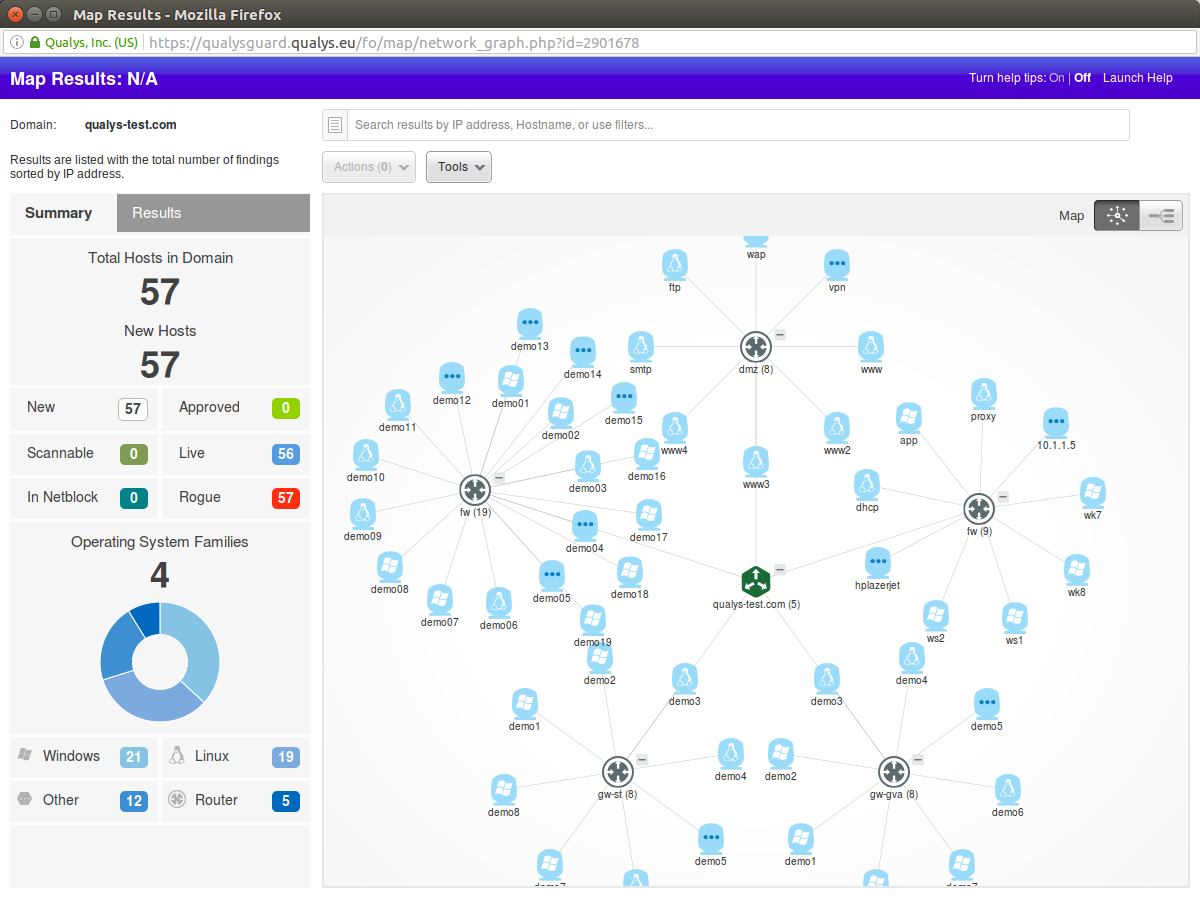
Qualys Maps is a of inventorization scanning. As a result of the scan, you get something like:
So, configuring Map Scanning looks like this:
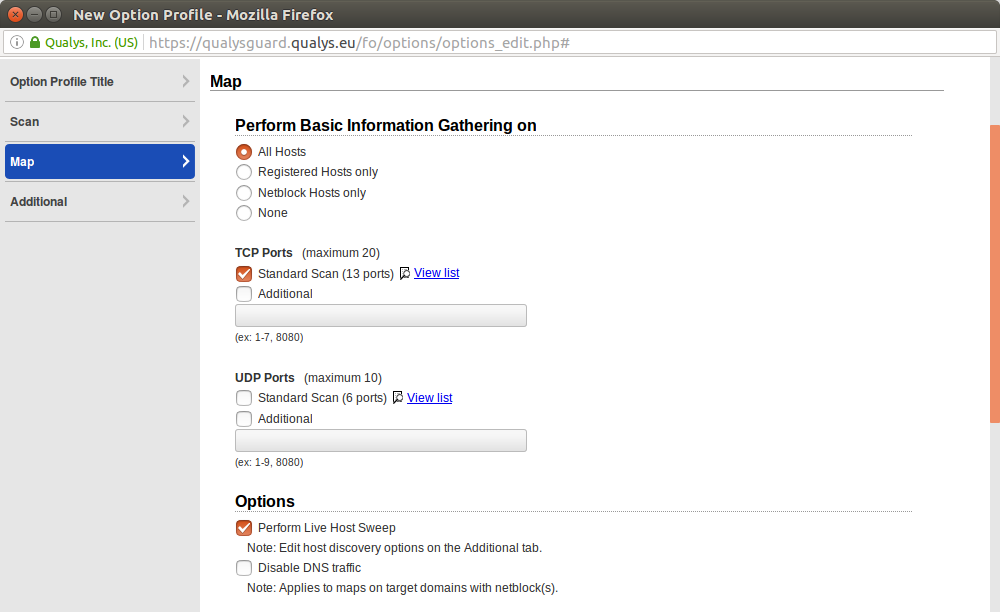
All available Map scanning configuration options:
Perform Basic Information Gathering on
- All Hosts
- Registered Hosts only
- Netblock Hosts only
- None
TCP Ports (maximum 20)
- Standard Scan (13 ports) View list
- Additional (ex: 1-7, 8080)
UDP Ports (maximum 10)
- Standard Scan (6 ports) View list
- Additional(ex: 1-9, 8080)
Options
- Perform Live Host Sweep Note: Edit host discovery options on the Additional tab.
- Disable DNS traffic Note: Applies to maps on target domains with netblock(s).
Performance
Configure performance options for mapping your network.
Overall Performance: NormalAuthentication
Authentication enables the scanner to log into hosts at scan time to extend detection capabilities. See the online help to learn how to configure this option.
VMware
Additional
In the additional settings, you can specify the ports that you don’t want to scan and packets you want to ignore.
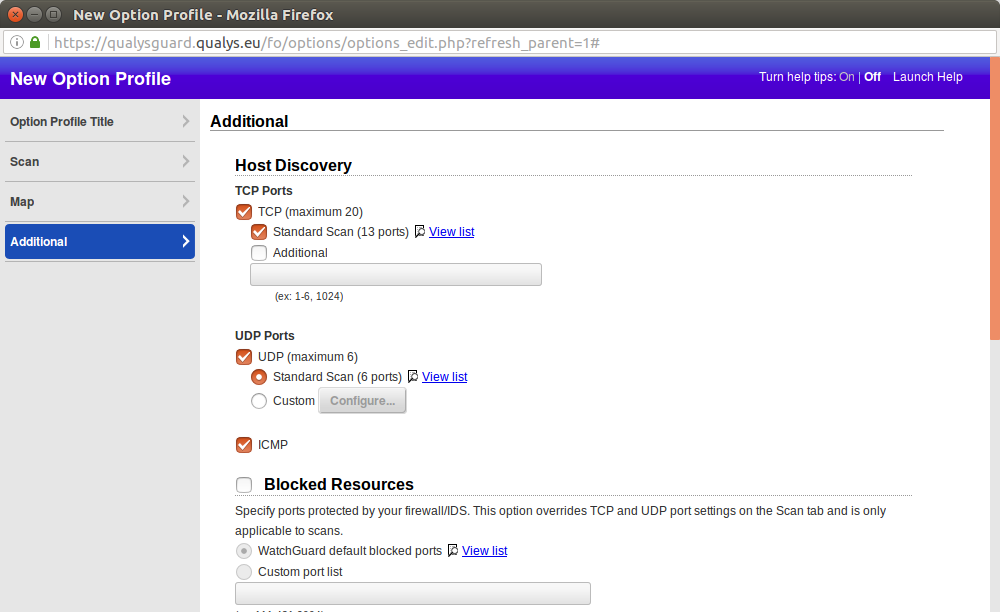
Host Discovery
TCP Ports
- TCP (maximum 20)
- Standard Scan (13 ports) View list
- Additional(ex: 1-6, 1024)
UDP Ports
- UDP (maximum 6)
- Standard Scan (6 ports) View list
- Custom
ICMP
Blocked Resources
Specify ports protected by your firewall/IDS. This option overrides TCP and UDP port settings on the Scan tab and is only applicable to scans.
- WatchGuard default blocked ports View list
- Custom port list (ex: 111,431,2004)
Specify IP addresses and ranges protected by your firewall/IDS.
- All registered IPs
- Custom IP list (ex: 204.121.23.1-204.121.23.9,119.36.0.1)
Options
- Ignore firewall-generated TCP RST packets. Note: This option applies to scans and maps.
- Ignore all TCP RST packets. Note: This option applies only to maps.
- Ignore firewall-generated TCP. SYN-ACK packets
- Do not send TCP ACK or SYN-ACK packets during host discovery. Note: For scans, this option applies only if the 3-way handshake option is disabled.
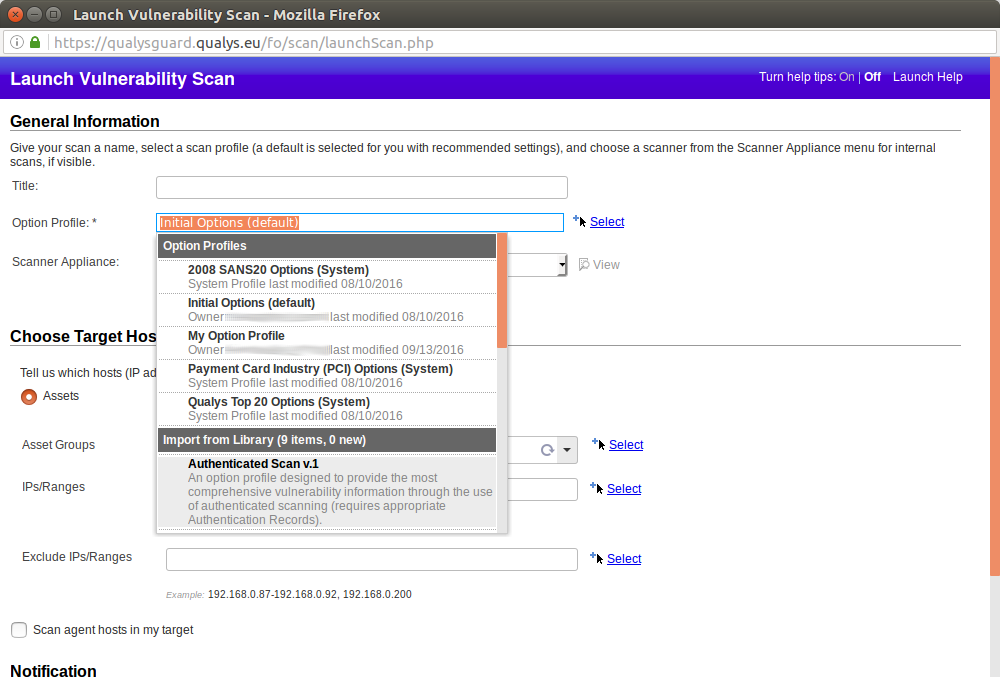
Click on “Save” and here we can see new “My Option Profile”

We can select this profile while launching new Vulnerability Scan:

Hi! My name is Alexander and I am a Vulnerability Management specialist. You can read more about me here. Currently, the best way to follow me is my Telegram channel @avleonovcom. I update it more often than this site. If you haven’t used Telegram yet, give it a try. It’s great. You can discuss my posts or ask questions at @avleonovchat.
А всех русскоязычных я приглашаю в ещё один телеграмм канал @avleonovrus, первым делом теперь пишу туда.

Pingback: Testing F-Secure Radar Vulnerability Management solution | Alexander V. Leonov