
Tenable Nessus: registration, installation, scanning and reporting. It’s a bit strange that I wrote in this blog about some relatively exotic vulnerability management solutions and not about the one I use every day. It is, of course, Nessus. The legend of vulnerability scanners. It would be fair to say that Nessus has become a synonym for vulnerability scan itself as Xerox for photocopy. First version of Nessus was developed by Renaud Deraison in 1998 as a free and open-source product. In October 2005 the license was changed to proprietary. The last version of GPL source codes became the base for the great open source vulnerability scanner – OpenVAS (btw, see my post “openvas_commander for OpenVAS installation and management”).
I am glad that Tenable still keeps Nessus mostly in UNIX-way. Nessus is a vulnerability scanner and makes one thing good – finds vulnerabilities on network hosts. If you need dashboards, advanced user management, advanced reporting capabilities, etc. use Tenable Security Center that works above the Tenable separate products: Nessus, Passive Vulnerability Scanner (PVS) and Log Correlation Engine (LCE).
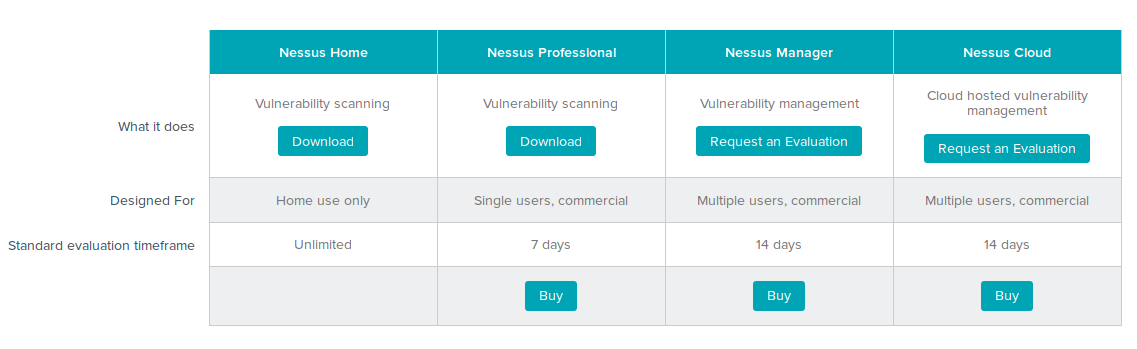
Well, mostly UNIX-way. The time is changing, and now we have now 4 version of Nessus:
- Nessus Home freeware for home users limited for scanning 16 hosts and for non-commercial home use only. It doesn’t support compliance checks (it is written on a site, but as fact it does) or content audits.
- Nessus Professional can scan any amount of hosts without limitations. Ideal for the companies with low budgets or/and companies with enormous amount of host in network. Costs only $2,190.00. Extremely cheap comparing with other commercial vulnerability scanner. There is also an edition of Nessus with the same functionality, as Professional, but designed to work with Tenable SecurityCenter. Read more about it in “Installing Nessus for SecurityCenter on laptop“.
- Nessus Manager for small enterprises. It is positioned by Tenable as “Vulnerability management” solution. As I see it, some Tenable users could said “We use Nessus, we like it, but we want some more features: dashboards, integration with Active Directory and somehow to control nessus slave-scanner with nessus-master scanner. So, now we have more expansive Nessus Manager for such users. And we need to use it for multiscanner feature and the local agents. And it is licensed by Ip. In may 2016 Nessus Manager cost $2,920.00 for 128 Hosts/128 Agents and $4,745.00 for 256 Hosts/256 Agents. Upd. I wrote a separate post about Nessus Manager and agent scanning, so if you are interested plz check out: “Nessus Manager and Agents“
- Nessus Cloud – like Nessus Manager but hosted on Tenable servers (Service As A Service, SaaS). Cost is the same as Nessus Manager. In April 2016 Tenable added some more advanced dashboards and scanning management features in Nessus Cloud. Maybe they will add such features in Nessus Manager. Maybe not.
As you see unlimited Nessus Professional costs $ 2,190.00. Nessus Manager with dashboards, advanced reporting, integration with the AD, groups of users, local agents support BUT with scanning restrictions (128 Hosts and 128 Agents) costs comparable $ 2,920.00. A few years ago it was like 1.5k and 6k. Does this mean that Tenable may drop unlimited Nessus Professional soon as a result? Hope not.
In this post I will review Nessus Home v 6.6.2. It’s almost like Nessus Professional, and, if you are not yet familiar with Nessus, you can try it easily right now and for free. I will review Nessus registration and installation process, basic scanning operations: creating a policy, scanning and reporting.
Registration process is quite simple. Just fill the blank at: http://www.tenable.com/products/nessus-home
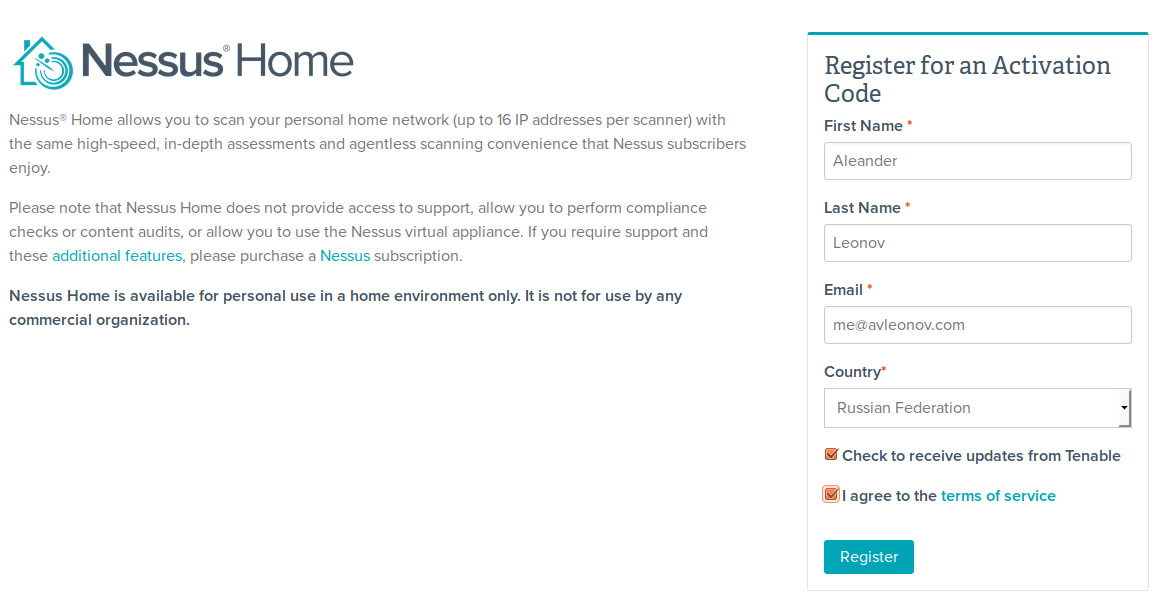

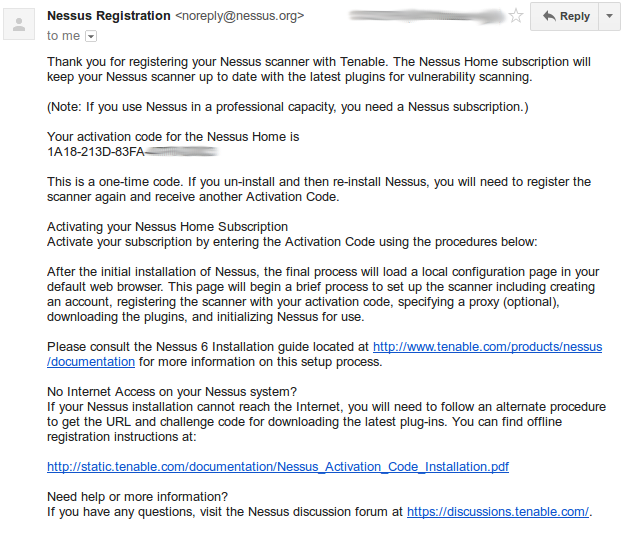
And soon you will receive activation key on your email.
You can download Nessus software package at http://www.tenable.com/products/nessus/select-your-operating-system
Nessus 6.6.2 is available for the wide range of Operating Systems:
Microsoft Windows
- Windows Server 2008, Server 2008 R2*, Server 2012, Server 2012 R2, 7, and 8 (64-bit)
- Windows 7 and 8 (32-bit)
Mac OS X
- Mac OS X (10.8 – 10.11)
Linux
- Debian 6 and 7 / Kali Linux 1 AMD64
- Debian 6 and 7 / Kali Linux 1 i386(32-bit)
- Red Hat ES 5 (64-bit) / CentOS 5 / Oracle Linux 5 (including Unbreakable Enterprise Kernel)
- Red Hat ES 5 i386(32-bit) / CentOS 5 / Oracle Linux 5 (including Unbreakable Enterprise Kernel)
- Red Hat ES 6 (64-bit) / CentOS 6 / Oracle Linux 6 (including Unbreakable Enterprise Kernel)
- Red Hat ES 6 i386(32-bit) / CentOS 6 / Oracle Linux 6 (including Unbreakable Enterprise Kernel)
- Red Hat ES 7 (64-bit) / CentOS 7 / Oracle Linux 7 (including Unbreakable Enterprise Kernel)
- Fedora 20, 21 (64-bit)
- SUSE 10 Enterprise (64-bit)
- SUSE 11 Enterprise (64-bit)
- SUSE 11 Enterprise i586(32-bit)
- Ubuntu 9.10 / Ubuntu 10.04 (64-bit)
- Ubuntu 9.10 / Ubuntu 10.04 i386(32-bit)
- Ubuntu 11.10, 12.04, 12.10, 13.04, 13.10, and 14.04 AMD64
- Ubuntu 11.10, 12.04, 12.10, 13.04, 13.10, and 14.04 i386(32-bit)
FreeBSD
- FreeBSD 10 AMD64
To download Nessus package you should agree with Subscription Agreement.
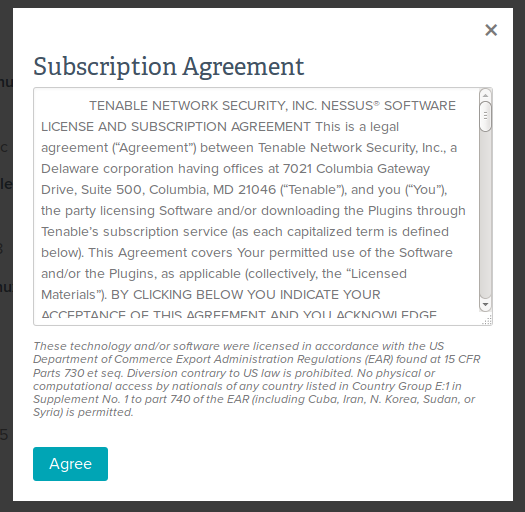
You will see the pop-ups with license agreement each time you try to download something from Tenable web site. So, it’s not possible to download Nessus package using wget to the host, where it will be installed. Not to say that it’s hard to get around, but is it really necessary? Why not show the license agreement during the installation?
I will install Nessus on 32-bit Ubuntu Linux 14.04. Nessus host and target host and will be located on separate virtual machines in VirtualBox. I configure network host only interfaces with a DHCP server, so they can see each other and the host where VitualBox works.
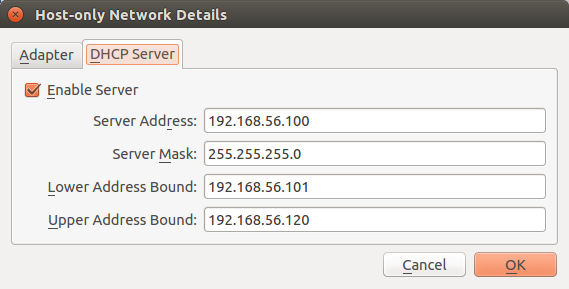
Server Address: 192.168.56.100
Server Mask: 255.255.255.0
Lower Address Bound: 192.168.56.101
Upper Address Bound: 192.168.56.120
Nessus host IP will be 192.168.56.101
I have downloaded the package, uploaded it to the Nessus host and installed it with dpkg (rpm for CentOS Linux):
$ sudo dpkg -i Nessus-6.6.2-ubuntu1110_i386.deb
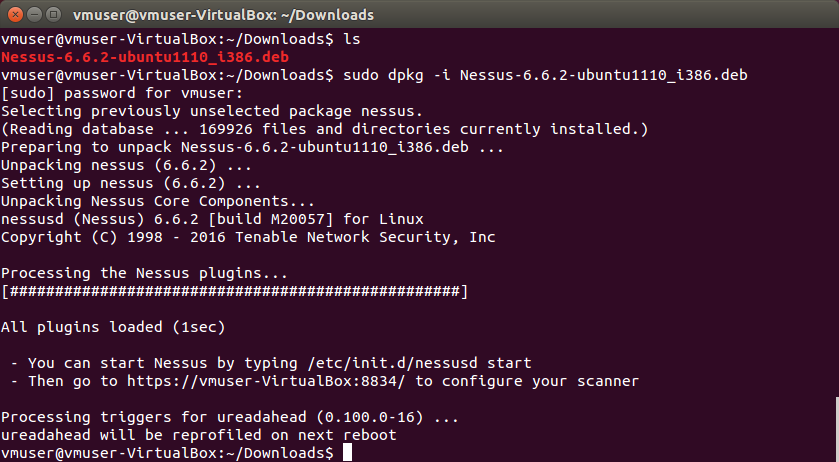
Start service:
– You can start Nessus by typing /etc/init.d/nessusd start
– Then go to https://<host>:8834/ to configure your scanner
$ sudo /etc/init.d/nessusd start
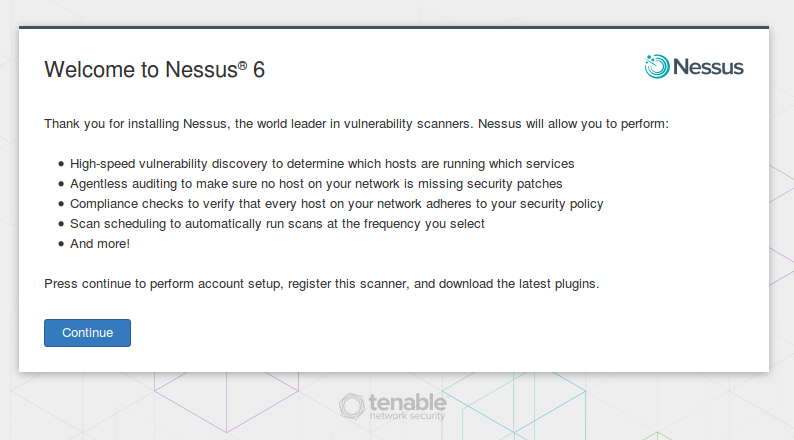
I open https://192.168.56.101:8834/ in web browser to continue installation and configuration. IMHO, Nessus installation process is much more convenient than Rapid7 Nexpose. Nexpose uses GUI installer, so you need to have X11 on a scanner host.
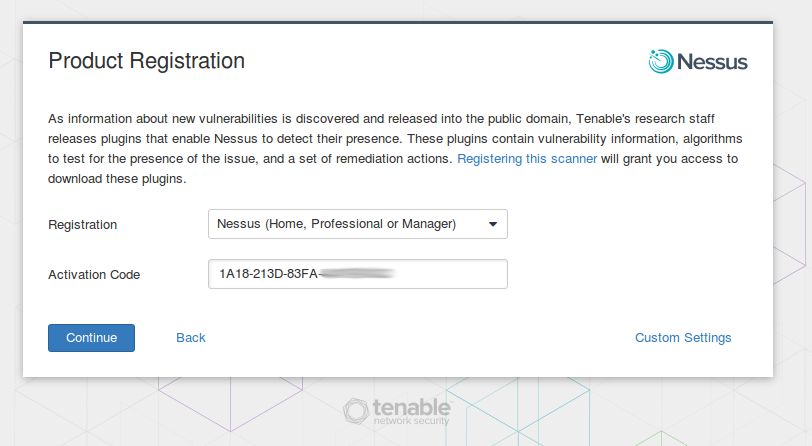
Nessus will ask activation code from the registration e-mail message.
Then we need to create an admin user.
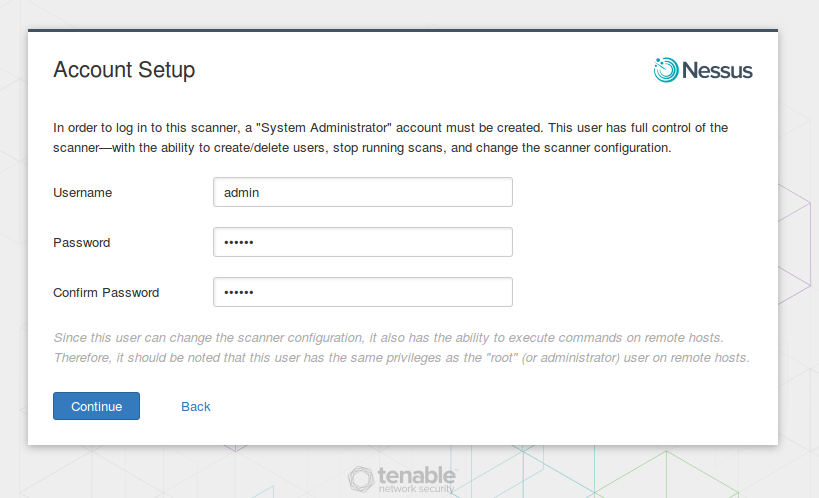
‘In order to log in to this scanner, a “System Administrator” account must be created. This user has full control of the scanner—with the ability to create/delete users, stop running scans, and change the scanner configuration… This user has the same privileges as the “root” (or administrator) user on remote hosts.’
Scanner admin account must be kept safe. Using this account attacker can run custom .audit and NASL scripts and use the credentials for authenticated scanning. All this malicious activity might not be detected by a firewall or IPS if you add scanner host in the exception list.
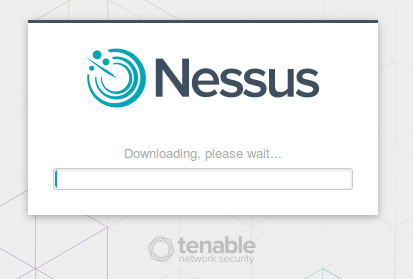
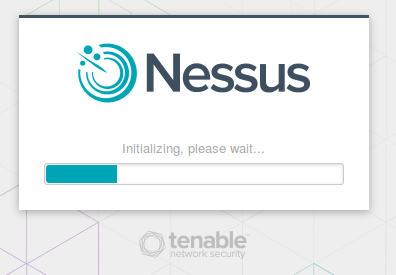
After account setup Nessus will download updates (mostly nasl plugins for scanning) and finish the installation.
Once you logged in, you can see a very minimalistic interface.
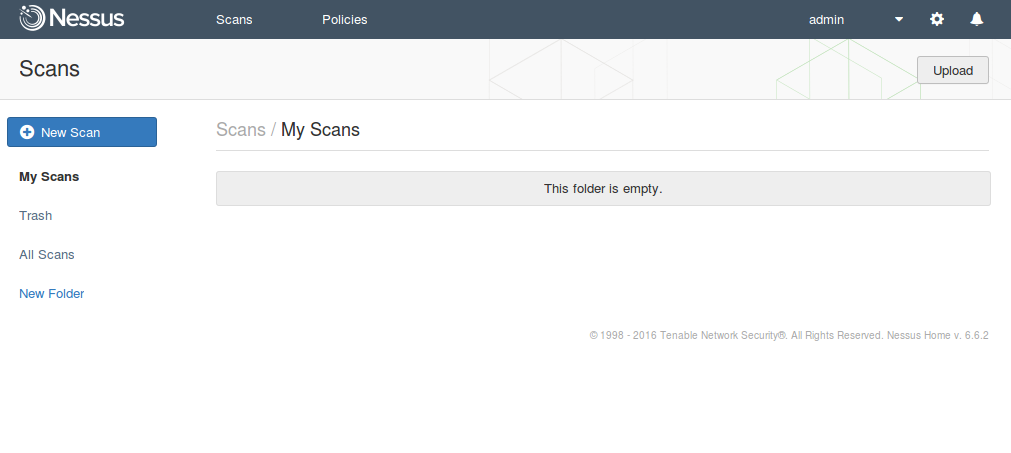
Starting from version 6, Nessus has two main entities: policies and scans.
In policies you make basic configuration: lists of plugins for vulnerability scanning, standards for compliance checking, credentials, etc.
In scan you configure more temporal things: list of targets for scanning, scheduling, notifications, etc. Each scan has a link to a policy.
So, the scan process looks like this:
- Decide what scanning policy you want to use (select an existing policy or create a new one)
- Create a scan
- Launch it
- Get the results
- Make scan report if necessary
- Profit!
Okay, let’s scan this CentOS 7 host:
vmuser@vmuser-VirtualBox:~$ ssh vmuser@192.168.56.102
The authenticity of host ‘192.168.56.102 (192.168.56.102)’ can’t be established.
ECDSA key fingerprint is 04:96:7a:5c:fb:dc:0e:31:3e:b5:42:cf:46:f2:c3:45.
Are you sure you want to continue connecting (yes/no)? yes
Warning: Permanently added ‘192.168.56.102’ (ECDSA) to the list of known hosts.
vmuser@192.168.56.102’s password:
Last login: Fri May 6 20:38:33 2016
[vmuser@st91 ~]$ cat /etc/redhat-release
CentOS Linux release 7.2.1511 (Core)
Click on “Policies” tab. We see that there is no available policy. Let’s create a new one.
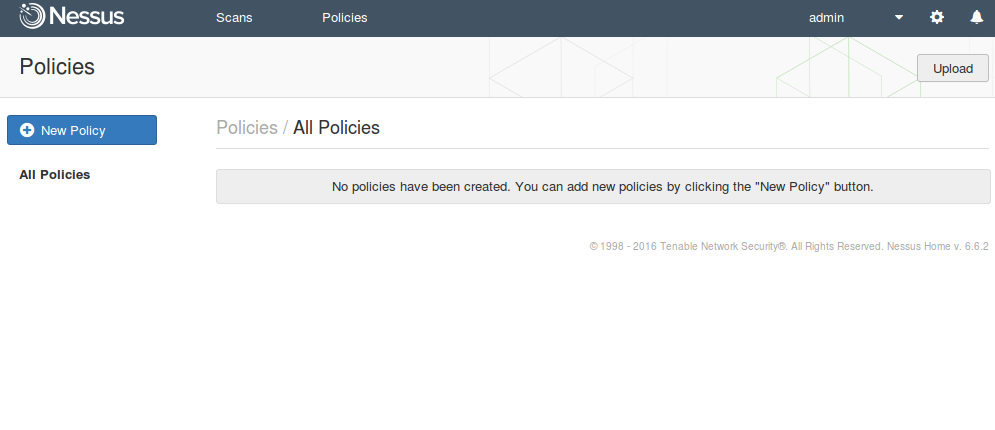
Click on “New Policy”. We see a bunch of policy templates.
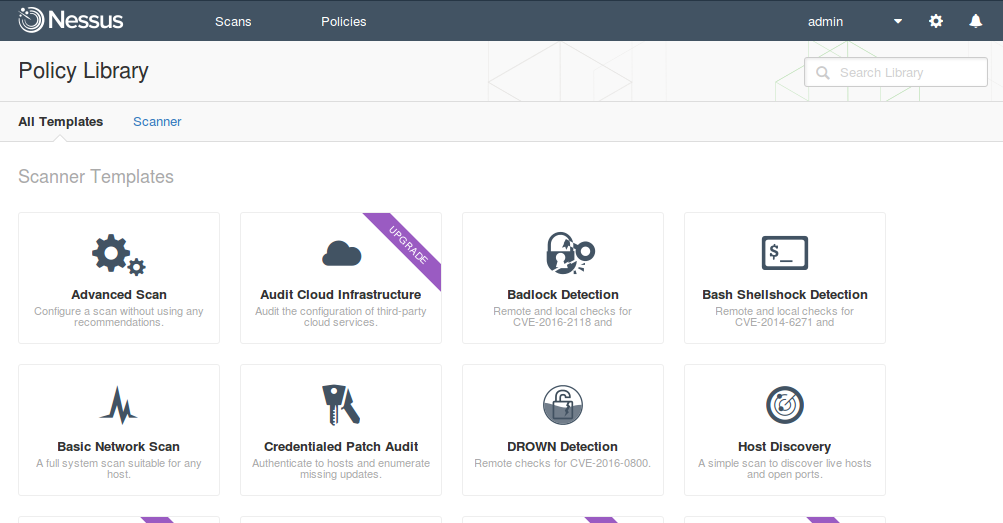
Some templates we can use right now:
- Advanced Scan. Configure a scan without using any recommendations.
- Badlock Detection. Remote and local checks for CVE-2016-2118 and CVE-2016-0128.
- Bash Shellshock Detection. Remote and local checks for CVE-2014-6271 and CVE-2014-7169.
- Basic Network Scan. A full system scan suitable for any host.
- Credentialed Patch Audit. Authenticate to hosts and enumerate missing updates.
- DROWN Detection. Remote checks for CVE-2016-0800.
- Host Discovery. A simple scan to discover live hosts and open ports.
- Malware Scan. Scan for malware on Windows and Unix systems.
- Web Application Tests. Scan for published and unknown web vulnerabilities.
Some policies are available only in the paid versions of Nessus (“Upgrade required”):
- Audit Cloud Infrastructure. Audit the configuration of third-party cloud services.
- Internal PCI Network Scan. Perform an internal PCI DSS (11.2.1) vulnerability scan.
- MDM Config Audit. Audit the configuration of mobile device managers.
- Mobile Device Scan. Assess mobile devices via Microsoft Exchange or an MDM.
- Offline Config Audit. Audit the configuration of network devices.
- PCI Quarterly External Scan. Approved for quarterly external scanning as required by PCI.
- Policy Compliance Auditing. Audit system configurations against a known baseline.
- SCAP and OVAL Auditing. Audit systems using SCAP and OVAL definitions.
In fact, almost all of them are the variations of Advanced Scan template with some settings strictly defined with no ability to modify. It might be useful for novices. But for this scan, I will create policy with Advanced Scan template, as I always do.
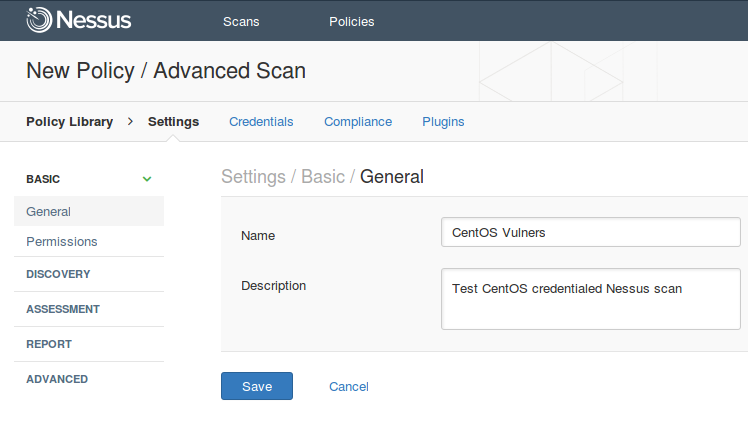
Policy Name can be mounted on the Basic tab of Settings.
Settings -> Configure Advanced Scan policy -> Settings / basic / General
Name: CentOS Vulners
Description: Test CentOS credentialed Nessus scan
Actually, setting the policy name is all of what 90% of Nessus users may ever want to configure here. Really, in “Settings” you can find tab most hardcore scanner options.
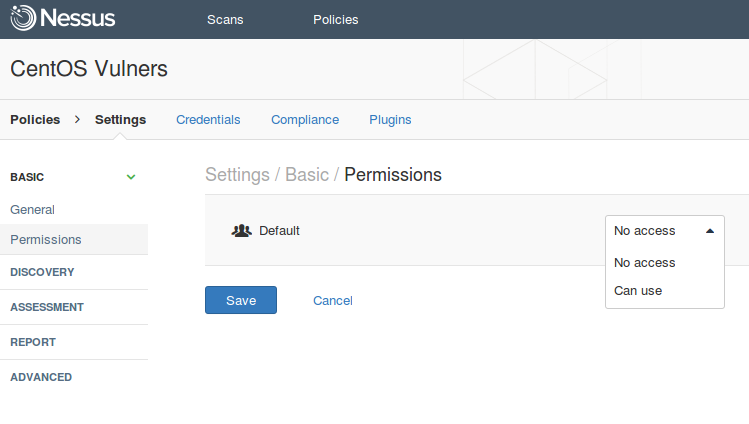
At Settings -> Permissions you can set permissions for the policy which we are creating now. As you see, I have only “default” user group.
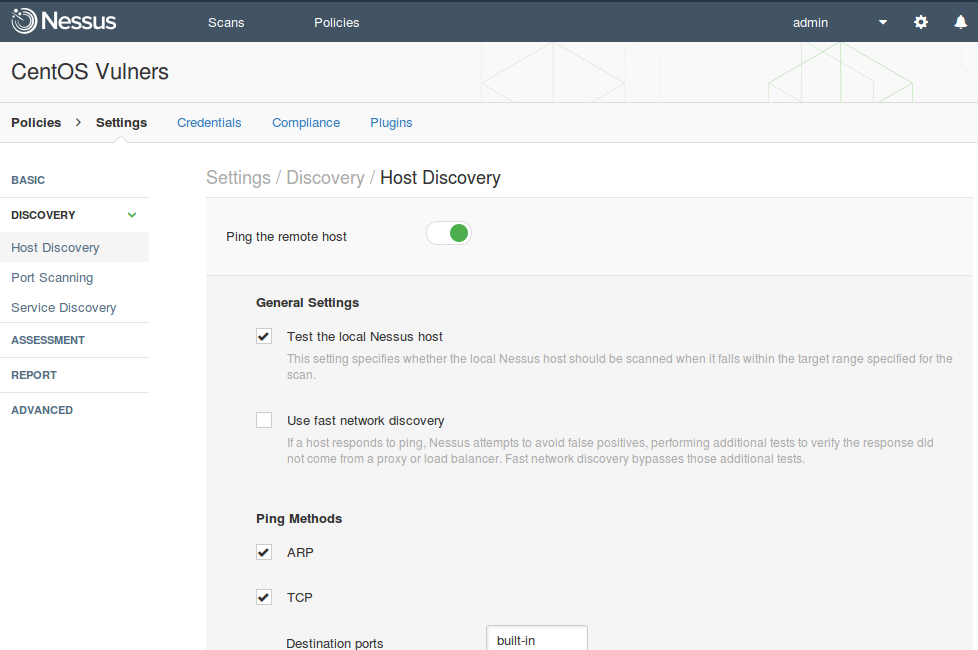
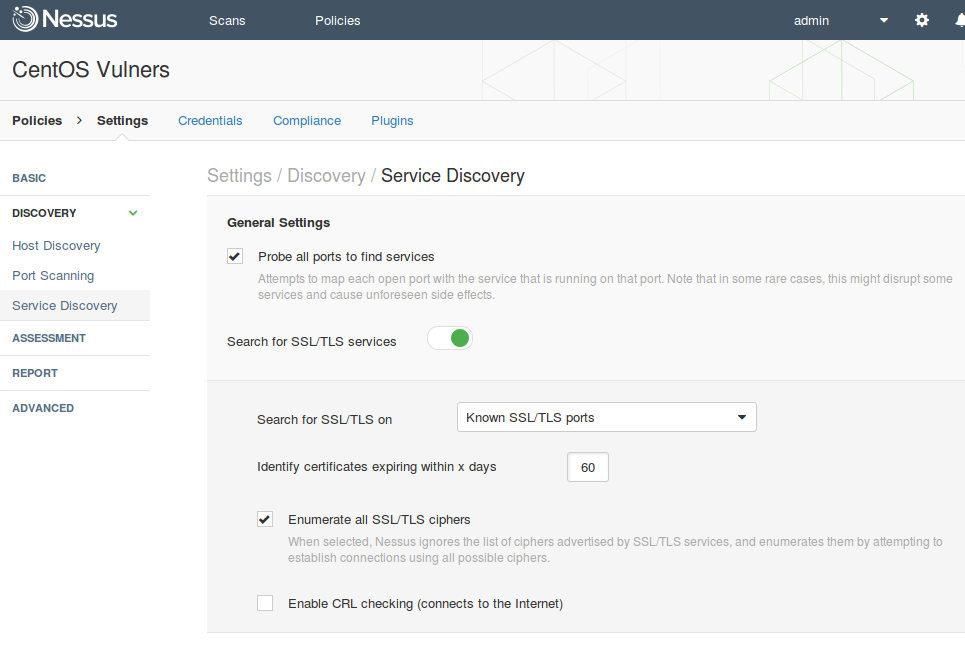
At Settings -> Discovery, you can customize how hosts should be detected in the network and how open ports and services should be detected on the host.
Discovery -> Host Discovery
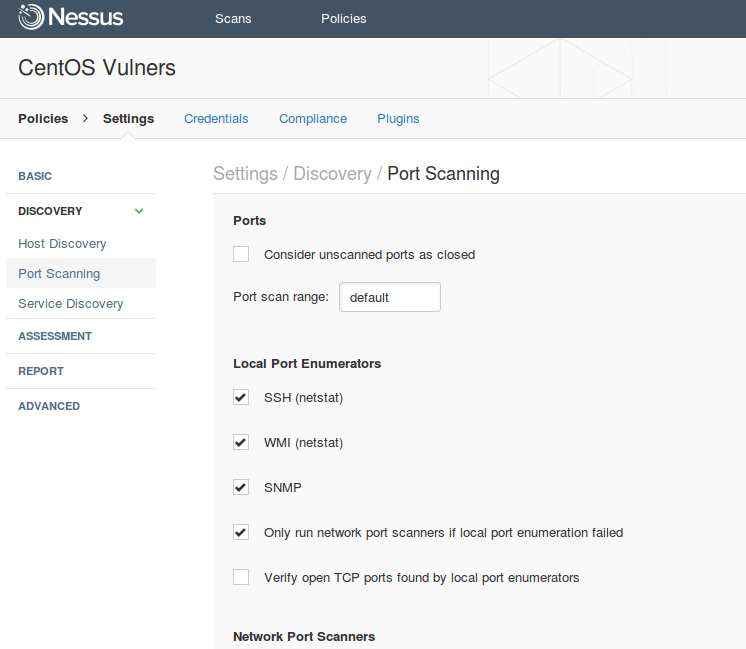
Discovery -> Port Scanning
Discovery -> Service Discovery
At Settings->Assessment you can customize vulnerability assessment methods that will be used during the scanning (General, Brute Force, Web Applications, Windows, Malware). And yes, Nessus can detect malware on a hosts!
If you want to scan in a paranoid mode in the section Settings->Assessment->General->Accuracy :
- Enable “Override normal accuracy”
- Select “Show potential false alarms”
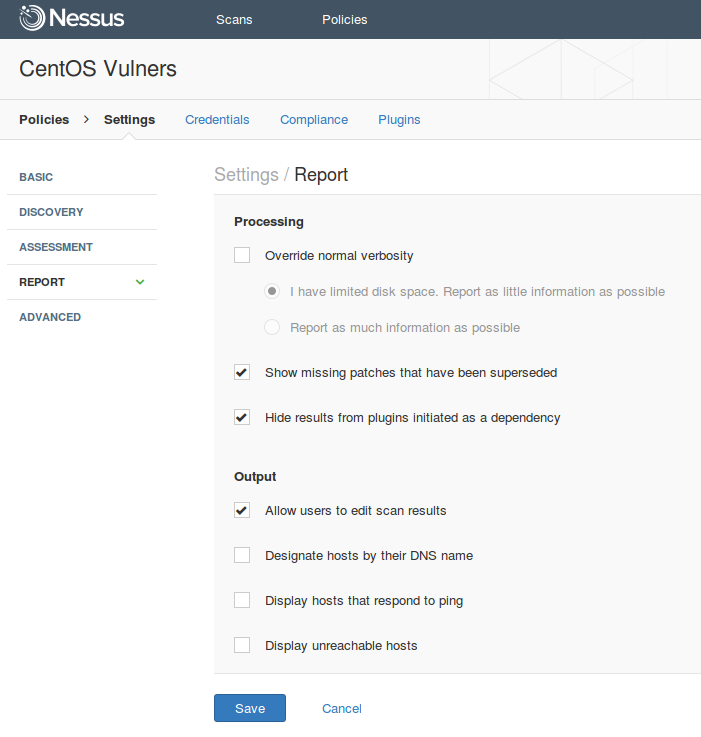
At Settings -> Report you can set up reporting strategy: “I have limited disk space. Report as little information as possible” or “Report as much information as possible”.
At Settings -> Advanced you can reduce the impact on the network setting:
- Max simultaneous checks per host
- Max simultaneous hosts per scan
- Max number of concurrent TCP sessions per host
- Max number of concurrent TCP sessions per scan
Also at Settings -> Advanced -> Debug you can configure what information will be written to the log files:
- Log scan details to server
- Logs the start and finish time for each plugin used during a scan to nessusd.messages.
- Enable plugin debugging
- Attaches available debug logs from plugins to the vulnerability output of this scan.
It is all very interesting and important. However, I wouldn’t like to dwell on Settings anymore. Maybe next time.
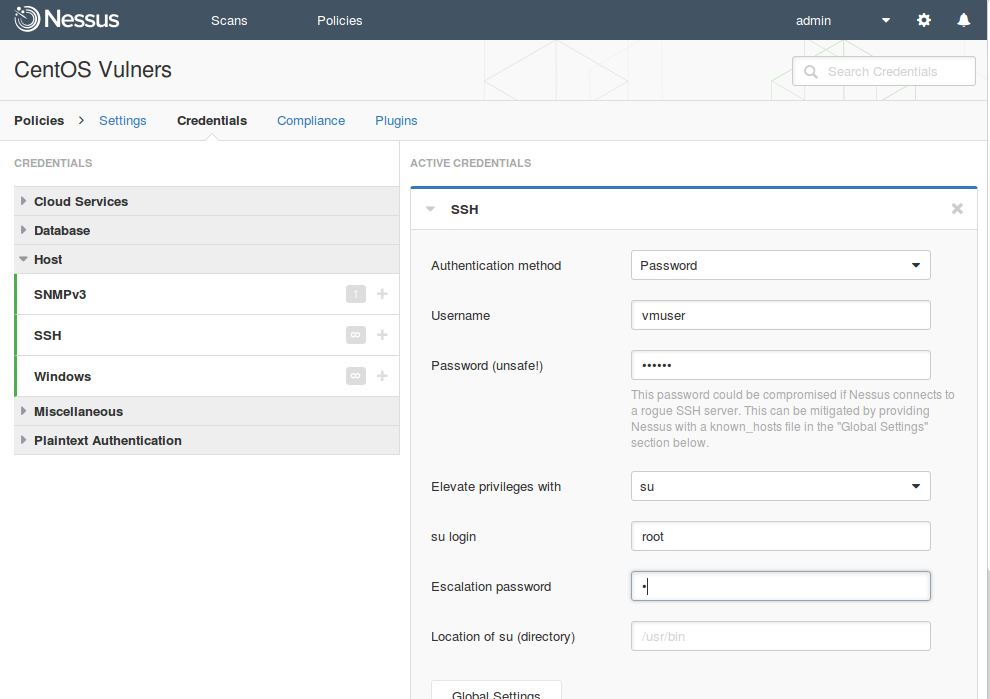
On the second tab, you can set up Credentials for scanning. Authenticated Scanning is faster and much more accurate. If you’re skeptical about vulnerability scanning and think that it can only produce results full of false positive errors, try authenticated scanning. Most of Nessus plugins works only if you specify credentials for the host. If you scan without credentials, you use your 10% of your scanner’s abilities, and probably don’t see most of the vulnerabilities in your infrastructure.
Here is the complete list of scan credentials, you can set up in Nessus (as of May 2016). This demonstrates how many different systems Nessus supports.
Cloud Services
- Amazon AWS
- Microsoft Azure
- Rackspace
- Salesforce.com
Database
- PostgreSQL
- DB2
- MySQL
- SQL Server
- Oracle
- MongoDB
Host
- SNMPv3
- SSH
- Windows
Miscellaneous
- ADSI
- IBM iSeries
- OpenStack
- Palo Alto Networks PAN-OS
- RHEV
- VMware ESX SOAP API
- VMware vCenter SOAP API
Plaintext Authentication
- FTP
- HTTP
- IMAP
- IPMI
- NNTP
- POP2
- POP3
- SNMPv1/v2c
- telnet/rsh/rexec
For CentOS scanning we need, of course, only SSH credential. I set up login and password for normal user and root password.Whether we should set up root password in vulnerability scanner is a debatable question. But this is a strong recommendation of the vendor, and if some user rights will be missed, scan results may be incomplete or even incorrect.
Security Compliance checks. Tenable website says that this feature is not supported in Nessus Home. As we see on screenshot it is. As we will see below, it even works.
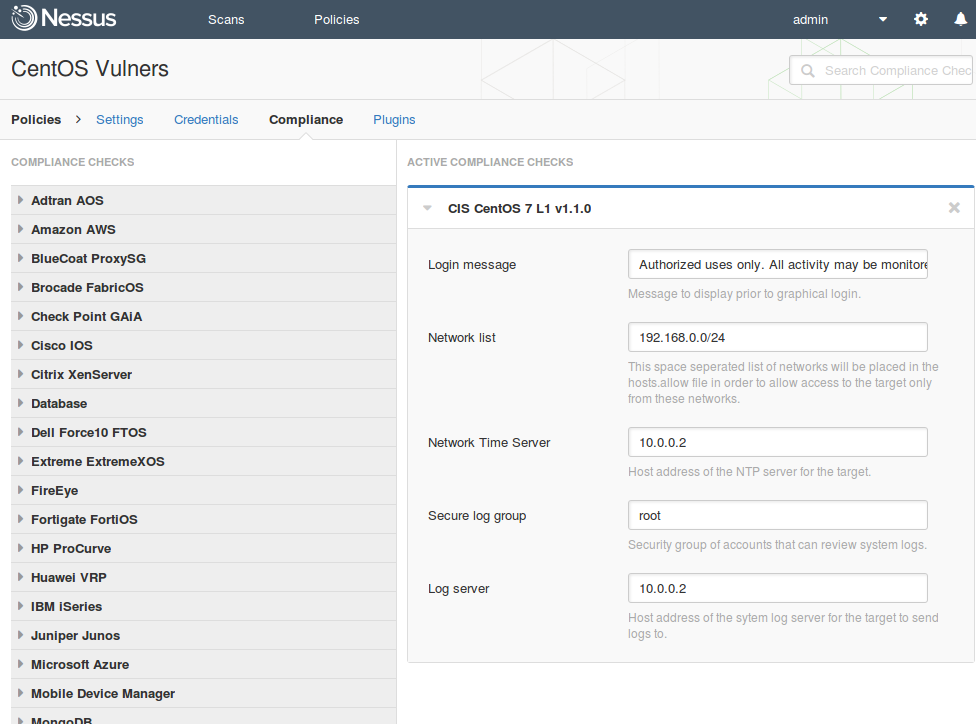
Up to version 6 to use compliance checks you had to upload special .audit file from Tenable Support Portal to your Nessus scanner. Home users did not have access to this portal, so there was no compliance checks in Nessus Home. In 6th version Tenable added compliance content directly to Nessus. However, to override compliance settings, excepting a small part, that is seen on screenshot, you still need to download .audit the file from the Support Portal, edit it and upload to Nessus. So Nessus Home users should live without overriding the standards settings. However, it’s not so much trouble. Read more about Nessus Compliance Management feature here: “.audit-based Compliance Management in Nessus”
Here is a complete list of systems that are supported by Nessus in Compliance checking mode (and there is even more standards for these systems):
- Adtran AOS
- Amazon AWS
- BlueCoat ProxySG
- Brocade FabricOS
- Check Point GAiA
- Cisco IOS
- Citrix XenServer
- Database
- Dell Force10 FTOS
- Extreme ExtremeXOS
- FireEye
- Fortigate FortiOS
- HP ProCurve
- Huawei VRP
- IBM iSeries
- Juniper Junos
- Microsoft Azure
- Mobile Device Manager
- MongoDB
- NetApp Data ONTAP
- OpenStack
- Palo Alto Networks PAN-OS
- Rackspace
- RHEV
- Salesforce.com
- SonicWALL SonicOS
- Unix
- Unix File Contents
- VMware vCenter/vSphere
- WatchGuard
- Windows
- Windows File Contents
Vulnerability detection Plugins. Another nice UNIX-way feature is that most of the detection rules and vulnerability checks are presented in Nessus as human-readable nasl-scripts. They are stored in the /opt/nessus/lib/nessus/plugins directory.
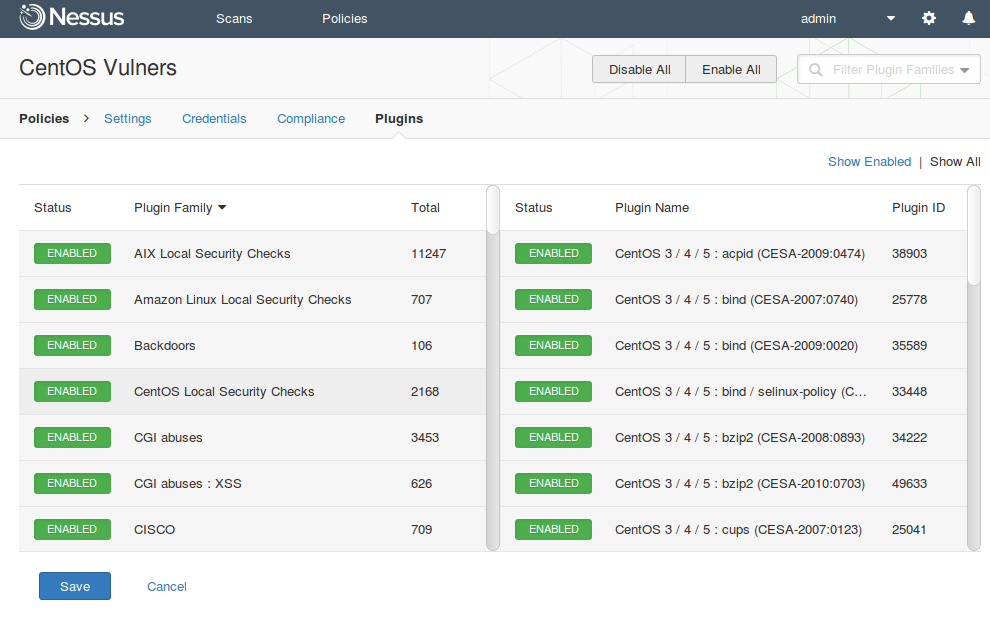
There are also compiled scripts in nbin format, which are faster, but can not be read. Since you see all the scripts, it’s is possible to say which vulnerabilities can be detected by Nessus and how detection works. At Plugins tab, you can disable some plugins or plugin groups to reduce, for example, the scanning time.
Here is the complete list of plugin groups (Plugin_Family Total):
- AIX Local Security Checks 11247
- Amazon Linux Local Security Checks 707
- Backdoors 106
- CentOS Local Security Checks 2168
- CGI abuses 3453
- CGI abuses : XSS 626
- CISCO 709
- Databases 439
- Debian Local Security Checks 3987
- Default Unix Accounts 104
- Denial of Service 107
- DNS 144
- F5 Networks Local Security Checks 313
- Fedora Local Security Checks 9698
- Firewalls 171
- FreeBSD Local Security Checks 3196
- FTP 247
- Gain a shell remotely 278
- General 218
- Gentoo Local Security Checks 2177
- HP-UX Local Security Checks 1984
- Huawei Local Security Checks 17
- Junos Local Security Checks 135
- MacOS X Local Security Checks 910
- Mandriva Local Security Checks 3139
- Misc. 1221
- Mobile Devices 53
- Netware 14
- Oracle Linux Local Security Checks 2239
- OracleVM Local Security Checks 234
- Palo Alto Local Security Checks 27
- Peer-To-Peer File Sharing 76
- Policy Compliance 45
- Red Hat Local Security Checks 3907
- RPC 36
- SCADA 262
- Scientific Linux Local Security Checks 2054
- Service detection 416
- Settings 75
- Slackware Local Security Checks 860
- SMTP problems 135
- SNMP 33
- Solaris Local Security Checks 3880
- SuSE Local Security Checks 8605
- Ubuntu Local Security Checks 3255
- VMware ESX Local Security Checks 110
- Web Servers 952
- Windows 3446
- Windows : Microsoft Bulletins 1151
- Windows : User management 28
I’ll keep all plugins enabled. After that I click on “Save” the policy.
We see that there is a new policy, which we have just created. Now we can use it in our scans.
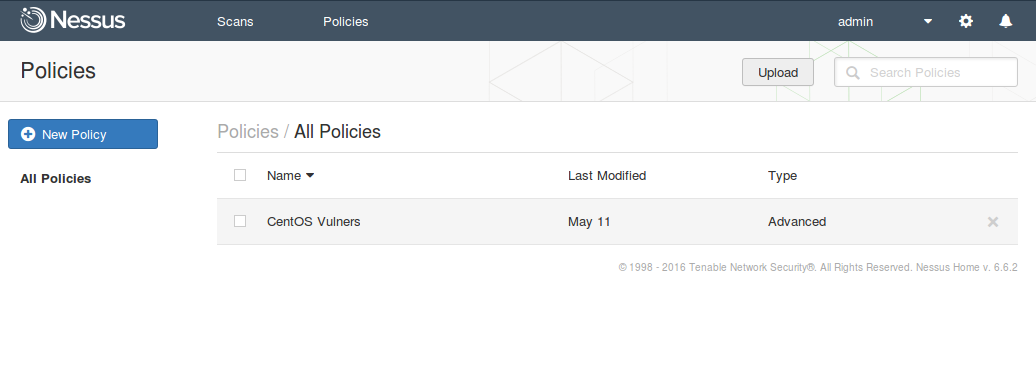
We go back to the Scans tab and create a New Scan.
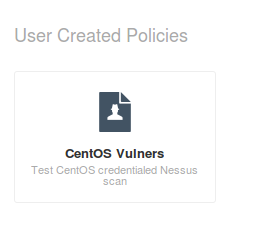
Choosing our scan policy “CentoOS Vulners”.
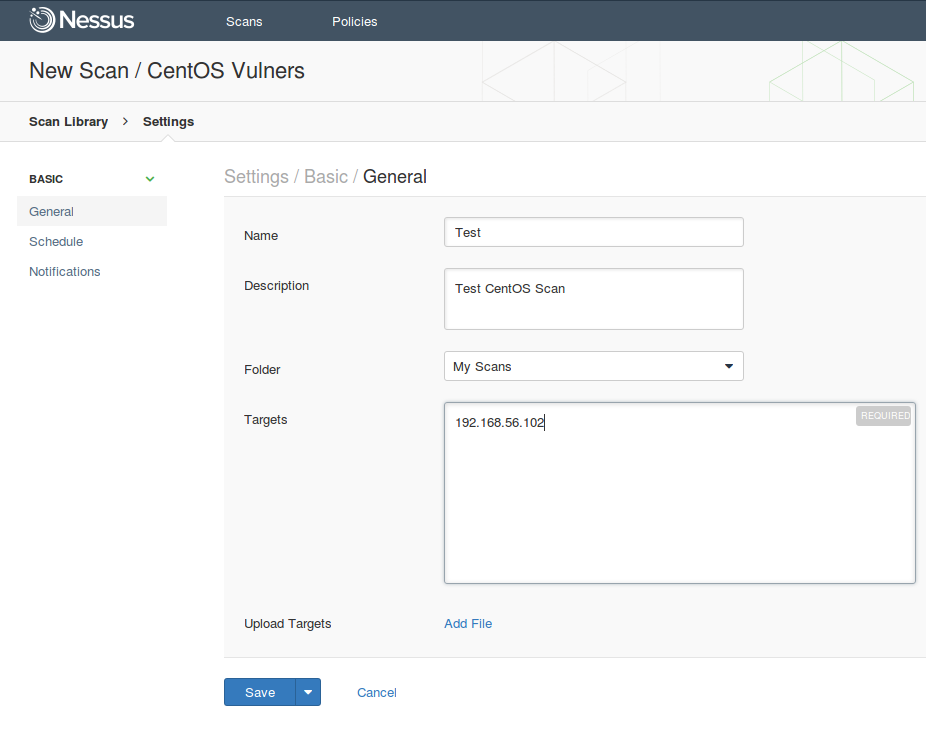
Filling the name of the scan, description, folder where scan will be stored and scanning targets.
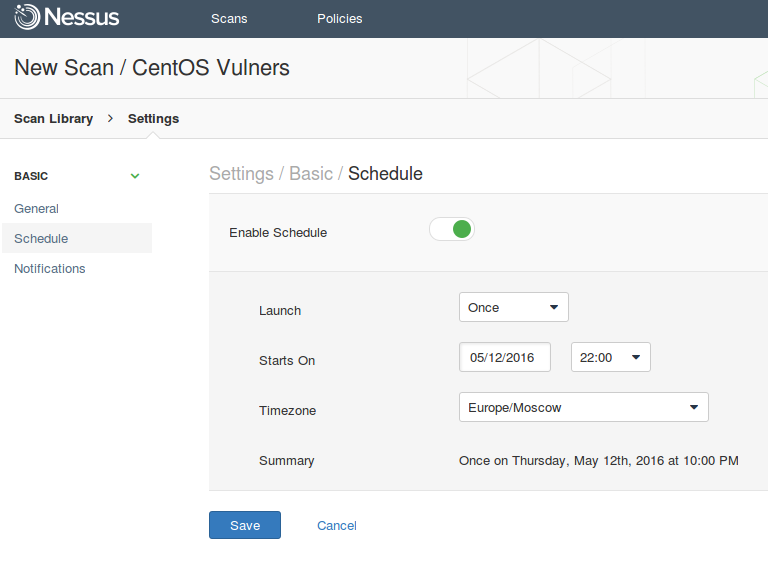
The scan can be run on a regular basis:
- Once
- Daily
- Weekly
- Monthly
- Yearly
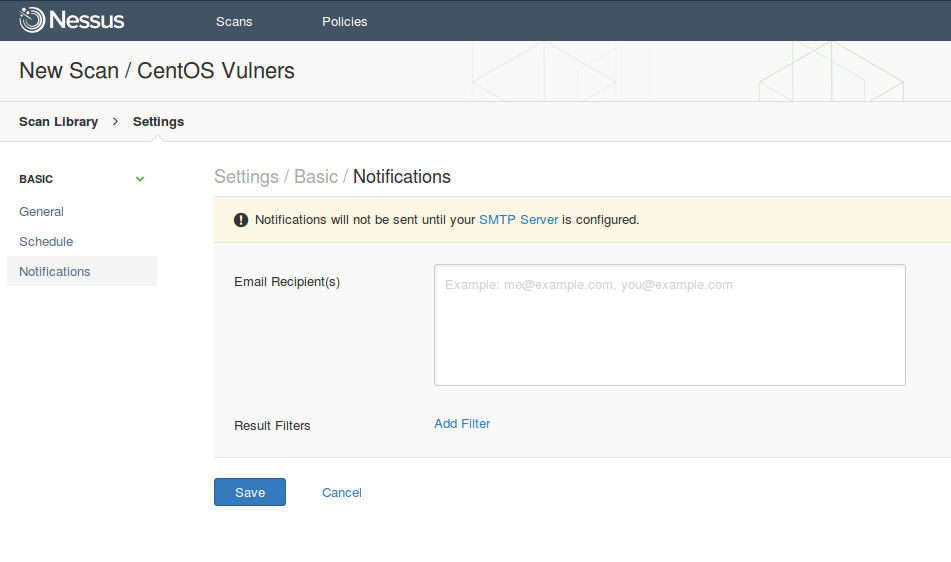
If you configure SMTP server, Nessus will be sending messages with scan results.
Save and run.
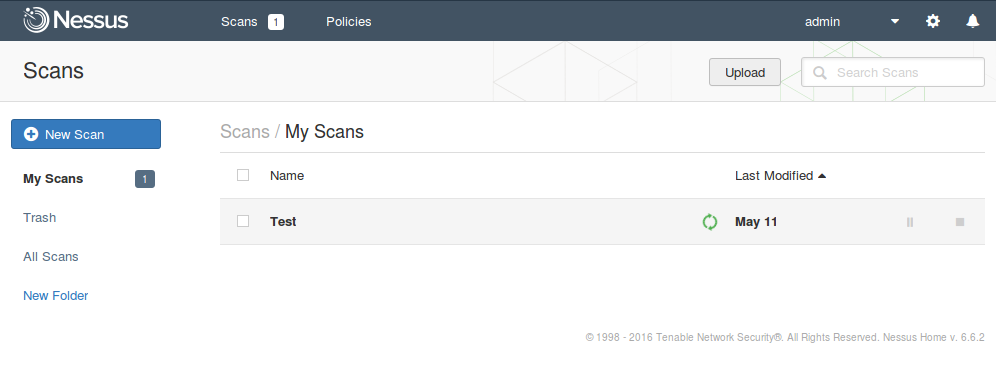
You can click on the scan and see how the results change.
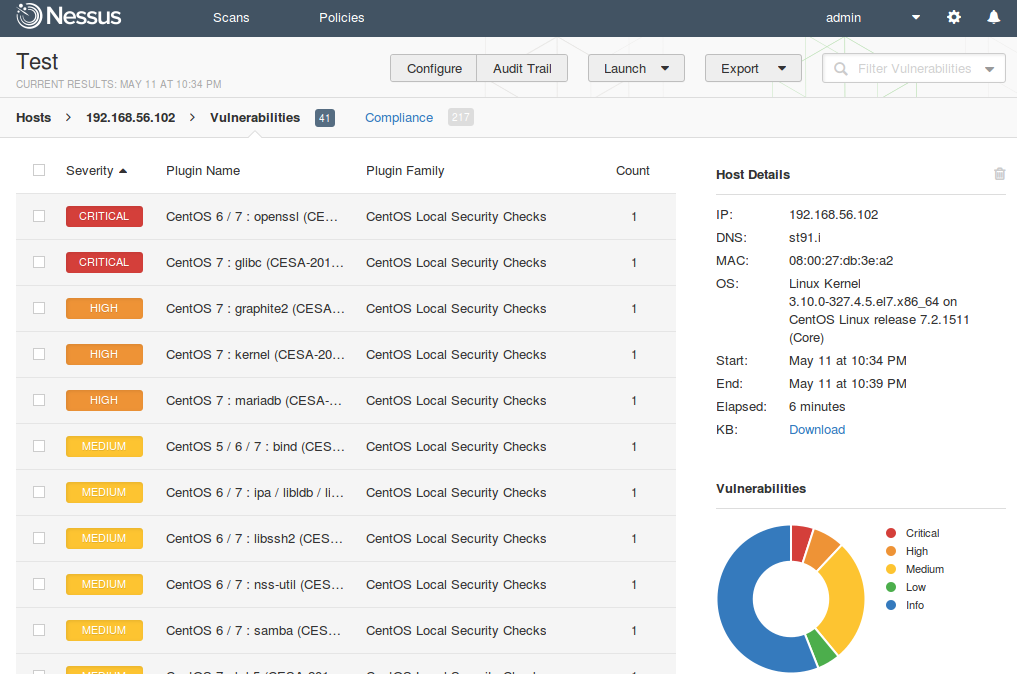
When the scanning is finished scan status at “Scan Details” column will be changed to “Completed”.

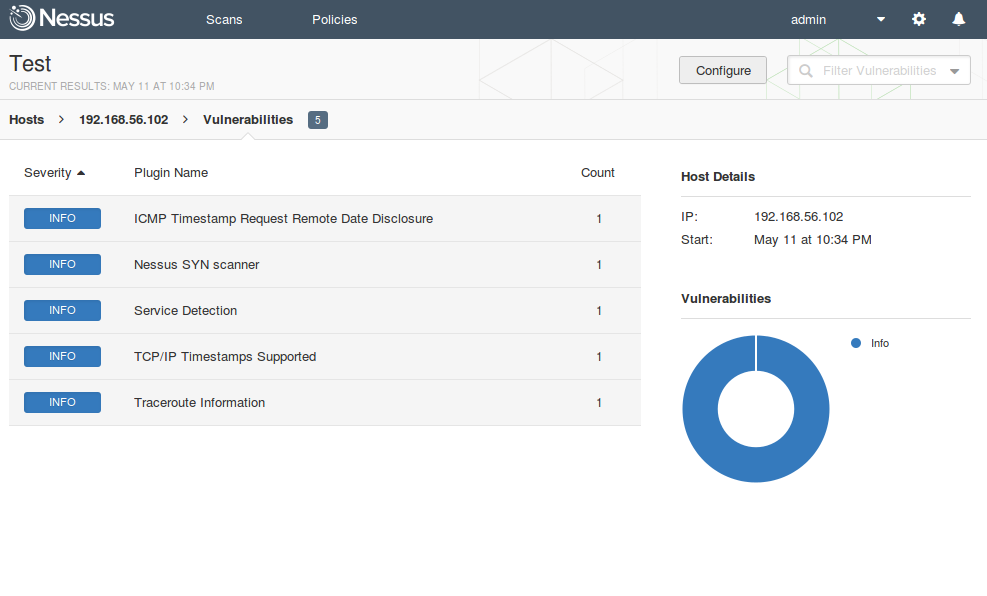
If you click on the Vulnerabilityies, you can see the full list of vulnerabilities detected on the host.
But just look at the list is not very interesting. I advise you to use actively filtering capabilities. Look in the upper right corner, on a search string. You can set advanced conditions for filtering. For example to get only critical vulnerabilities with network access vector in CVSS and available public exploit.
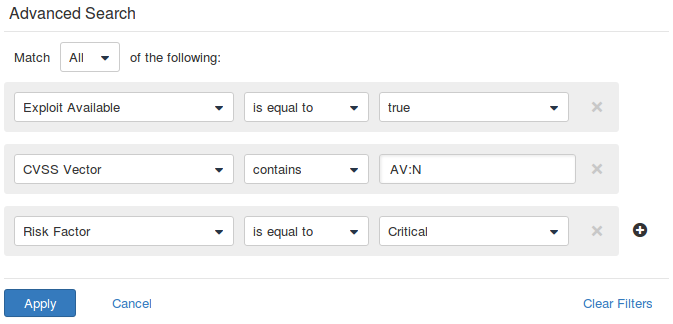
Full list of parameters that can be used in filters:
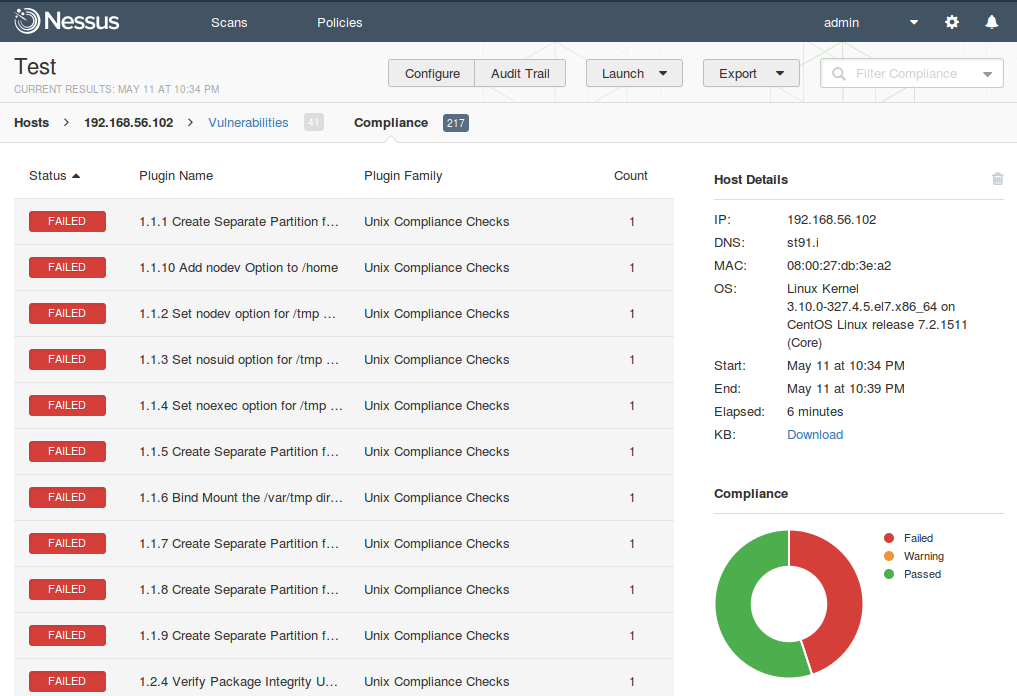
Сompliance. Everything is clear. Red – setting did not meet the safety requirements of the standard (in this case CIS for CentOS), Green – compliant. Also pay attention to filtering capabilities.
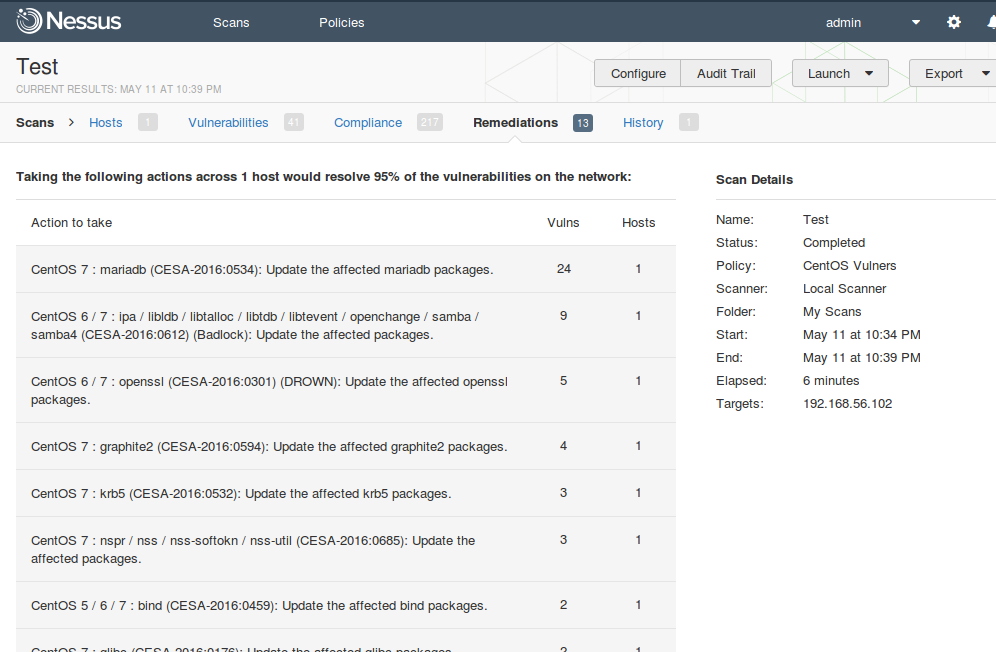
In Remediation section you can see recommendations for vulnerability level mitigation.
Scan results can be exported in the following formats:
- Nessus (xml)
- HTML
- CSV
- Nessus DB
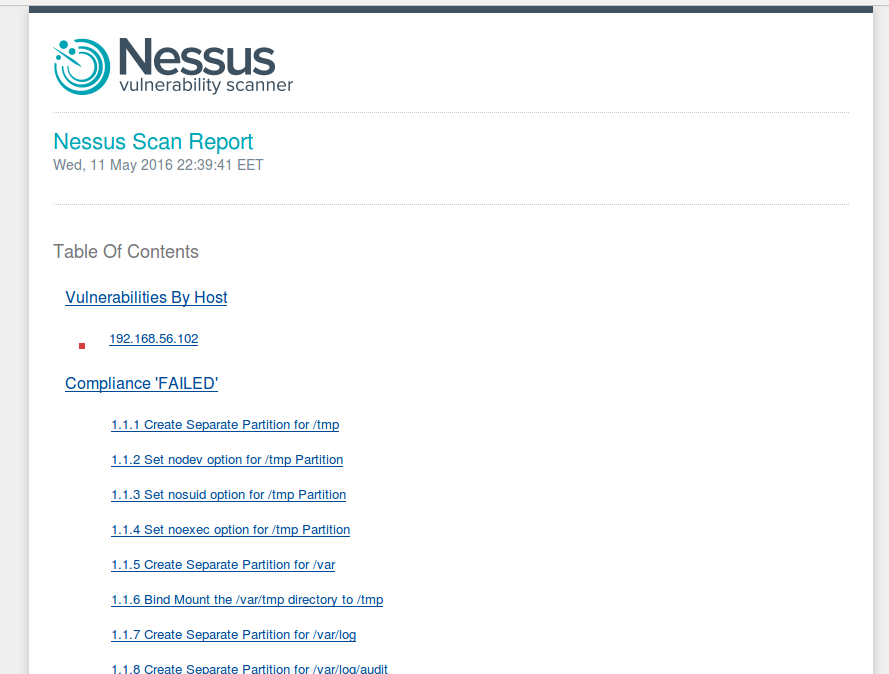
Talking about human readable reports. Nessus doesn’t have many options for repot customization. That is logical. Otherwise, Nessus could compete with Tenable enterprise level Security Center.
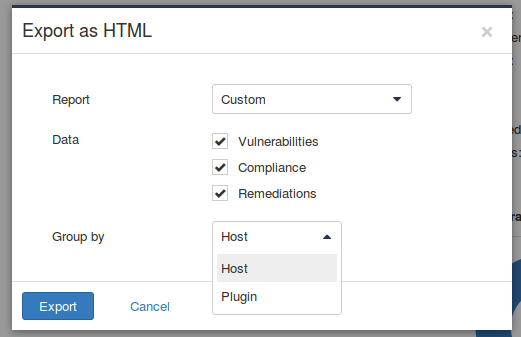
However, reports are more than informative. Report can be grouped by host or vulnerability (plugin). This report is grouped by host.
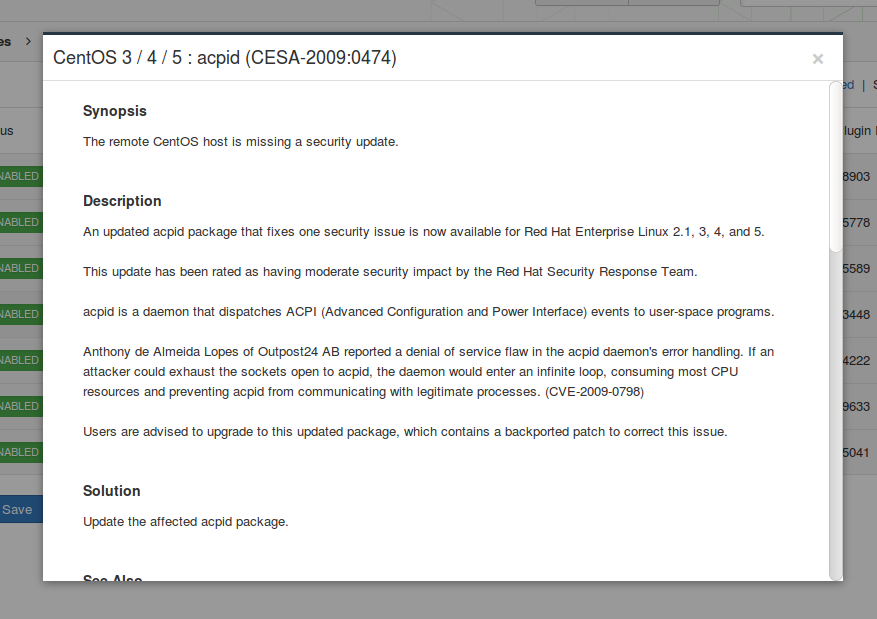
Vulnerabilities are grouped by ports. You can click on each vulnerability and read full description.
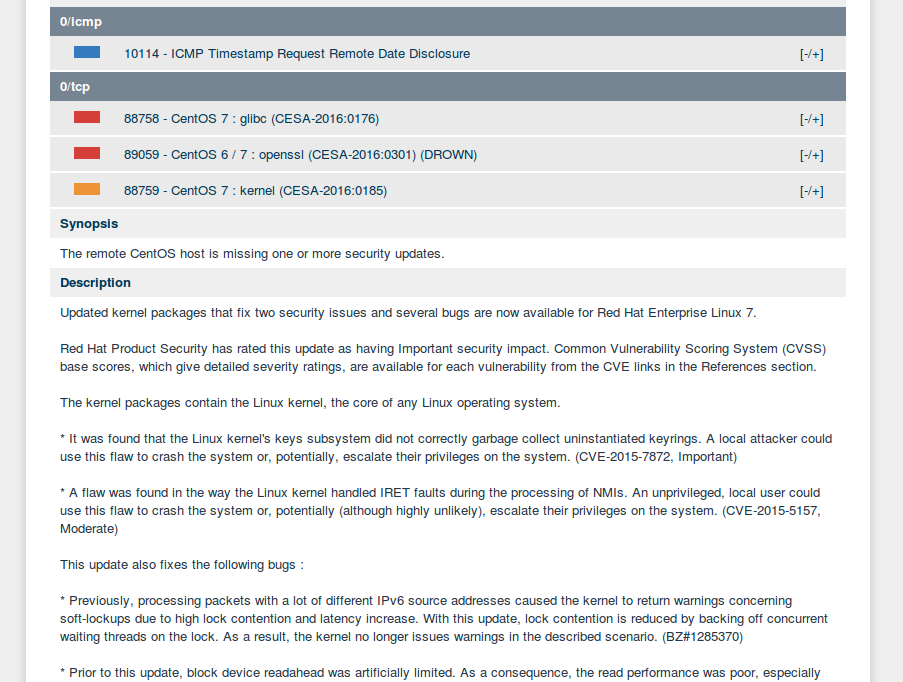
In most cases, description also includes a small generated part, which explains why particular vulnerability was added to the list. For example, old version of linux kernel was detected on a host.
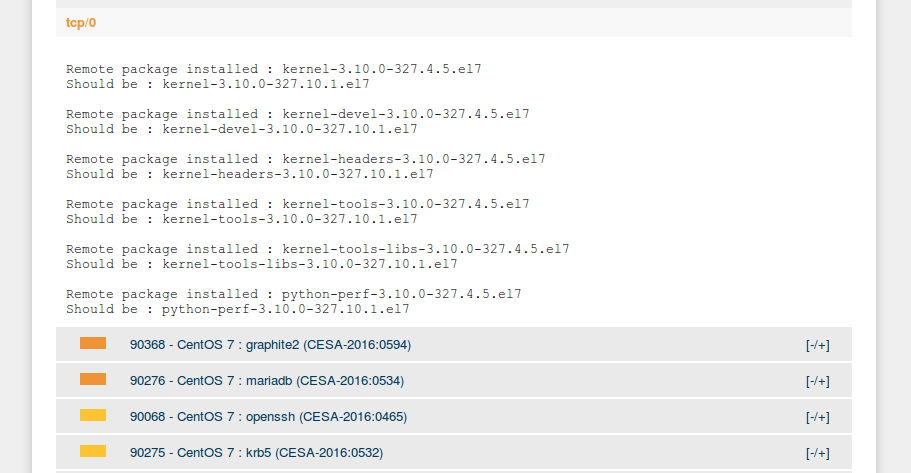
At this point I would like to finish this article. But Nessus topic does not end with the GUI description. I hope that this article will be a good starting point for the articles about Nessus API (upd. Retrieving scan results through Nessus API, Nessus API for hosts scanning, Choosing the right time for Nessus update), Nessus v2 xml report format, Parsing Nessus v2 XML reports with python, nasl and .audit scripting.

Hi! My name is Alexander and I am a Vulnerability Management specialist. You can read more about me here. Currently, the best way to follow me is my Telegram channel @avleonovcom. I update it more often than this site. If you haven’t used Telegram yet, give it a try. It’s great. You can discuss my posts or ask questions at @avleonovchat.
А всех русскоязычных я приглашаю в ещё один телеграмм канал @avleonovrus, первым делом теперь пишу туда.
Pingback: Testing Rapid7 Nexpose CE vulnerability scanner | Alexander V. Leonov
Pingback: Retrieving scan results through Nessus API | Alexander V. Leonov
Pingback: Vulnerability scanners: a view from the vendor and end user side | Alexander V. Leonov
Pingback: Tenable SecurityCenter and its API | Alexander V. Leonov
Pingback: Qualys Option Profiles for Vulnerability Scanning | Alexander V. Leonov
Pingback: OpenVAS plugins in Vulners.com | Alexander V. Leonov
Pingback: Nessus API for hosts scanning | Alexander V. Leonov
Pingback: Qualys authenticated scanning | Alexander V. Leonov
Pingback: Nessus Manager and Agents | Alexander V. Leonov
Pingback: Fast comparison of Nessus and OpenVAS knowledge bases | Alexander V. Leonov
Pingback: ZeroNights16: Enterprise Vulnerability Management | Alexander V. Leonov
Pingback: Installing Nessus for SecurityCenter on laptop | Alexander V. Leonov
Pingback: What’s actually new in Tenable.io VM application | Alexander V. Leonov
Pingback: Tenable.IO VM: connected scanners and asset UUIDs | Alexander V. Leonov
Pingback: Qualys new look and new products | Alexander V. Leonov
Pingback: Scaner-VS: Vulnerability Management solution for Russian Military | Alexander V. Leonov
Pingback: Study Vulnerability Assessment in Tenable University for free | Alexander V. Leonov
Pingback: Vulnerability Management for Network Perimeter | Alexander V. Leonov
Pingback: Vulnerability Management at Tinkoff Fintech School | Alexander V. Leonov
How to connect to scan patch vulnerability with Nessus Home ?