
Today I would like to write a post about Outpost24. This company was founded in 2001. For comparison, Tenable was founded in 2002 and Qualys in 1999. So, it’s a company with a pretty long history. Outpost24 make Vulnerability Management & Web Application Security products and provide various services in these areas. As far as I can tell, they are known mainly in Central and Northern Europe.
I’ve been testing their cloud-based solution for network perimeter scanning – OUTSCAN. Here I want to show the main features of the GUI and share my impressions.
Scanning
First of all, before you start using this service, you should accept the EULA. Pay attention to these points:
I have been given full control of which IP addresses to be scanned. Scanning towards an IP address without permission is likely to be an illegal act. I have the full responsibility for such actions.
I have been informed that the scanning may impact the performance of the network being audited. I have been given the option to have the scanning run at hours that are convenient to me, allowing me to limit the possible impact of the scanning.
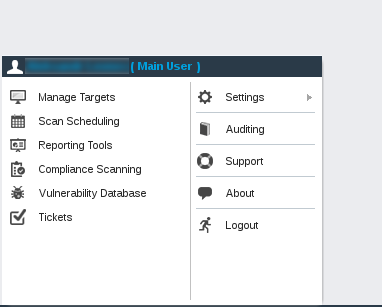
After successful log in, you will see GUI similar to the “Start” menu in Windows.
Before actual scanning it is necessary to specify Target group. You can do it at “Manage Targets”.
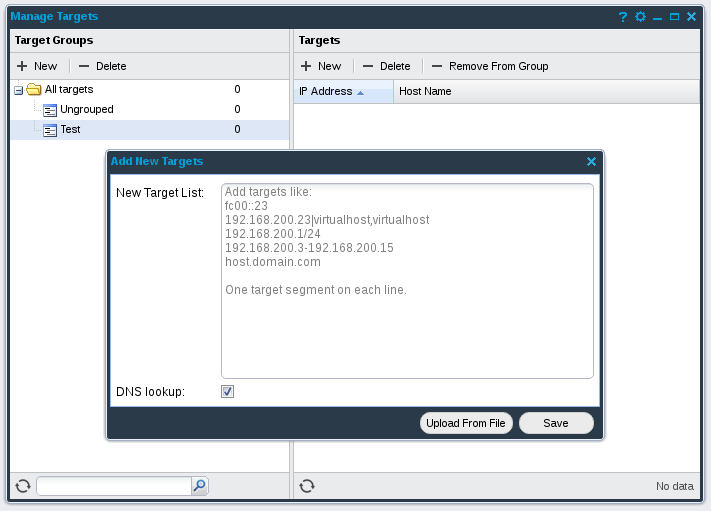
I created Test target group with some hosts. When new target group is created, you can go to “Scan Scheduling” and create a new scan job.
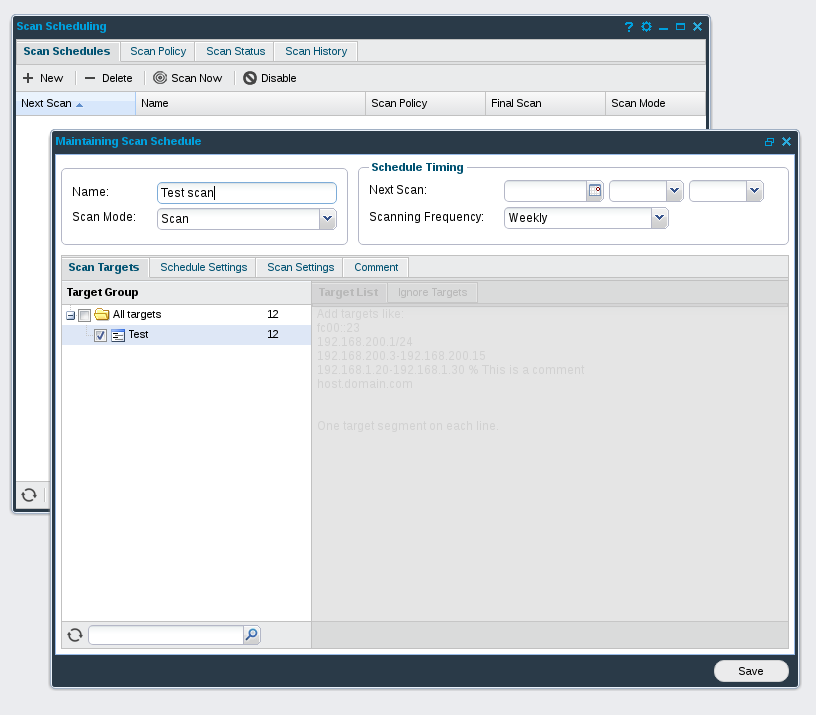
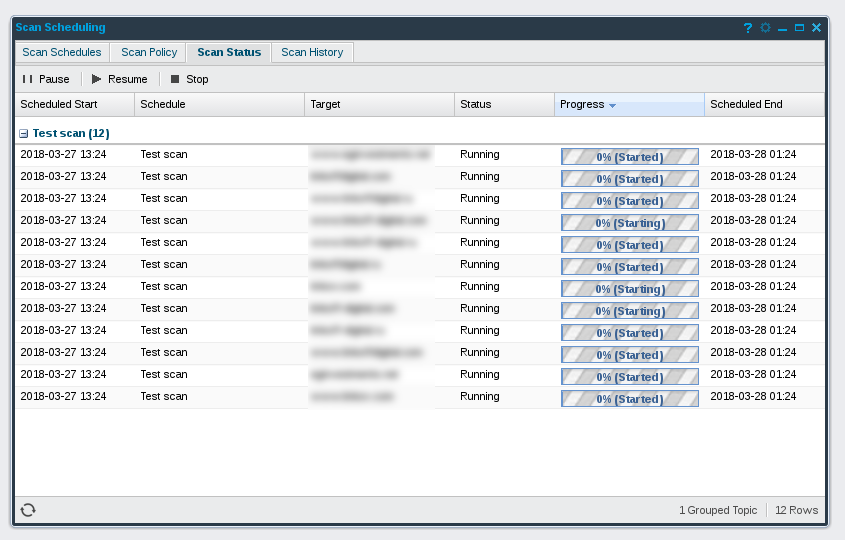
Scans can be launched regularly. A very interesting feature is that you can launch scans only during some specified time windows, if it is necessary. I created new Test scan for Test group and clicked on “Scan Now”.
If you switch to “Scan Status”, you can see which hosts OUTSCAN is currently scanning.
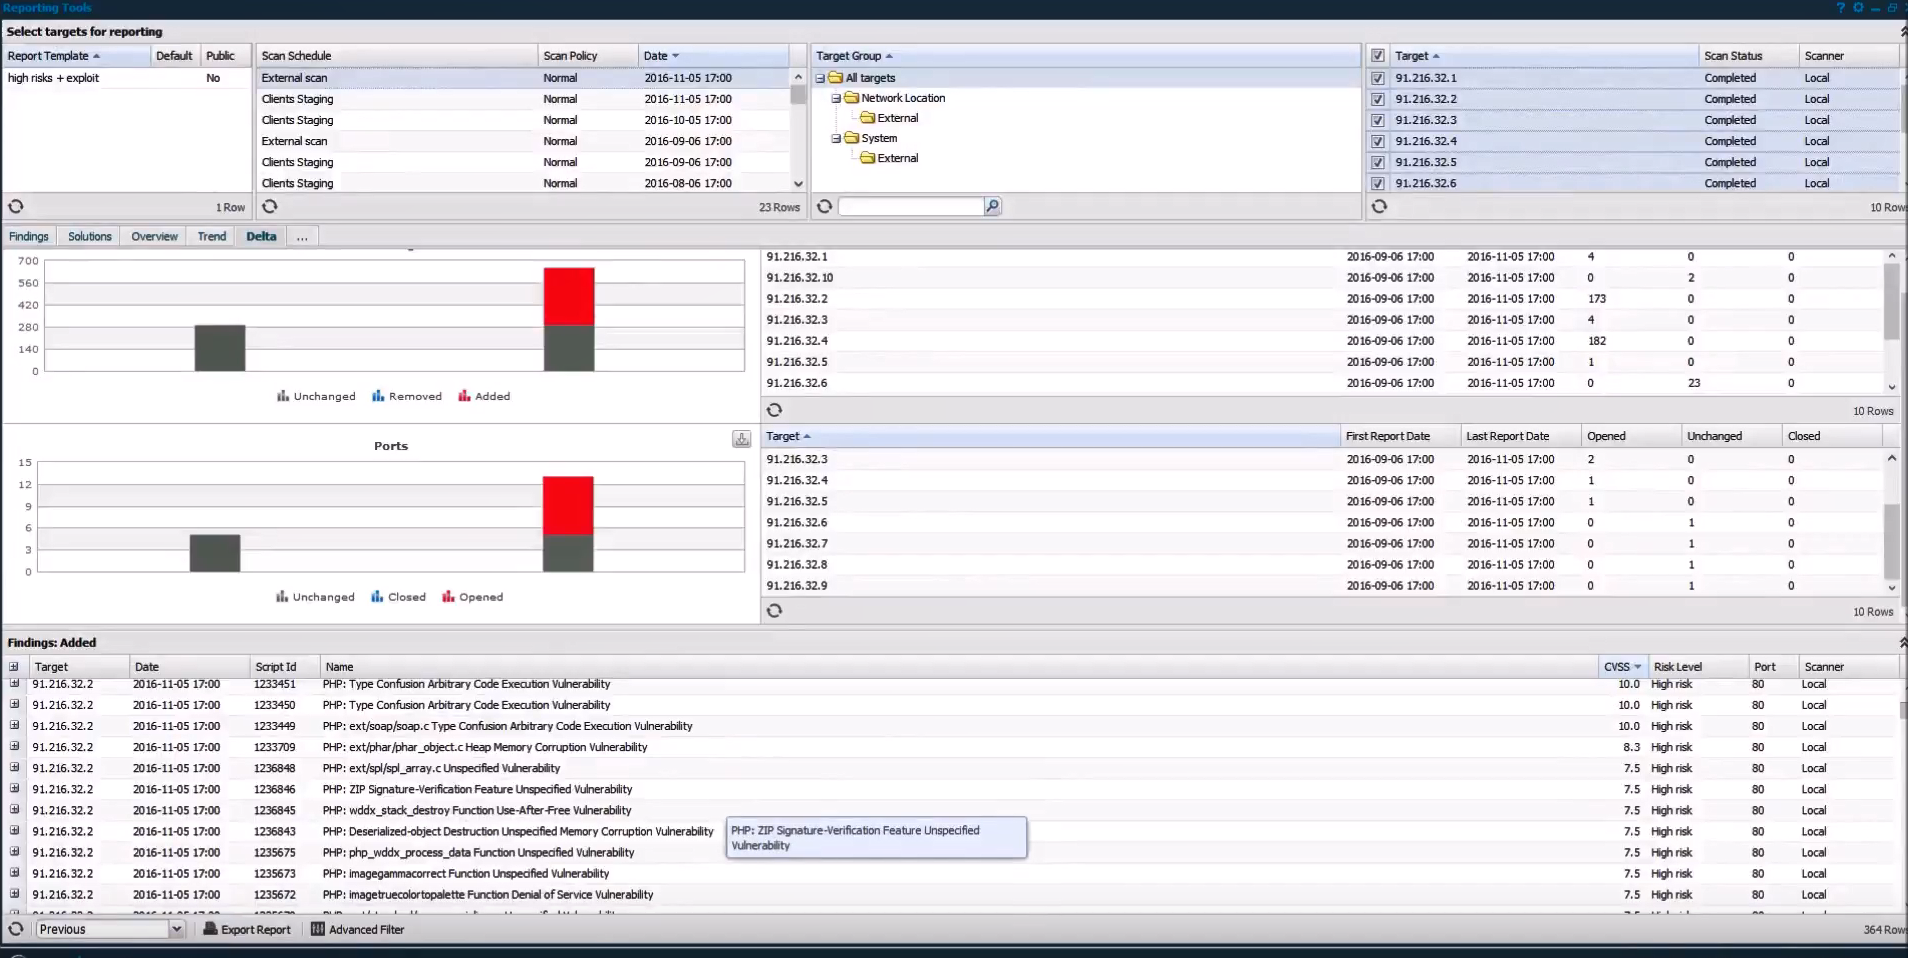
Reporting
Let’s say the scan was finished. How can we see the results? We can do it in “Reporting Tools” at Main Menu. All further screenshots I took from this video.
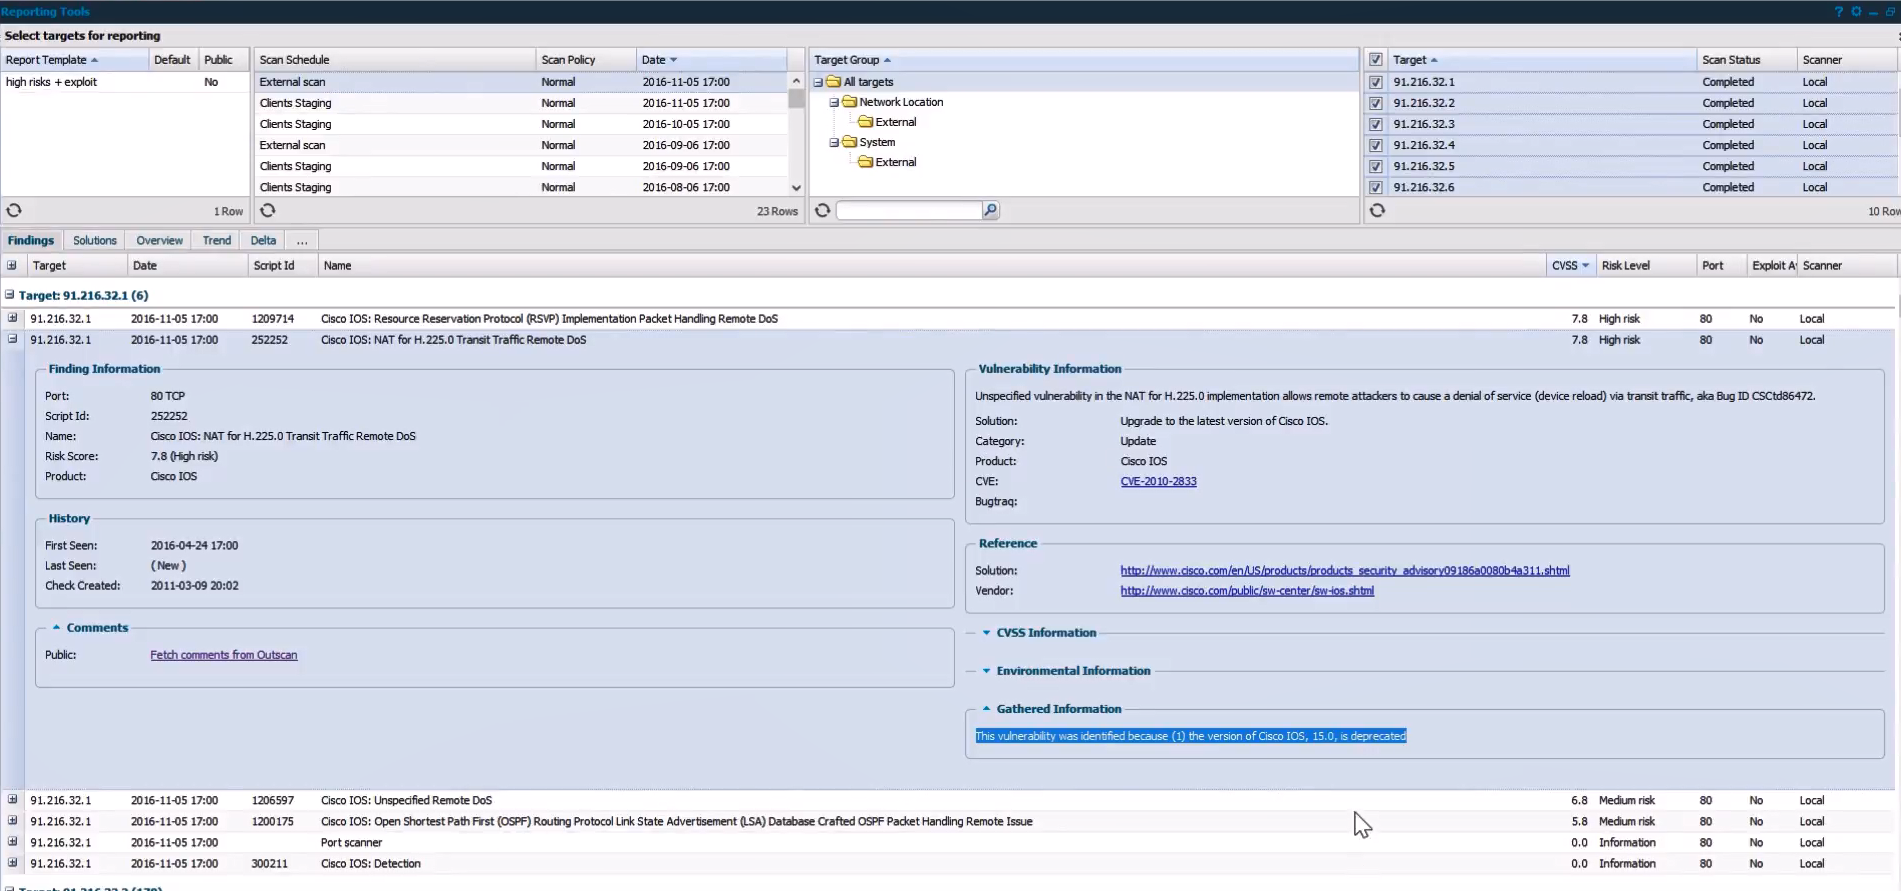
The very unique feature of Outscan is that it does not have classical reports, which you can see in other Vulnerability Management solutions. Instead of this, they have a powerful interface for filtering vulnerabilities. The interface reminded me system for booking vacation tours. 🙂 But it’s actually quite convenient to use.
You can select Scan Schedule, Target Group, Targets, apply various filters to the vulnerability parameters and, as a result, get vulnerabilities you are interested it. Then you can save these criteria as a Report Template.
You can filter vulnerabilities by
- Target
- Date
- Script Id
- Name
- CVSS
- Risk Level
- Port
- Exploit Availability
- Scanner
For each vulnerability you can make these things:
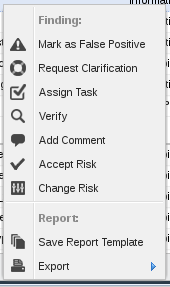
- Mark as False Positive
- Request Clarification
- Assign Task
- Verify
- Add Comment
- Accept Risk
- Change Risk
In “Solutions” tab OUTSCAN will show the recommendations for fixing vulnerabilities

Solution parameters:
- Solution (name)
- Category (Update, No Solution, Workaround, Not acknowledged, Filter, etc.)
- Product
- Open Issues
- Target
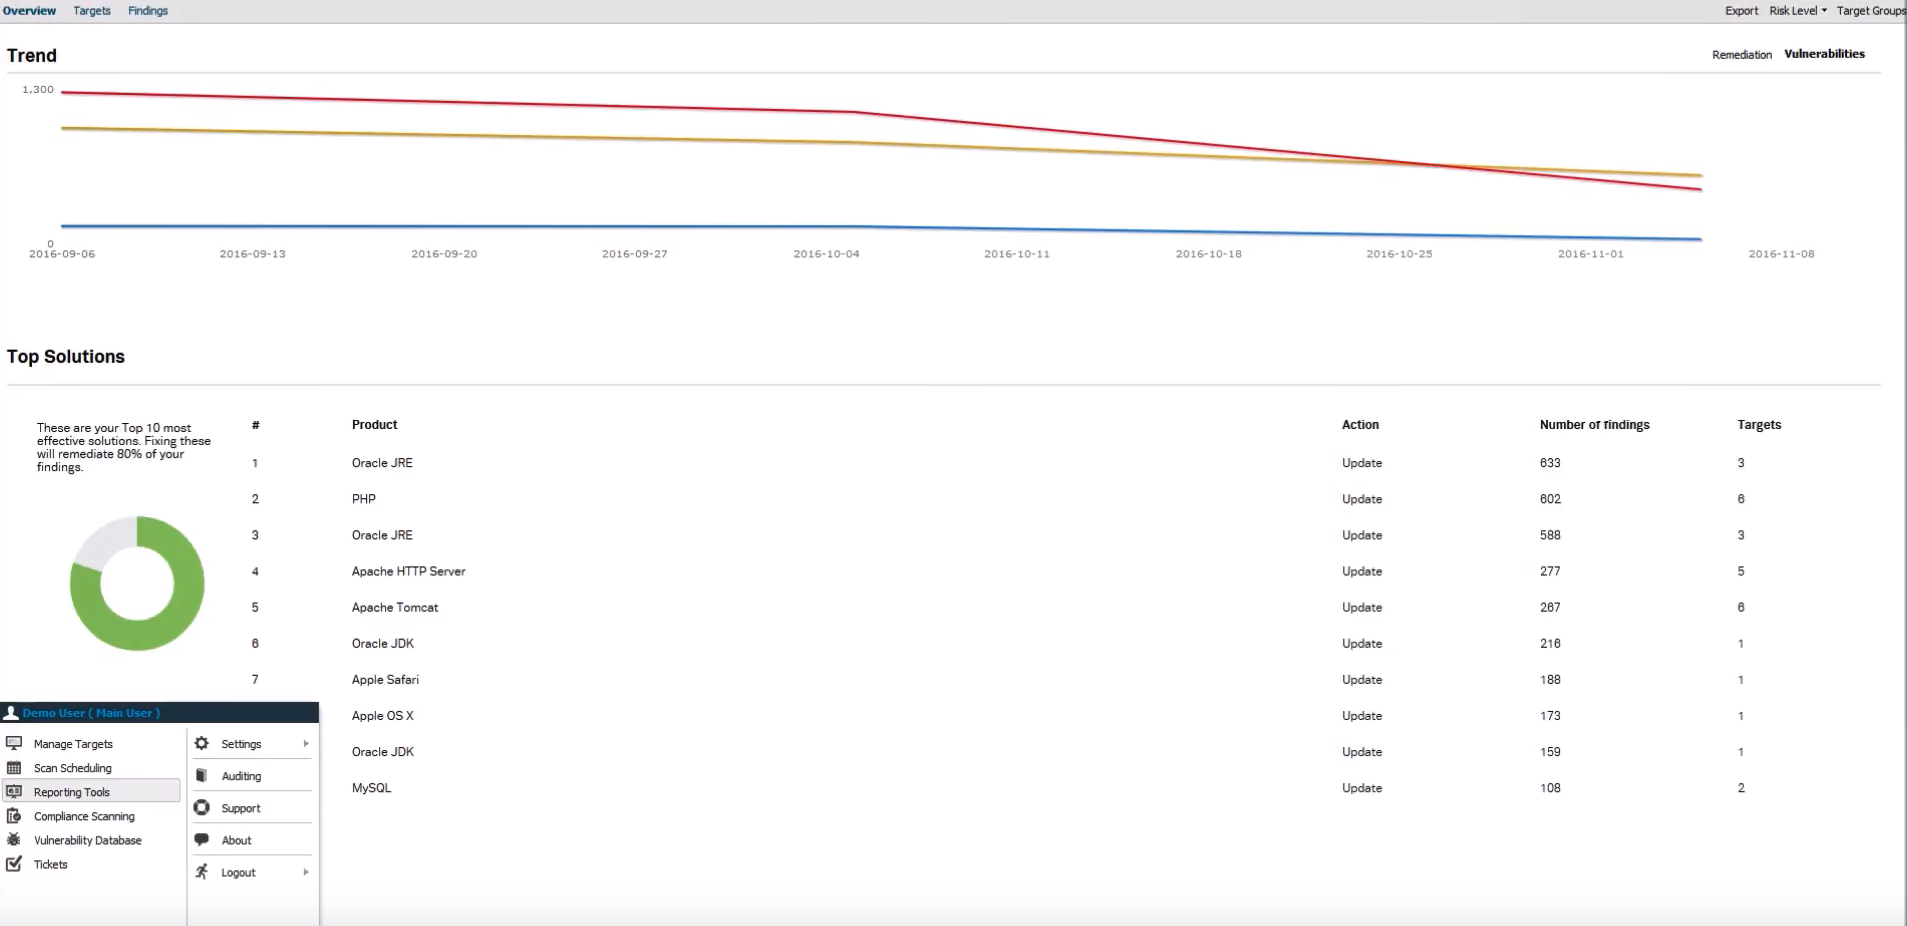
As you can see, they show on the pie chart TOP 10 Solutions, that will fix most of vulnerabilities.
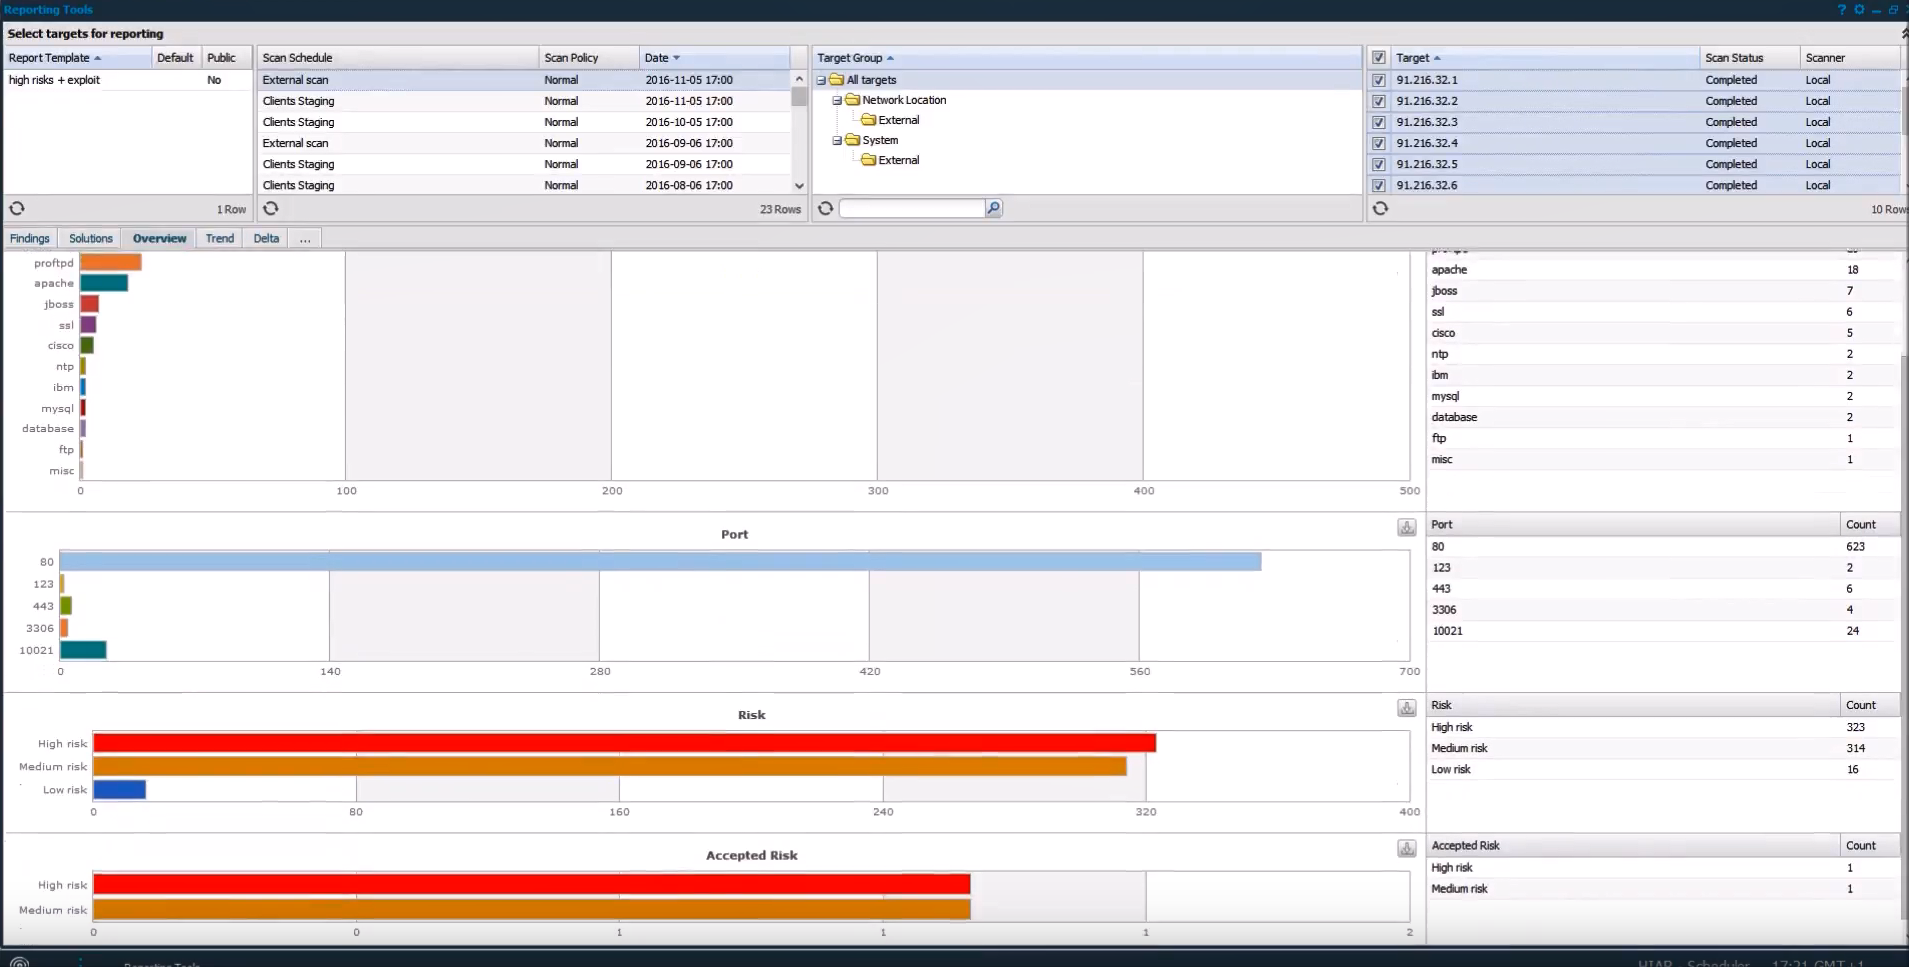
In “Overview” tab they show statistics and diagrams for products, ports, risks, etc.
In “Trends” tab they show how the parameters from the Overview were changing over time.

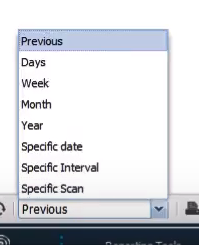
Finally, in “Delta” tab you can make a diff and see what exactly changed in the selected period of time.
You can select the following time intervals:
And, if you already have some scan results, they will be displayed on the start screen like this:
In conclusion
OUTSCAN has some pretty unique features that I haven’t seen in other VM products.
- Flexible configuration of the scan time is very useful. From my experience, there can be requirements from IT to scan different hosts in very different time intervals. Often you can start scanning not earlier than hour X and finish strictly at hour Y. Therefore, such flexibility is in demand.
- Reporting Tools show a very good combination of flexibility and simplicity. I think it’s possible to significantly improve the effectiveness of the Vulnerability Management program in the organization if you use these feature in combination with your own scripts. I have not tried it, but representatives of Outpost24 say that this is possible through the API.
Unfortunately I haven’t tested this service deeply enough to talk about disadvantages. Everything seems reliable. I did not find any obvious problems with quality of vulnerability detection. I can tell that on my small set of assets, it was scanning no worse than Nessus.

Hi! My name is Alexander and I am a Vulnerability Management specialist. You can read more about me here. Currently, the best way to follow me is my Telegram channel @avleonovcom. I update it more often than this site. If you haven’t used Telegram yet, give it a try. It’s great. You can discuss my posts or ask questions at @avleonovchat.
А всех русскоязычных я приглашаю в ещё один телеграмм канал @avleonovrus, первым делом теперь пишу туда.
Pingback: Outpost24 Appsec Scale for Web Application Scanning | Alexander V. Leonov