
Qualys authenticated scanning. Let’s see how authenticated scanning works in Qualys. Nessus stores scanning credentials in related Scan Policy (see “Tenable Nessus: registration, installation, scanning and reporting“). Iit’s not always convenient. In Qualys you can set up a scanning record and configure for which hosts it will be used.
I downloaded Qualys Virtual Scanning Appliance VirtualBox image and configured it as it was described in “Using Qualys Virtual Scanner Appliance“. The only difference: I configured second network device as VirtualBox “Host Only Adapter” to scan virtual machines on my host. You can see how to configure VirtualBox “Host Only Adapter” in my post here.
I also have a CentOS target virtual machine with IP 192.168.56.101.
First of all, let’s check that we can make an unauthenticated scan of the host. I created an authenticated scan like I showed in “Qualys Vulnerability Management GUI and API”:
Scan results:
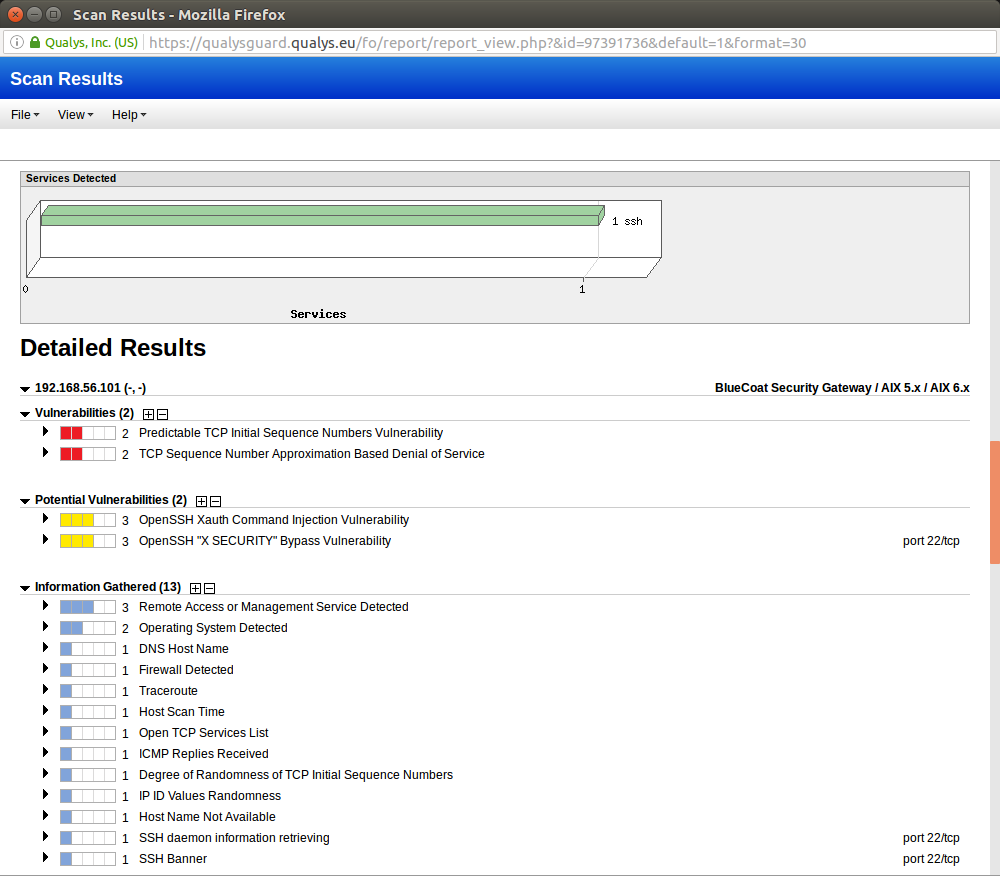
It’s fun to see “BlueCoat” and “AIX” in OS Detection. But it shows how hard is to detect remote host type correctly without authentication. And without correct OS Detection you will probably have some problems with Vulnerability Detection.
Now let’s add scanning account in “Vulnerability Management -> Scans -> Authentication” tab:
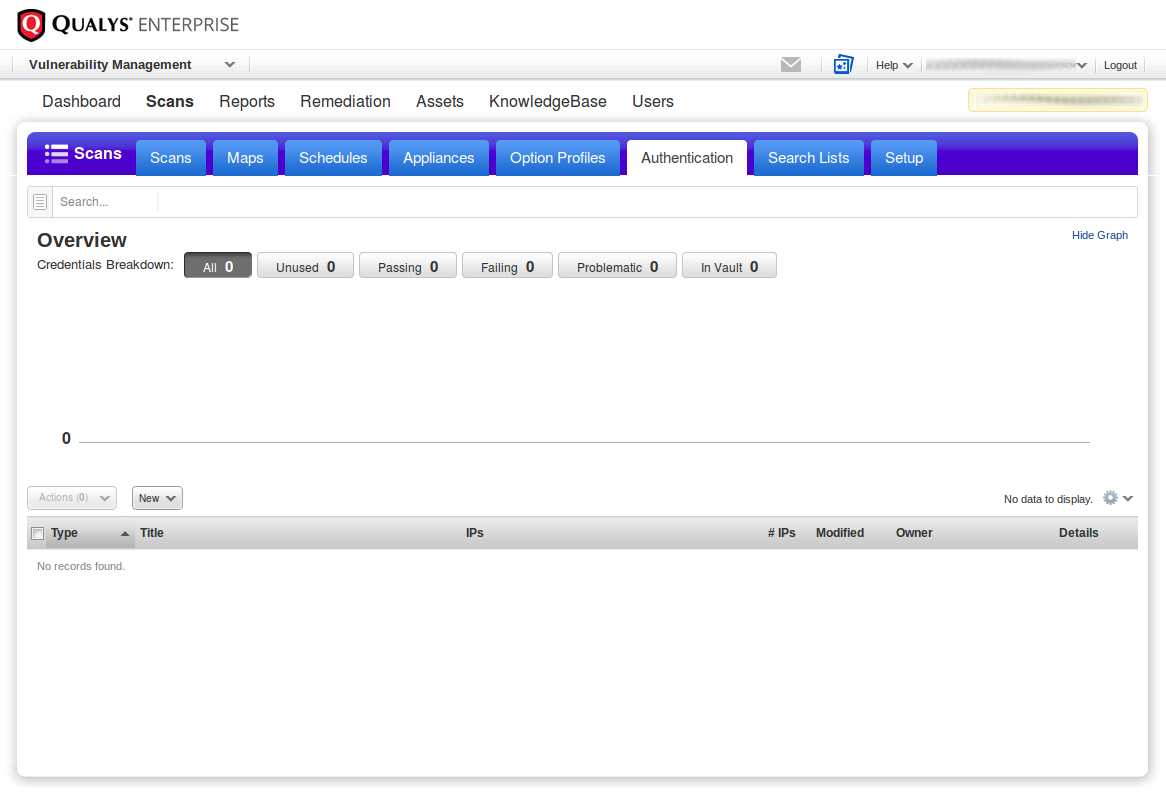
Here you can see what authentication options Qualys support. For ssh/telnet scanning you need Unix Record:

Main authentication records Qualys supports:
- Windows Record
- Unix Record
- Oracle Record
- Oracle Listener Record
- SNMP Record
- MS SQL Record
- Cisco IOS Record
- IBM DB2 Record
- VMware Record
- MySQL Record
- Sybase Record
- Checkpoint Firewall
- HTTP Record
- Application Records
This gives an idea of how many types of systems Qualys can asses efficiently.
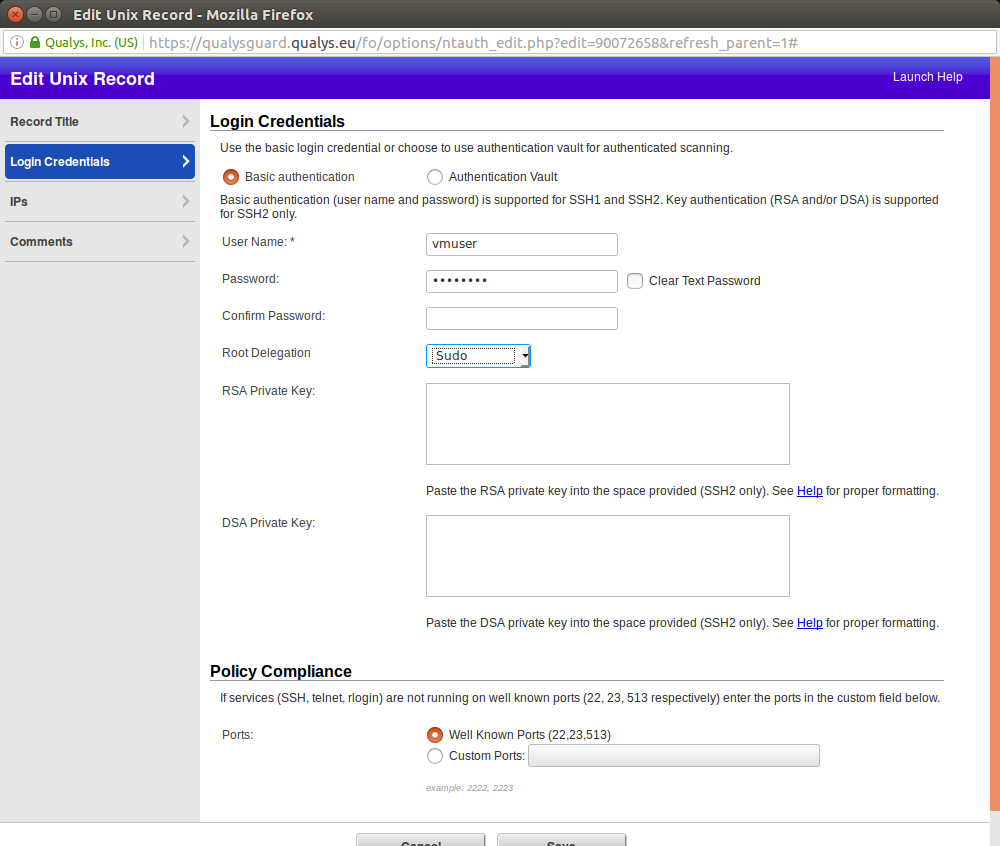
Title: “CentOS Auth”. Adding user name, password and ports for authentication.
For root delegation Qualys supports only
- Sudo
- PowerBroker
- Pimsu
Why not “login with unprivileged user, then make su”? Maybe such authentication method seems to be less secure. I chose to delegate with sudo, so I edited /etc/sudoers:
...

#Allow root to run any commands anywhere

root ALL=(ALL) ALL

vmuser ALL=(ALL) ALL

...
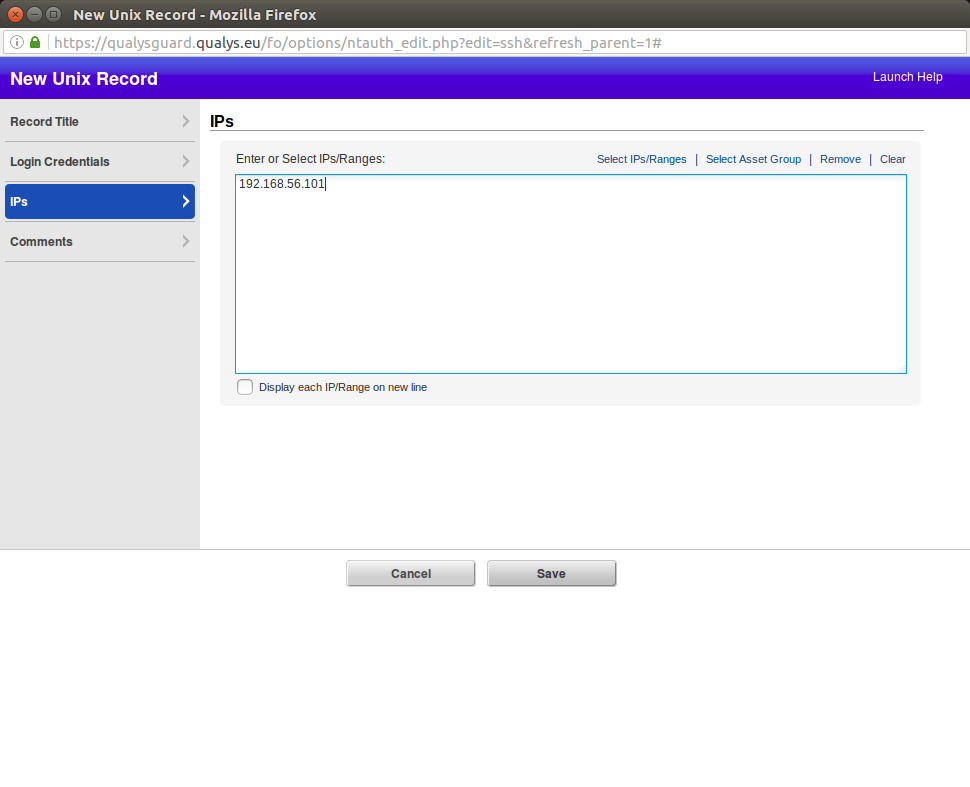
Here you can set the IPs (Ranges) or Asset Group for which this authentication record will be used:
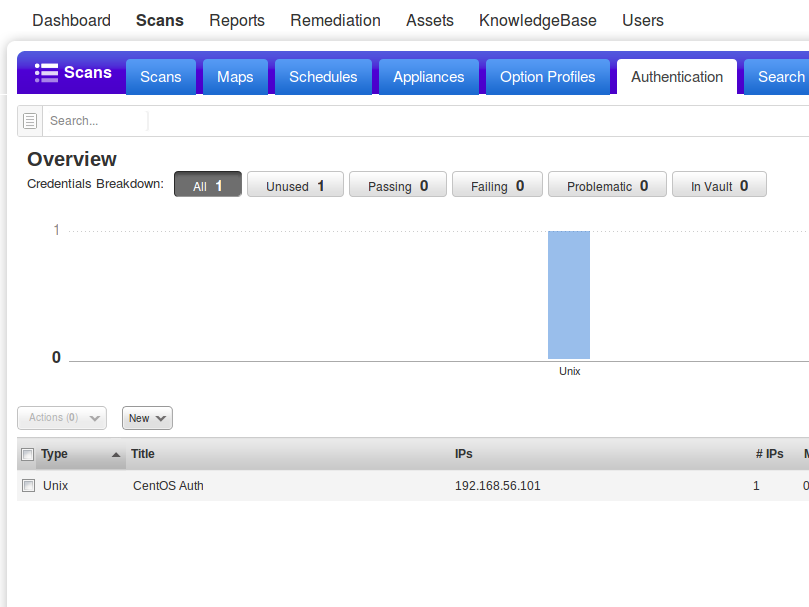
New Unix Authentication record appeared:
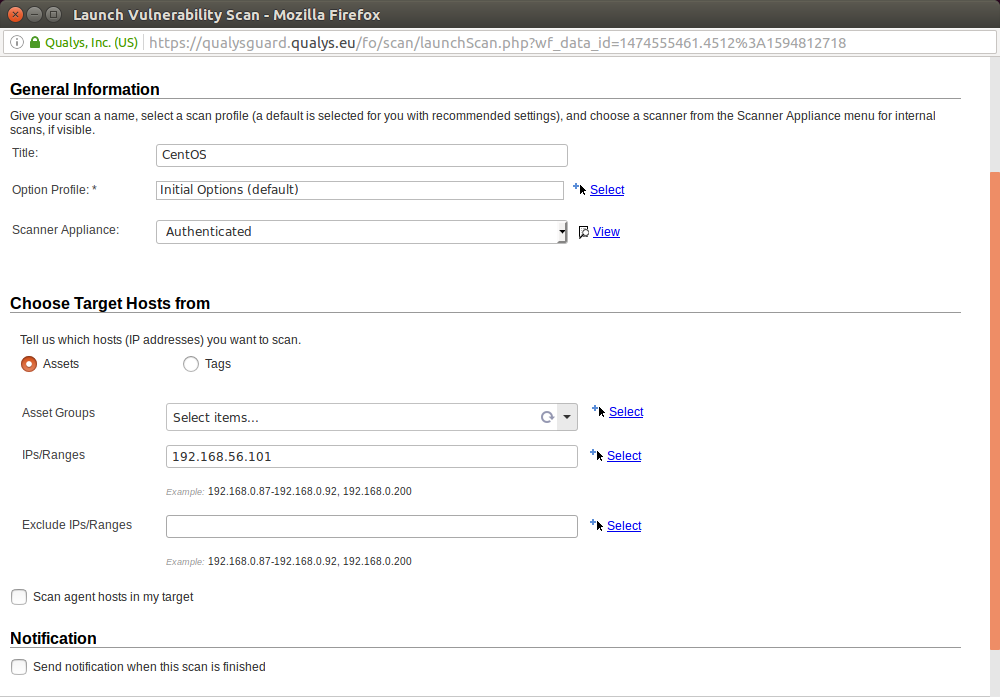
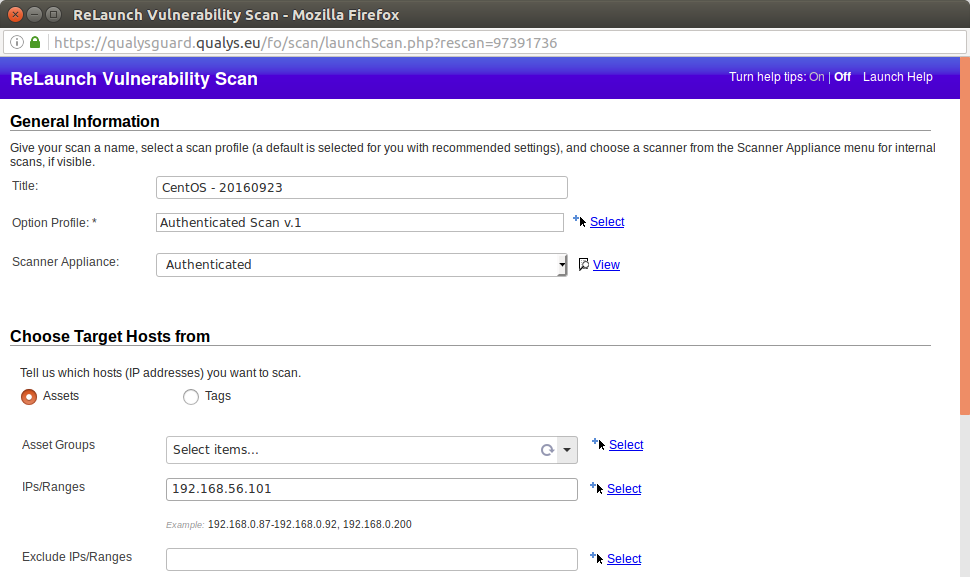
During the scan configuration I chose standard Authenticated Scan profile:
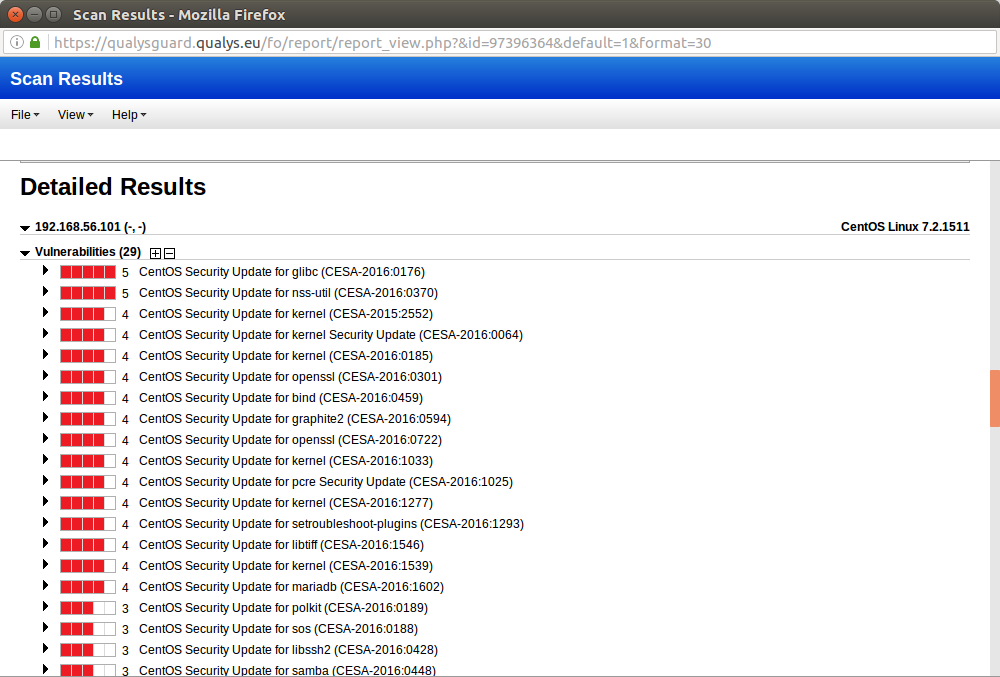
As you can see, comparing with previous unauthenticated scan, the results are much more reliable and OS was detected correctly:

Hi! My name is Alexander and I am a Vulnerability Management specialist. You can read more about me here. Currently, the best way to follow me is my Telegram channel @avleonovcom. I update it more often than this site. If you haven’t used Telegram yet, give it a try. It’s great. You can discuss my posts or ask questions at @avleonovchat.
А всех русскоязычных я приглашаю в ещё один телеграмм канал @avleonovrus, первым делом теперь пишу туда.
Hi,
Nice article, I am wondering whether Qualys is detecting vulnerabilitiesat the OS level by looking at the package management system, or doing scans of binaries. If it’s the latter a tarbal based install would be missed.
Do you know?
Hi! Thank you for your kind words, BizzWood! Well, nobody knows, as long as code of Qualys vulnerability checks is closed. =) But, if you look at bash history file on target host after the scan, you can see that they trying to run various binaries with “-v”, “–version” keys. So, in theory, they may detect vulnerabilities in some software that were not installed from official repository.
Hi,
Thanks for this article. I have tried following the steps. I have compared my authenticated and unauthenticated scan but I see no difference. Also, I noticed in the Authentication tab that my credentials are unused. I used exactly same scan profile you used.