Installing Nessus for SecurityCenter on laptop. The great thing about Tenable SecurityCenter: when you buy it you also get hundreds of licenses for Nessus. You can google different types of SecurityCenter bundles with “SecurityCenter Continuous View – On Premise” request. “Scanners” here mean SC scanners:
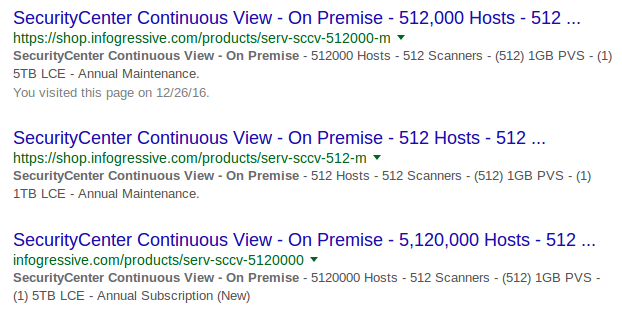
You will need these scanner licenses to deploy Nessus hosts on your network, connect them to your Tenable SecurityCenter and manage scan process using SecurityCenter via graphical user interface or API. Of course, with all the restrictions on amount of IP addresses that you can scan.
At the same time, these Nessus for SecurityCenter servers are fully functional. Technically this servers are the same as Nessus Professional. Nessus for SecurityCenter has the same web interface, where you can create multiple user accounts, manage the scans in GUI and API, scan any amount of IP addresses. Scan data will be stored locally on your Nessus server and your SecurityCenter will not see it or use it in any way. This is really great. And I hope it is a feature and not a bug.
However, there are some differences. Nessus Professional downloads security plugins and makes activation using remote Tenable severs. Nessus for SecurityCenter does these things using SecurityCenter in your network.
So, when you have such a great amount of Nessus licenses you may want to install one on your own laptop. It might be really useful for debugging. For example, when you are developing your own nasl scripts, to enable them in Nessus, you will need to restart it. And you will not probably want to do it on the Nessus server where dozens of scanning jobs are running.
In this post I will try to install Nessus on Centos 7 in VirtualBox, configure port forwarding, activate and update Nessus plugins with SecurityCenter.
CentOS 7
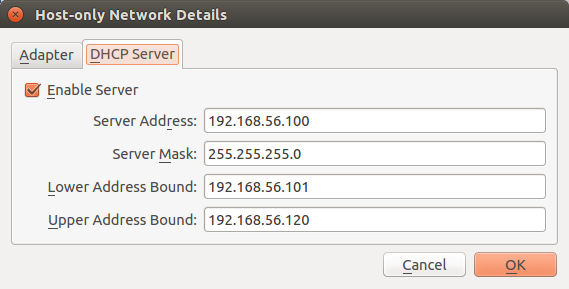
I have created default virtual machine configuration in VirtualBox with two network interfaces: NAT and Host-only Network. Configuration for Host-only Network you can see on the screenshot:
I have installed the latest version of CentOS 7 available at the time: CentOS-7-x86_64-Minimal-1511.iso from https://mirror.yandex.ru/centos/7/isos/x86_64/
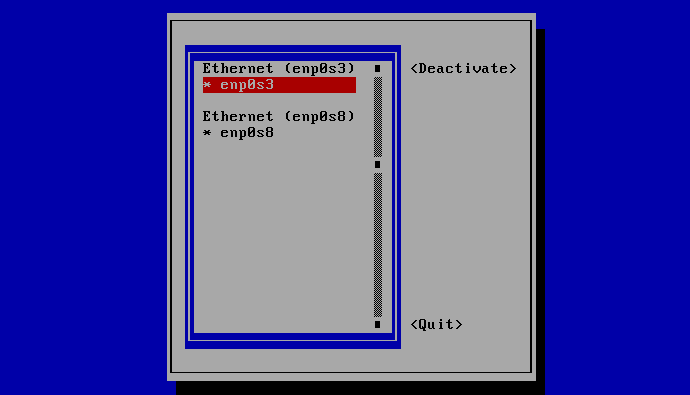
CentOS installation process is pretty straightforward. I use “vmuser” as user name. If network is not working after installation run “nmtui", choose “Edit a connection” and set “Automatically connect” for all the adapters.
With “ip addr" you can get an IP-address of virtual machine. For me it is 192.168.56.101.
upd. If you want to have a static IP-address for the server in VirtualBox host-only network you may also configure it with nmtui for corresponding host-only interface (enp0s8):
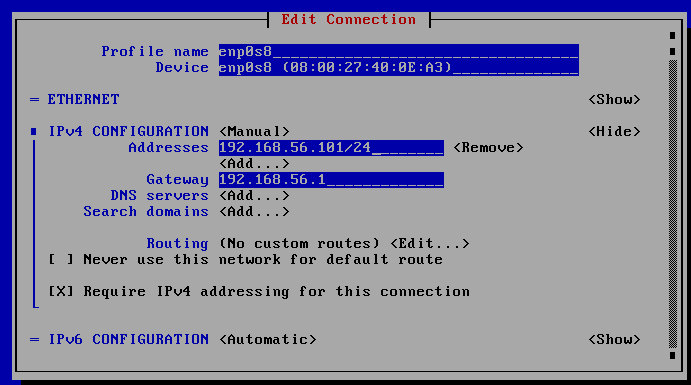
And restart network service with:
# systemctl restart network.service
Installing OpenSSH Server:
# yum install openssh-server
Trying to connect to Centos 7 virtual machine using “ssh vmuser@192.168.56.101" to check that everything is fine.
Port forwarding
SecurityCenter manages Nessus servers connecting to them at 8834 TCP port (it’s a default port, it can be changed). So, to activate my Nessus installation, SecurityCenter will need to connect to my laptop at 8834 tcp and then this connection should be forwarded to 8834 port of CentOS 7 virtual machine. We can do it with port forwarding feature. In configuration of virtual machine NAT interface I defined Port Forwarding rules:
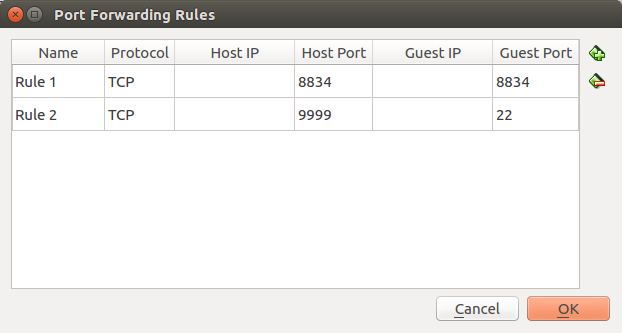
I also forwarded 22 ssh Guest Port for testing reasons. The IP-address of my laptop is 172.16.15.22. If “ssh vmuser@172.16.15.22 -p 9999" works well, then everything was configured correctly. Note, that port forwarding of low host ports, like 22 host to 22 guest port will not work. It is because you are probably run Virtualbox from normal user, not root.
Nessus installation
I have downloaded Nessus 6.9.2 rpm package for Red Hat ES 7 / CentOS 7 / Oracle Linux 7 (including Unbreakable Enterprise Kernel) – x86_64 at https://support.tenable.com/support-center/
Uploading Nessus-6.9.2-es7.x86_64.rpm to the the CentOS 7 virtual machine:
$ scp Nessus-6.9.2-es7.x86_64.rpm vmuser@192.168.56.101:/home/vmuser

vmuser@192.168.56.101's password:

Nessus-6.9.2-es7.x86_64.rpm 100% 33MB 32.9MB/s 00:01
Then connect to the server and install Nessus package:
$ ssh vmuser@192.168.56.101

$ su

# rpm -i Nessus-6.9.2-es7.x86_64.rpm

warning: Nessus-6.9.2-es7.x86_64.rpm: Header V4 RSA/SHA1 Signature, key ID 1c0c4a5d: NOKEY

Unpacking Nessus Core Components...

nessusd (Nessus) 6.9.2 [build M20074] for Linux

Copyright (C) 1998 - 2016 Tenable Network Security, Inc
Processing the Nessus plugins...

[##################################################]
All plugins loaded (1sec)

- You can start Nessus by typing /bin/systemctl start nessusd.service

- Then go to https:/192.168.56.101:8834/ to configure your scanner
# systemctl start nessusd.service
If you don’t see anything at https:/192.168.56.101:8834/ you may try to disable firewall:
# systemctl stop firewalld

# systemctl status firewalld
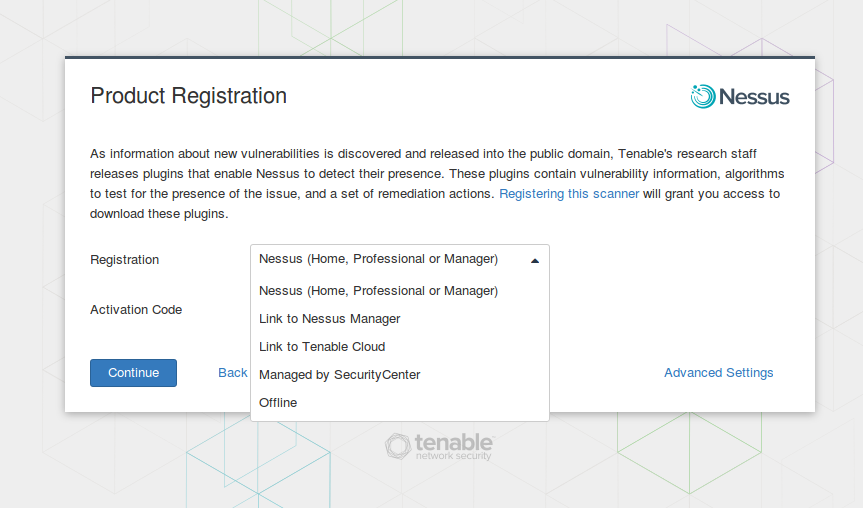
Configuration process at https://192.168.56.101:8834/ is the same as it was for Nessus Home and Nessus Manager. The only difference is Product Registration screen. You need to choose there “Managed by SecurityCenter”. Administrator account, that you will create during the configuration process, will be used by SecurityCenter for activation and updating.
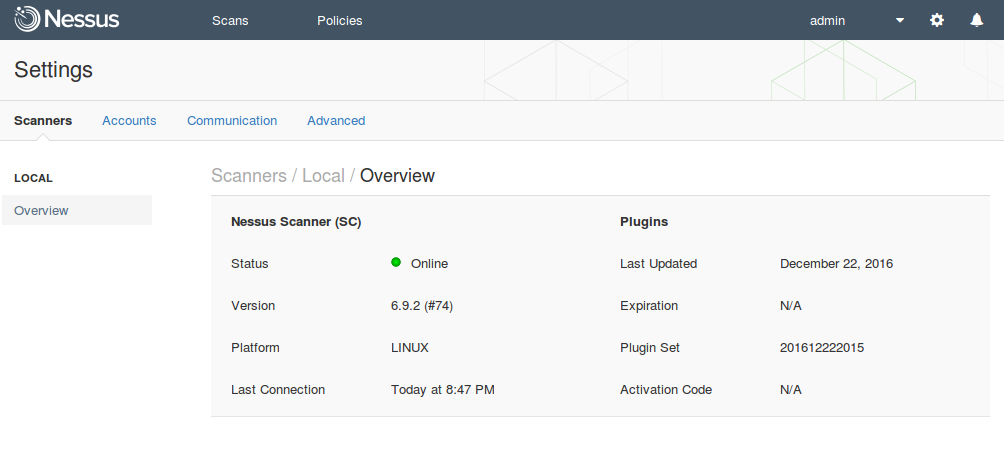
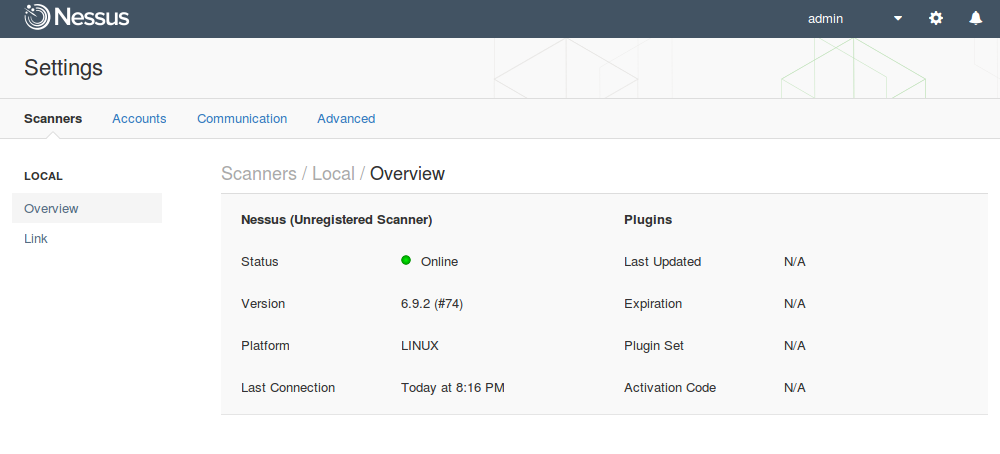
When configuration process will be finished, you will see this Settings screen. As you see, there are no Scan and Policies tabs. There are no plugins as well.
SecurityCenter
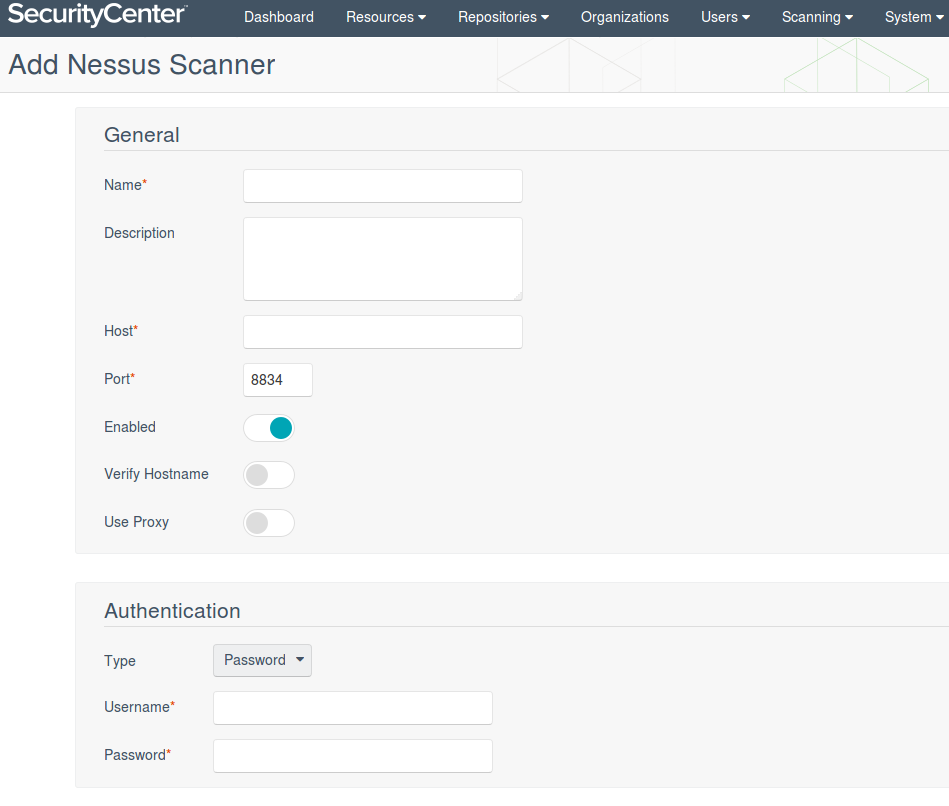
Check once again, that port forwarding is working. Open https://172.16.15.22:8834/, where 172.16.15.22 is your laptop IP. If everything is fine, go to SecurityCenter (https://<SecurityCenter_host>/#nessus_scanners) with your administrator account and add new Nessus Scanner. You will need to specify name of the scanner, host, port, and method of authentication: by login/password or SSL certificate.
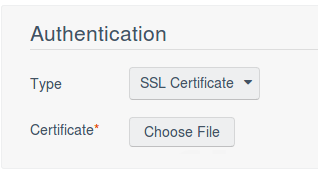
upd. Alternative SSL Certificate authentication option:
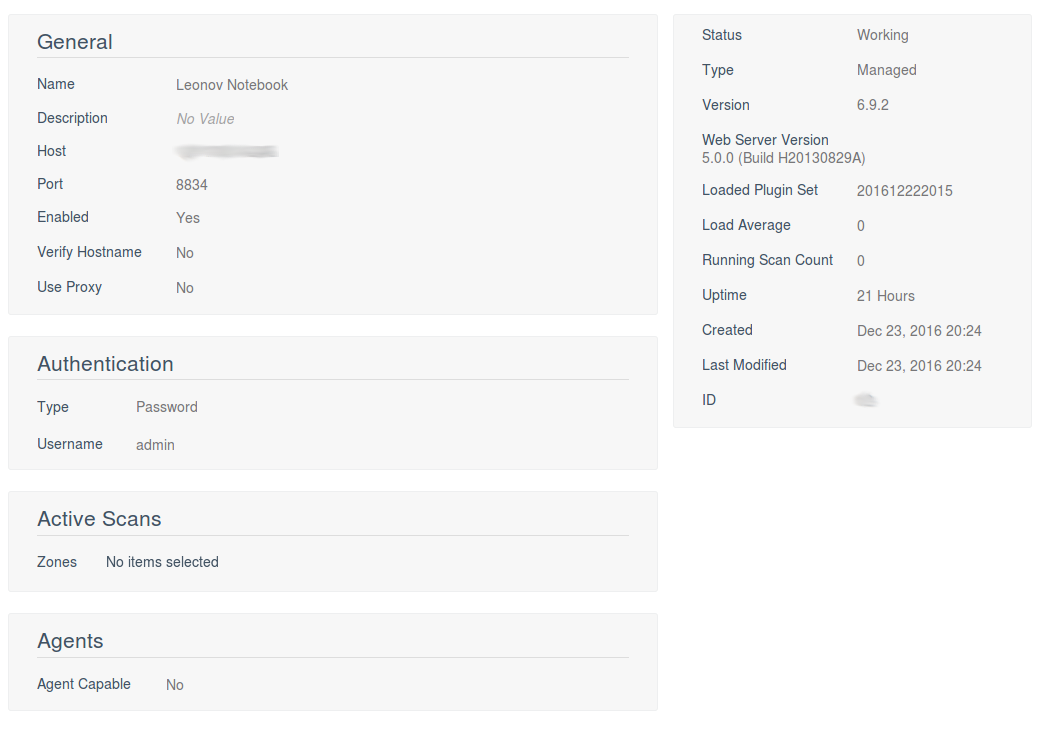
I have created “Leonov Notebook” scanner, host 172.16.15.22, port 8834 and used “admin” account of my new Nessus server for authentication.
You can see the status of the new scanner:
![]()
The status will be changing: “Updating Status”, “Plugins Out of Sync”, “Updating plugins” and finally “Working”. Here is how new Nessus scanner looks from SecurityCenter when activation and update are finished:
When you connect to https:/192.168.56.101:8834/ or https://172.16.15.22:8834/ you will see fully functional and ready to use Nessus for SecurityCenter scanner with the latest Plugin Set:

upd. Next time to update Nessus for SC server make sure that it is visible from SecurityCenter host. Then login at SecurityCenter https://<SecurityCenter_host>/#nessus_scanners press “Options” button and choose “Update Status”. Some time later SecurityCenter will connect to your Nessus for SC installation and will update the plugins.

Hi! My name is Alexander and I am a Vulnerability Management specialist. You can read more about me here. Currently, the best way to follow me is my Telegram channel @avleonovcom. I update it more often than this site. If you haven’t used Telegram yet, give it a try. It’s great. You can discuss my posts or ask questions at @avleonovchat.
А всех русскоязычных я приглашаю в ещё один телеграмм канал @avleonovrus, первым делом теперь пишу туда.

Pingback: Tenable Nessus: registration, installation, scanning and reporting | Alexander V. Leonov
Pingback: Tenable.IO VM: connected scanners and asset UUIDs | Alexander V. Leonov
Pingback: ISACA Moscow Vulnerability Management Meetup 2017 | Alexander V. Leonov
Pingback: New Nessus 7 Professional and the end of cost-effective Vulnerability Management (as we knew it) | Alexander V. Leonov