
Tenable.IO VM: connected scanners and asset UUIDs. I have already wrote earlier about new features of Tenable.io VM cloud vulnerability scanner. In this post, I would like to show how Tenable.io cloud service works with Nessus scanner deployed inside your network. Spoiler! Everything is very different from Nessus and Tenable SecurityCenter.
I also would like to demonstrate how Nessus creates Asset IDs (Tenable UUIDs) on the the host during authenticated scanning and how can we get this IDs from the scan results.
Nessus host configuration
I configured CentOS 7 host the same way I did it for Nessus for SecurityCenter. The only difference: Tenable.io will use host name of our server as the name of the Nessus scanner in Tenable.io interface. So it is better to make host name meaningful. In CentOS 7, you can do it like this:
# hostnamectl set-hostname "nessus_tenableio"
# hostnamectl set-hostname "nessus_tenableio" --pretty
# hostnamectl set-hostname "nessus_tenableio" --static
# hostnamectl set-hostname "nessus_tenableio" --transient
# hostnamectl status
   Static hostname: nessus_tenableio
         Icon name: computer-vm
           Chassis: vm
        Machine ID: c906a24fd4a84b818626a38d08b32da6
           Boot ID: ad9afa42d7274308aa703d908316e577
    Virtualization: kvm
  Operating System: CentOS Linux 7 (Core)
       CPE OS Name: cpe:/o:centos:centos:7
            Kernel: Linux 3.10.0-327.el7.x86_64
      Architecture: x86-64
# systemctl restart systemd-hostnamed
Nessus installation
The link to Nessus distributions (remote scanners) is on the Tenable.io scanners page:
Download Nessus from this page (authorization is not required):

To get a link for direct download, you can do this:
And use this link in wget to download Nessus package:
# wget "http://downloads.nessus.org/nessus3dl.php?file=Nessus-6.10.2-es7.x86_64.rpm&licence_accept=yes&t=337dd29f94981db78493643ae23aae68" -O Nessus-6.10.2-es7.x86_64.rpm
--2017-03-07 15:35:34-- http://downloads.nessus.org/nessus3dl.php?file=Nessus-6.10.2-es7.x86_64.rpm&licence_accept=yes&t=337dd29f94981db78493643ae23aae68
Resolving downloads.nessus.org (downloads.nessus.org)... 52.16.241.207
Connecting to downloads.nessus.org (downloads.nessus.org)|52.16.241.207|:80... connected.
HTTP request sent, awaiting response... 301 Moved Permanently
Location: https://downloads.nessus.org/nessus3dl.php?file=Nessus-6.10.2-es7.x86_64.rpm&licence_accept=yes&t=337dd29f94981db78493643ae23aae68 [following]
--2017-03-07 15:35:34-- https://downloads.nessus.org/nessus3dl.php?file=Nessus-6.10.2-es7.x86_64.rpm&licence_accept=yes&t=337dd29f94981db78493643ae23aae68
Connecting to downloads.nessus.org (downloads.nessus.org)|52.16.241.207|:443... connected.
HTTP request sent, awaiting response... 200 OK
Length: 38311788 (37M) [application/octet-stream]
Saving to: ‘Nessus-6.10.2-es7.x86_64.rpm’

100%[===============================================================================================================================>] 38 311 788 8,34MB/s in 5,3s

2017-03-07 15:35:41 (6,85 MB/s) - ‘Nessus-6.10.2-es7.x86_64.rpm’ saved [38311788/38311788]
Now install Nessus in the system and run it:
# rpm -i Nessus-6.10.2-es7.x86_64.rpm
warning: Nessus-6.10.2-es7.x86_64.rpm: Header V4 RSA/SHA1 Signature, key ID 1c0c4a5d: NOKEY
Unpacking Nessus Core Components...
nessusd (Nessus) 6.10.2 [build M20085] for Linux
Copyright (C) 1998 - 2016 Tenable Network Security, Inc

Processing the Nessus plugins...
[##################################################]

All plugins loaded (1sec)
- You can start Nessus by typing /bin/systemctl start nessusd.service
- Then go to https://nessus_tenableio:8834/ to configure your scanner

# /bin/systemctl start nessusd.service
And stop the firewall service. Bad practice, but for PoC it’s fine:
# systemctl stop firewalld
Now let’s go to https://192.168.56.101:8834/
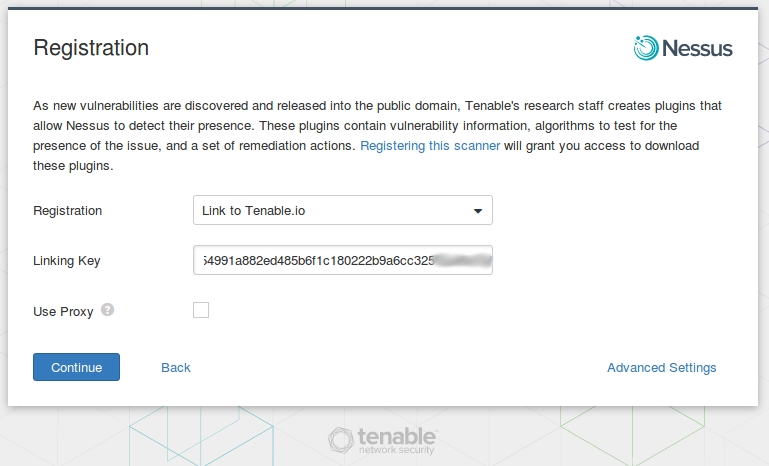
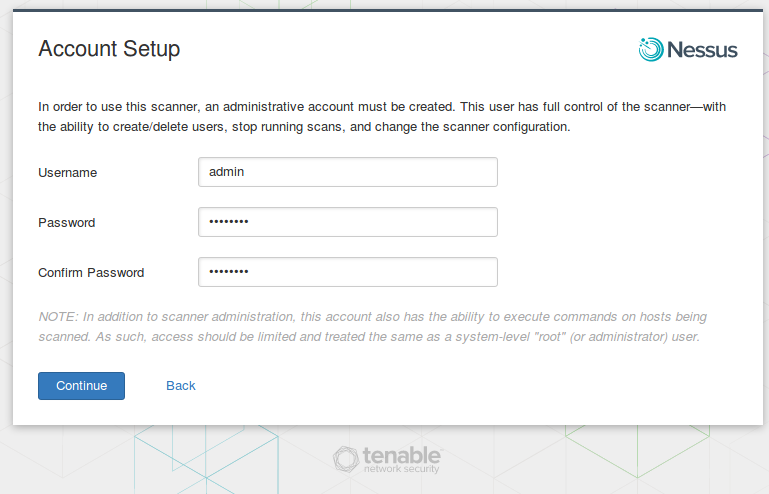
In order to use Nessus scanner administrative account must be created:
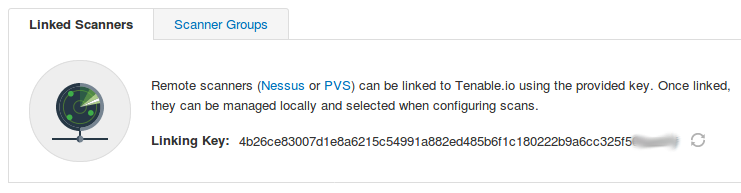
Choose “Link to Tenable.io” registration option and use your Linking Key from Tenable.io web interface. As you can see, Nessus will connect to the Tenable.io server and make all registration procedures. If you remember, in SecurityCenter we needed to make additional host configuration, to ensure that SecurityCenter is able to connect to each Nessus and manage it. In Tenable.io it’s much more convenient.
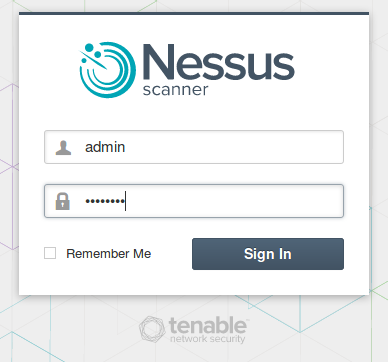
Setup completed!
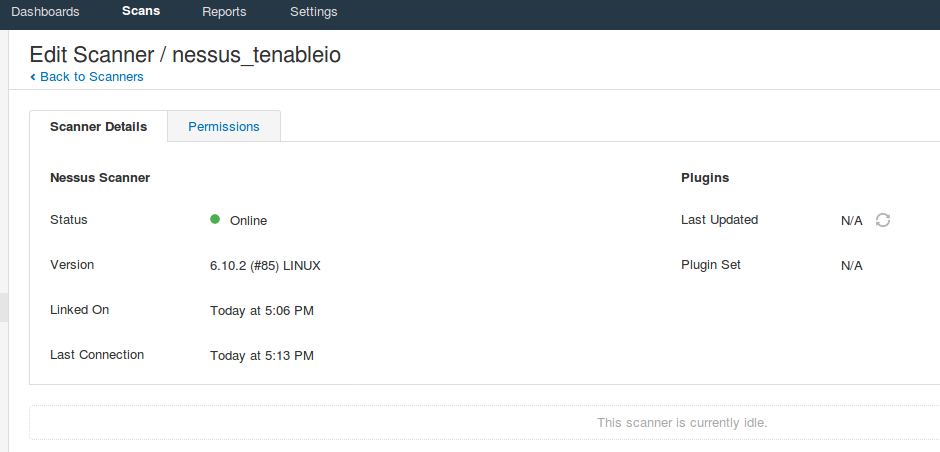
As you can see, our nessus_tenableio appeared in the list of scanners:

If you click on nessus_tenableio, you can see that it is not updated. We can forcefully update it:
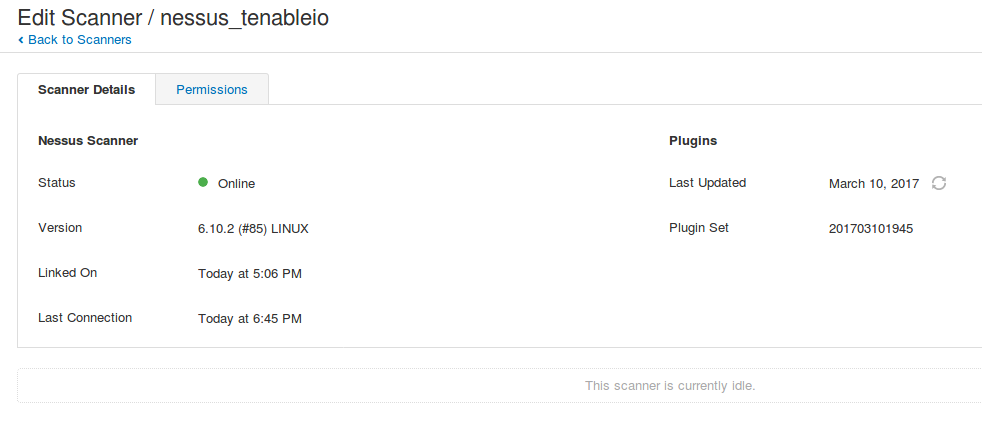
After a while the status will be changed:
Target host scanning and Asset IDs
We can try using this scanner to scan 192.168.56.102 – CentOS 5 target host.
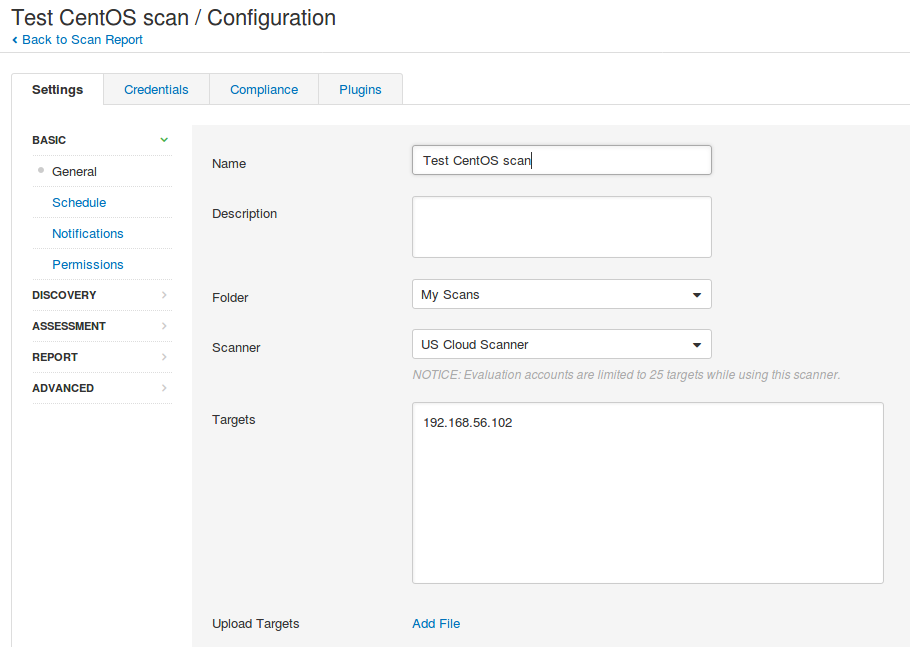
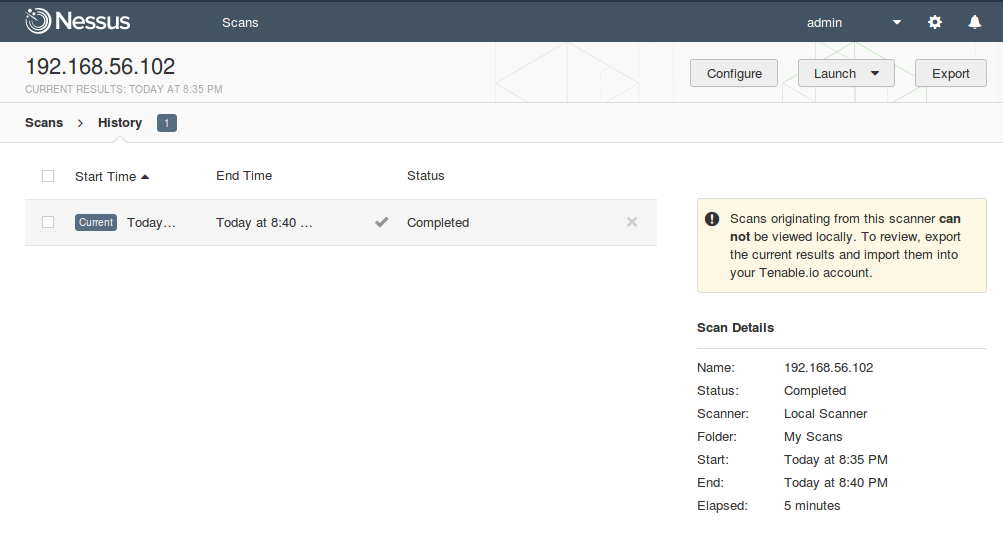
The scanning process is not much different from scanning with local Nessus Professional or Nessus Home. But if you used to watch how the scan results are changing in a real time, it will not work. If the scan takes, for example, 5 minutes you will not see anything in the interface during this time, and only when scan will be finished the results will be displayed.
Scan results:

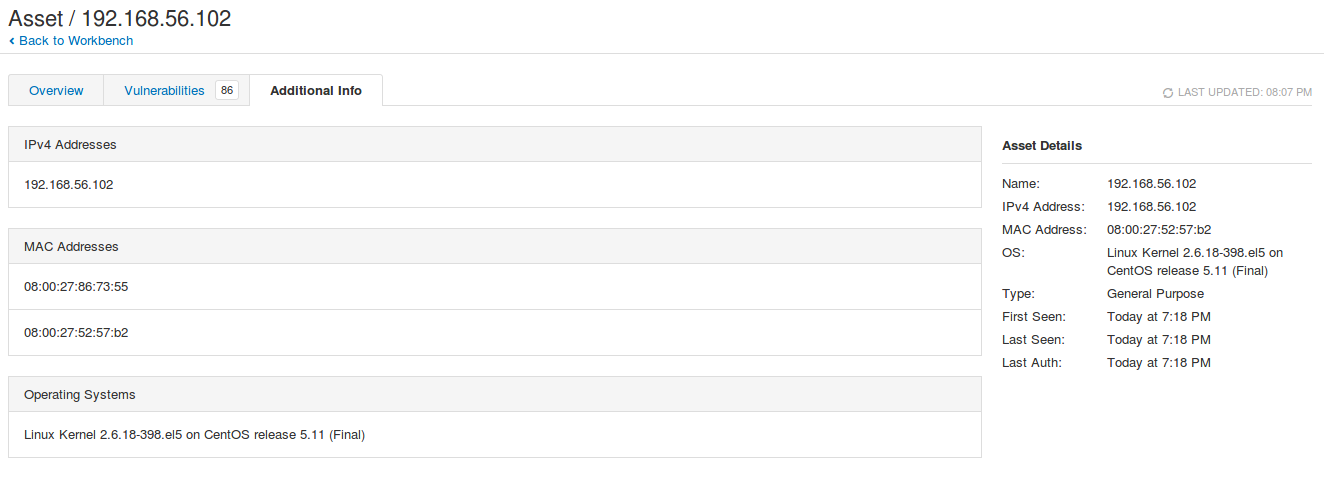
For the first time I scanned without root privileges, therefore, only these parameters were used to define an Asset: IP Address, MAC Addresses, OS version.
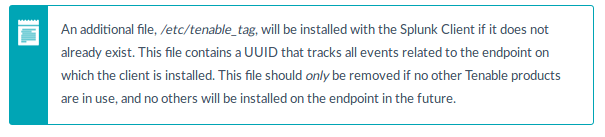
And then I scanned the same host with root privileges and Nessus created me the file /etc/tenable_tag on the host:
# cat /etc/tenable_tag
21b498c27d1b4f98a6f7ca7f5d94f7f3
A brief description of this file from the Tenable LCE manual:
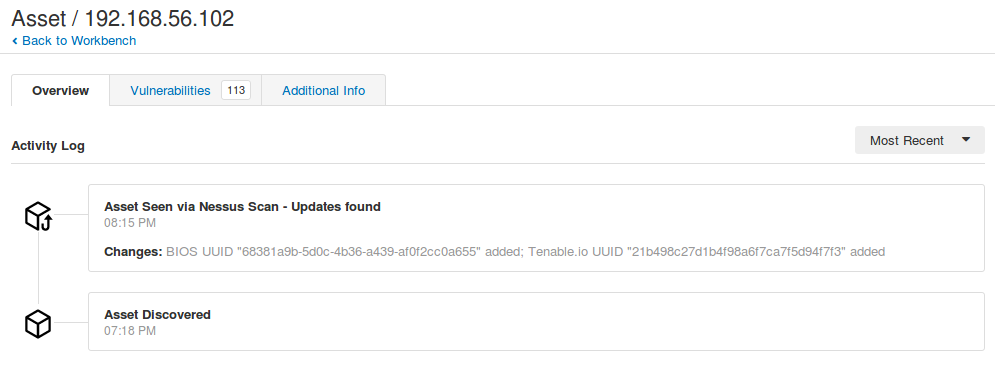
Here is how Asset description looks after scanning with root privileges. As you can see, the Tenable UUID was added:
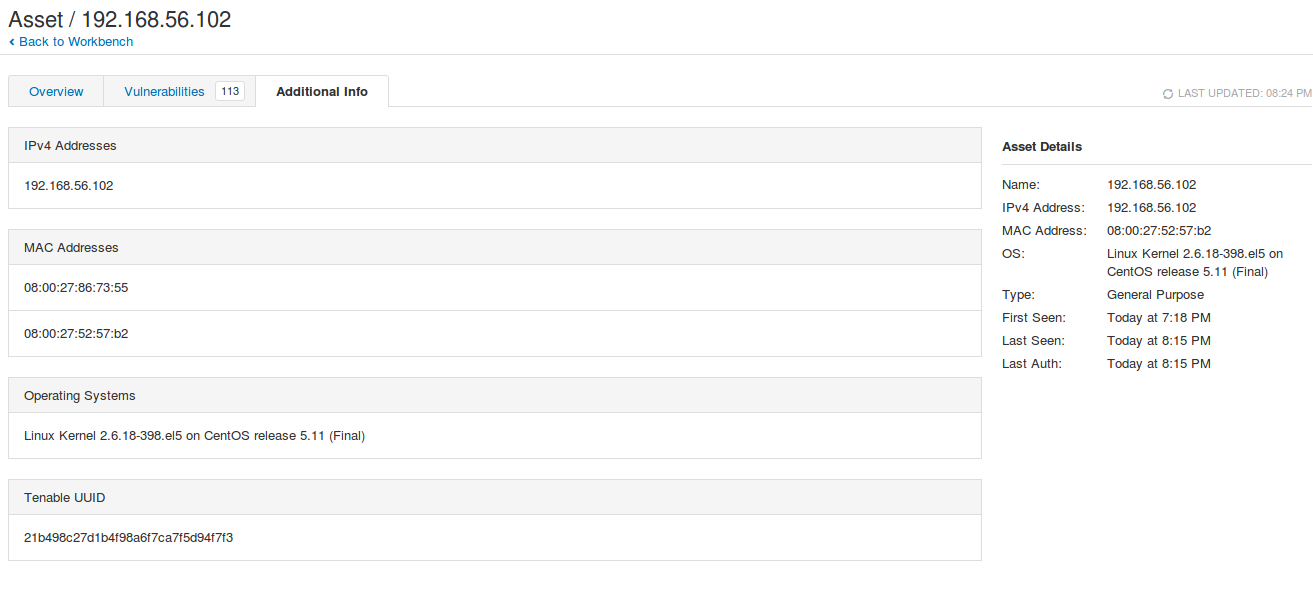
And these changes were also fixed in the Asset activity log:
You will not find the Tenable UUID in the output of the plugins, but here it is in Nessus2 XML report:
<?xml version="1.0" ?> <NessusClientData_v2> <Policy><policyName>Advanced Network Scan</policyName> .. <Report name="CentOS 5 Test Scan" xmlns:cm="http://www.nessus.org/cm"> <ReportHost name="192.168.56.102"><HostProperties> ... <tag name="cpe">cpe:/o:linux:linux_kernel</tag> <tag name="os">linux</tag> <tag name="ssh-fingerprint">SSH-2.0-OpenSSH_4.3</tag> <tag name="cpe-1">cpe:/a:openbsd:openssh:4.3 -> OpenBSD OpenSSH 4.3</tag> <tag name="cpe-0">cpe:/o:centos:centos:5:update11</tag> <tag name="system-type">general-purpose</tag> <tag name="operating-system">Linux Kernel 2.6.18-398.el5 on CentOS release 5.11 (Final)</tag> <tag name="TAG">21b498c27d1b4f98a6f7ca7f5d94f7f3</tag> <tag name="bios-uuid">68381A9B-5D0C-4B36-A439-AF0F2CC0A655</tag> ... </HostProperties> ... </ReportHost> </Report> </NessusClientData_v2>
So, if you export reports to xml, parse it and send the Splunk, or other SIEM, you can use these asset identifiers in your searches and reports.
Features of Nessus connected to Tenable.io
Unlike fully functional Nessus for SecurityCenter, capabilities of Nessus connected to Tenable.io are very limited. You can create scans in local Nessus, run the scans, but you can not view the scan results, only export them in Nessus .db and then upload this files to the Tenable.io VM.
Scan originating from this scanner can not be viewed locally. To review, export the current results and import them into your Tenable.io account.
As you can see, the only option is export in Nessus DB format with the password for encryption.
It’s pretty logical from Tenable.io licensing point of view, but it’s sad for a thrifty user. It will not be possible to buy cheapest bundle of Tenable.io VM, and scan as many as hosts as you like using free Nessus scanners connected to Tenable.io only for feed updates only, 😉 And something tells me that we will not see the full description of Nessus .db files soon as well.

Hi! My name is Alexander and I am a Vulnerability Management specialist. You can read more about me here. Currently, the best way to follow me is my Telegram channel @avleonovcom. I update it more often than this site. If you haven’t used Telegram yet, give it a try. It’s great. You can discuss my posts or ask questions at @avleonovchat.
А всех русскоязычных я приглашаю в ещё один телеграмм канал @avleonovrus, первым делом теперь пишу туда.
As an FYI, there is no need to even create an account on the scanner anymore. Just use the nessuscli to link the scanner and then start it up. Technically you can leave firewalld in its default state, as there really is no use for the WebUI anymore. This also makes automation of deployment a lot easier, for example:
https://github.com/SteveMcGrath/deploy/blob/master/fabfile/nessus.py
Thank you for very useful comment, Steve!
Pingback: New Nessus 7 Professional and the end of cost-effective Vulnerability Management (as we knew it) | Alexander V. Leonov