
In the last post about Kenna Security cloud service I mentioned their main features for analyzing data from different vulnerability scanners. Now let’s see how to import Tenable Nessus scan results in Kenna. Here you can see the list of connectors for all supported products:

Three connectors for Nessus are available:
- Nessus Importer retrieves existing scan results from your Nessus server.
- Nessus Scanner can schedule scans on your Nessus server.
- Nessus XML imports xml (.Nessus2) files.
First two connectors work with Nessus server directly. And they probably won’t work anymore with Nessus Professional 7, because of API removing (see “New Nessus 7 Professional and the end of cost-effective Vulnerability Management (as we knew it)“). If Nessus server is deployed on-premise you should use special Kenna Virtual Tunnel.
Last “Nessus XML” connector is the most flexible. No matter how you got your scan results, it will be possible to import them to Kenna. See how to get XML reports from from Nessus server in a post “Retrieving scan results through Nessus API“. You can upload XML scan results using Kenna web GUI (not very efficient way, but for testing – why not?) or REST API.
To use Kenna REST API you will need an Application Token. Go to the the Settings menu -> Applications:
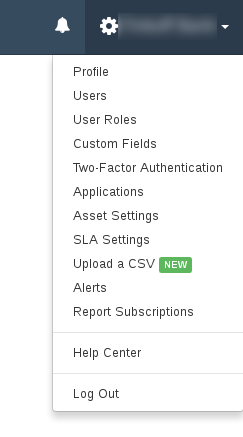
And generate the token:
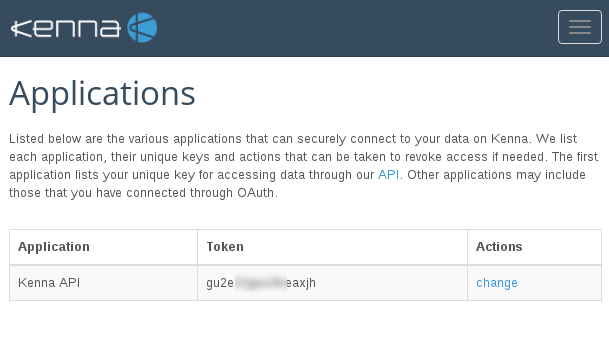
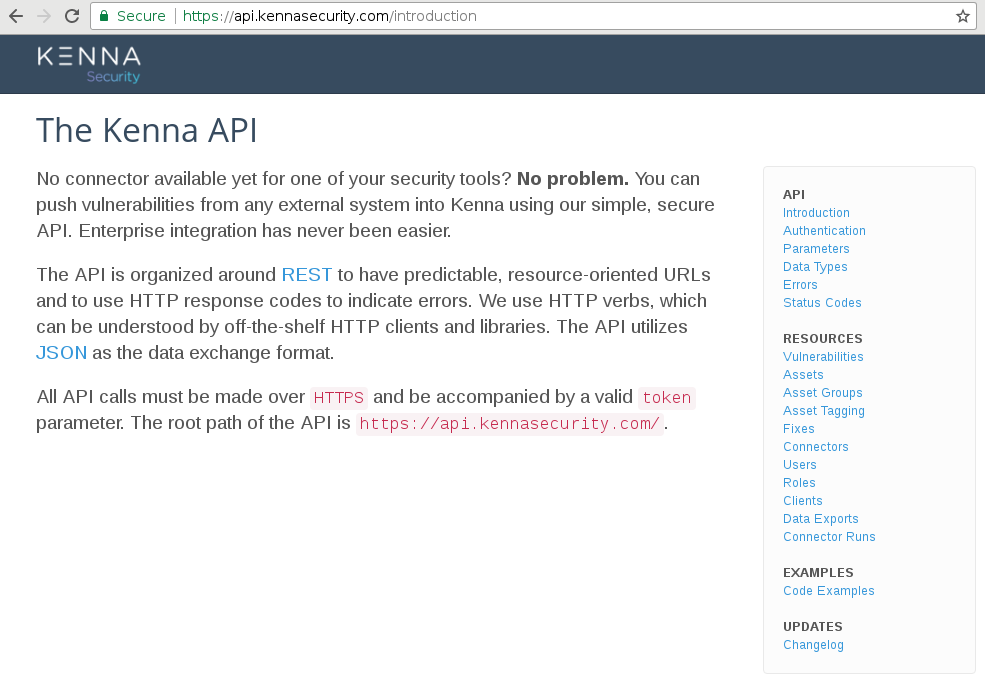
Kenna Rest API has a pretty good documentation at https://api.kennasecurity.com/introduction
First request
Let’s make our first request using token 3049tu809oidjfgp. I just need to put it in headers. For example, let’s get all our assets:
import requests

headers = {
    'X-Risk-Token': '3049tu809oidjfgp',
}
response = requests.get('https://api.eu.kennasecurity.com/assets', headers=headers)
print(response.text)
Output:
{"assets":[],"meta":{"page":1,"pages":0}}
I have no assets, It’s ok, because I have not uploaded any files yet.
Getting connector ID
I added Nessus XML connector manually in GUI. To work with this connector using API I need to get it’s ID. I list all my connectors:
response = requests.get('https://api.eu.kennasecurity.com/connectors', headers=headers)
print(response.text)
Output:
{"connectors":[{"host":null,"name":"Nessus XML","running":false,"id":238784}]}
And retrieve connector_id for Nessus XML connector:
import json

connector_id = ""
for connector in json.loads(response.text)['connectors']:
    if connector['name'] == "Nessus XML":
        connector_id = connector['id']
print(connector_id)
Output:
238784
Sending one Nessus scan report
Let’s send a file to this Nessus XML connector:
import requests

files = {
    'file': ('0.xml', open('data/test_masked_nessus_data/0.xml', 'rb')),
}

response = requests.post('https://api.eu.kennasecurity.com/connectors/' + str(connector_id) + '/data_file', headers=headers, files=files)
print(response.text)
Output:
{"success":"true","run_url":"https://api.kennasecurity.com/connectors/238784/run"}
Ok, File is already there. Now we need to make a get request to start processing:
response = requests.get('https://api.eu.kennasecurity.com/connectors/' + str(connector_id) + '/run', headers=headers)
print(response.text)
Output:
{"success":"true"}
Sending ALL Nessus scan reports
Now we can repeat previous operations for all scan reports in data/test_masked_nessus_data/ directory. Note that output of run request will not always be {“success”:”true”}. For big reports it can be in {“success”:”false”,”error”:”Connector could not run”}. And in this case we should keep trying.
import os
import requests
import time

for file in os.listdir('data/test_masked_nessus_data/'):
    print(file)
    files = {
        'file': (file, open('data/test_masked_nessus_data/' + file, 'rb')),
    }

    response = requests.post('https://api.eu.kennasecurity.com/connectors/' + str(connector_id) + '/data_file',
                             headers=headers, files=files)
    print(response.text)

    success = "false"
    while success != "true":
        response = requests.get('https://api.eu.kennasecurity.com/connectors/' + str(connector_id) + '/run',
                                headers=headers)
        print(response.text)
        success = json.loads(response.text)["success"]
        time.sleep(2)
Output:
0.xml
{"success":"true","run_url":"https://api.kennasecurity.com/connectors/238784/run"}
{"success":"false","error":"Connector could not run"}
{"success":"false","error":"Connector could not run"}
{"success":"false","error":"Connector could not run"}
{"success":"false","error":"Connector could not run"}
{"success":"false","error":"Connector could not run"}
{"success":"true"}
1.xml
{"success":"true","run_url":"https://api.kennasecurity.com/connectors/238784/run"}
{"success":"false","error":"Connector could not run"}
{"success":"false","error":"Connector could not run"}
{"success":"false","error":"Connector could not run"}
{"success":"false","error":"Connector could not run"}
{"success":"false","error":"Connector could not run"}
{"success":"false","error":"Connector could not run"}
{"success":"false","error":"Connector could not run"}
{"success":"true"}
...
As you can see, everything is pretty simple and intuitive.

Hi! My name is Alexander and I am a Vulnerability Management specialist. You can read more about me here. Currently, the best way to follow me is my Telegram channel @avleonovcom. I update it more often than this site. If you haven’t used Telegram yet, give it a try. It’s great. You can discuss my posts or ask questions at @avleonovchat.
А всех русскоязычных я приглашаю в ещё один телеграмм канал @avleonovrus, первым делом теперь пишу туда.
Pingback: Kenna Security: Analyzing Vulnerability Scan data | Alexander V. Leonov