
Making simple Nmap SPA web GUI with Apache, AngularJS and Python Twisted. The last time I was developing dynamic web applications years ago. I used CGI and PHP back then. 🙂 Now I am really interested in a modern approach, when you have a Single Page Web Application (SPA) written in HTML and JavaScript, that makes http requests to some external API.
It’s pretty cool, because your application becomes API-centric naturally. You work on human interface and improve integration capabilities at the same time. And the task of securing your web app mostly reduces to securing your formalized API.
The very best way to learn something new is to write a post about this stuff. 😉 Here I will reproduce my own steps of making a very basic web app:
- Launch Apache web-server with http/https.
- Make a simple API service: Nmap wrapper.
- Make a web-application with “multipage” experience. There should be at least two pages: Scan and About.
- On Scan page it will be possible to input a target (hostname or IP), scan arguments and launch scan by clicking on the button. The same behavior will be if the target will be passed as a parameter in address bar.
- On other pages should be some static text.
As you can see, it is a very limited task, but it should clear up the most confusing parts of the process.
Apache web server on Ubuntu Linux
I will do it in Ubuntu 16.04 LTS
sudo apt-get update

sudo apt-get install apache2
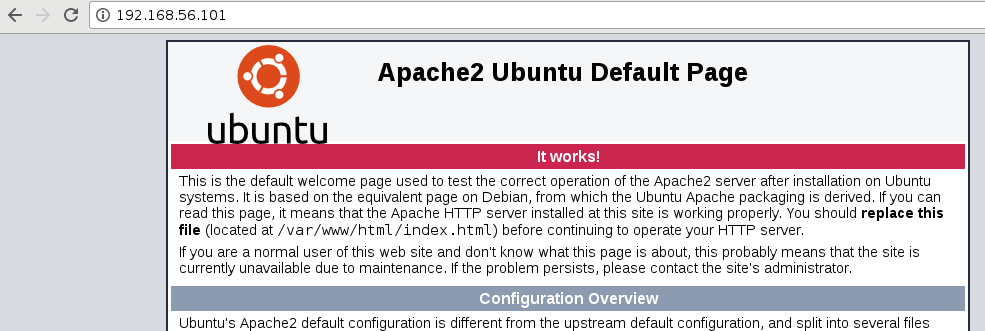
Ok, it works!
NB. Commands for Centos7:
sudo yum install httpd

sudo systemctl start httpd

sudo systemctl enable httpd

sudo systemctl status httpd

sudo rm /etc/httpd/conf.d/welcome.conf

sudo systemctl restart httpd
How to add SSL certificate
Enable ssl module:
sudo a2enmod ssl

sudo systemctl restart apache2
Create a self-signed SSL certificate:
$ sudo mkdir /etc/apache2/ssl

$ sudo openssl req -x509 -nodes -days 365 -newkey rsa:2048 -keyout /etc/apache2/ssl/apache.key -out /etc/apache2/ssl/apache.crt

Generating a 2048 bit RSA private key

.......................................................................................+++

.............................................................+++

writing new private key to '/etc/apache2/ssl/apache.key'

-----

You are about to be asked to enter information that will be incorporated

into your certificate request.

What you are about to enter is what is called a Distinguished Name or a DN.

There are quite a few fields but you can leave some blank

For some fields there will be a default value,

If you enter '.', the field will be left blank.

-----

Country Name (2 letter code) [AU]:RU

State or Province Name (full name) [Some-State]:Moscow

Locality Name (eg, city) []:Moscow

Organization Name (eg, company) [Internet Widgits Pty Ltd]:avleonov

Organizational Unit Name (eg, section) []:avleonov

Common Name (e.g. server FQDN or YOUR name) []:localhost

Email Address []:me@avleonov.com
Check that it was created successfully:
$ ls /etc/apache2/ssl

apache.crt  apache.key
Edit Apache configuration:
$ cat /etc/apache2/sites-available/default-ssl.conf  | grep -vP "^[\t ]*#" | grep -vP "^$" | sudo sed 's|/etc/ssl/certs/ssl-cert-snakeoil.pem|/etc/apache2/ssl/apache.crt|'  | sudo sed 's|/etc/ssl/private/ssl-cert-snakeoil.key|/etc/apache2/ssl/apache.key|' | sudo tee /etc/apache2/sites-available/my-ssl.conf
<IfModule mod_ssl.c>
	<VirtualHost _default_:443>
		ServerAdmin webmaster@localhost
		DocumentRoot /var/www/html
		ErrorLog ${APACHE_LOG_DIR}/error.log
		CustomLog ${APACHE_LOG_DIR}/access.log combined
		SSLEngine on
		SSLCertificateFile	/etc/apache2/ssl/apache.crt
		SSLCertificateKeyFile /etc/apache2/ssl/apache.key
		<FilesMatch "\.(cgi|shtml|phtml|php)$">
				SSLOptions +StdEnvVars
		</FilesMatch>
		<Directory /usr/lib/cgi-bin>
				SSLOptions +StdEnvVars
		</Directory>
	</VirtualHost>
</IfModule>
Enable this configuration:
$ sudo a2ensite my-ssl.conf

Enabling site my-ssl.
To activate the new configuration run:
sudo systemctl restart apache2
Here is our localhost website with https:

Nmap API Server
I didn’t want to make my own API service at first. I planned to use Vulners API and make something like Vulners browser extension. However, to make request from JavaScript to API on remote web server, this web server should add special headers in response. It is called Cross-Origin Resource Sharing (CORS). For example, you can make requests to https://www.googleapis.com/discovery/v1/apis, but you can’t make requests to https://vulners.com/api/v3/.
Disabling this by default may be a good security measure, but from the develper’s point of view it’s crazy. You can make literally any requests from the server side, but in browser your hands are tied up.
So, I decided to launch python web server Twisted on the same host and port 8800 and make some automation for nmap port scanner. Here is how I installed dependencies on Ubuntu server:
sudo apt-get install python-setuptools python-dev build-essential nmap

sudo easy_install pip

sudo pip install twisted pyopenssl python-nmap
And here is the code:
#!/usr/bin/python2

from twisted.web.server import Site
from twisted.web.server import NOT_DONE_YET
from twisted.web.resource import Resource
from twisted.internet import reactor, ssl
import json
import nmap

class API(Resource):
    def __init__(self):
        self.token = "34095ut0935ug9q8t9q8tfidfjoisdf"

    def deal_with_header(self, request):
        request.setHeader('Access-Control-Allow-Origin', '*')
        request.setHeader('Access-Control-Allow-Methods', 'GET, POST, OPTION')
        request.setHeader('Access-Control-Allow-Headers', 'x-prototype-version, x-requested-with, content-type')
        request.setHeader('Access-Control-Max-Age', 2520) # 42 hours
        request.setHeader('Content-type', 'application/json')
        return request

    def render_GET(self, request):
        request = self.deal_with_header(request)
        request.write('')
        request.finish()
        return NOT_DONE_YET

    def render_OPTIONS(self, request):
        request = self.deal_with_header(request)
        request.write('')
        request.finish()
        return NOT_DONE_YET


    def render_POST(self, request):
        request = self.deal_with_header(request)
        data = json.loads(request.content.read())
        results = dict()
        if data['token'] == self.token:
            results['token_status'] = "ok"
        else:
            results['token_status'] = "wrong"

        if data['action'] == "nmap":
            if data['token'] == self.token:
                nm = nmap.PortScanner()
                results["nmap"]= nm.scan(hosts=data['hosts'], arguments=data['arguments'])

        return(json.dumps(results))


root = Resource()
root.putChild("api", API())
factory = Site(root)
reactor.listenSSL(8800, factory, ssl.DefaultOpenSSLContextFactory(privateKeyFileName = '/etc/apache2/ssl/apache.key', certificateFileName = '/etc/apache2/ssl/apache.crt'))
#reactor.listenTCP(8800, factory)

reactor.run()
The token "34095ut0935ug9q8t9q8tfidfjoisdf"is just a random string that I use for “authentication” in python server script and in js script of Web GUI (and API requests). It’s a stub in the code instead of full-functioning authentication procedure.
Note that I launch server with the same self-signed certificate/etc/apache2/ssl/apache.crt. There is also commented line for launching the server as http.
In deal_with_header function there are some headers I need to be set for CORS. And in therender_POST function you can see how to control Nmap from Python scripts.
I can make requests to API this way:
$ curl -k -H "Content-Type: application/json" -X POST -d '{"action": "nmap", "hosts": "localhost", "arguments":"-sn", "token": "34095ut0935ug9q8t9q8tfidfjoisdf"}' https://192.168.56.101:8800/api
{"nmap": {"nmap": {"scanstats": {"uphosts": "1", "timestr": "Thu Feb 1 17:01:16 2018", "downhosts": "0", "totalhosts": "1", "elapsed": "0.00"}, "scaninfo": {}, "command_line": "nmap -oX - -sn localhost"}, "scan": {"127.0.0.1": {"status": {"state": "up", "reason": "syn-ack"}, "hostnames": [{"type": "user", "name": "localhost"}, {"type": "PTR", "name": "localhost"}], "vendor": {}, "addresses": {"ipv4": "127.0.0.1"}}}}, "token_status": "ok"}
JavaScript
The most interesting part was dealing with html/JavaScript. Choosing the right framework for single page application is not an easy task. There are way too many of them. 🙂 I decided to try AngularJS. Basically, because of this nice tutorial at https://www.w3schools.com/angular.
Couple of words about the AngularJS. You can put additional parameters to your html code elements and control content and actions of this elements from the script. For example you can handle clicks on button, read/write the content of inputs and text blocs. Pretty straightforward. Another cool thing is routing. You can change the part of page depending on the URL and even pass the parameters. The content may be set as a string or a filename.
The code of my first single page application index.html:
<!DOCTYPE html>
<html>
<script src="https://ajax.googleapis.com/ajax/libs/angularjs/1.6.7/angular.min.js"></script>
<script src="https://ajax.googleapis.com/ajax/libs/angularjs/1.6.7/angular-route.js"></script>
<body ng-app="myApp">
<p><a href="#!">Main</a>
<a href="#!scan">Scan</a>
<a href="#!about">About</a>
</p>
<p>Click on the links to change the content.</p>
<div ng-view>
<script>
var app = angular.module("myApp", ["ngRoute"]);
app.config(function($routeProvider) {
$routeProvider
.when("/", {
template : "<h1>Main</h1><p>Click on the links to change this content</p>"
})
.when("/scan", {
templateUrl : "scan.html",
controller : "scanCtrl"
})
.when("/scan", {
templateUrl : "scan.html",
controller : "scanCtrl"
})
.when("/scan/:target", {
templateUrl : "scan.html",
controller : "scanCtrl"
})
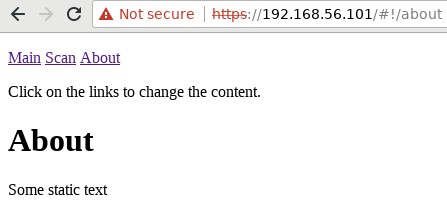
.when("/about", {
template : "<h1>About</h1><p>Some static text</p>"
});
});
app.controller("scanCtrl", function ($routeParams, $scope, $http, $location) {
$scope.scanFunc = function() {
if ( $scope.arguments == null ) {
$scope.arguments = " ";
}
$http({
url: 'https://' + $location.host() + ':8800/api',
method: "POST",
data: { "action": "nmap", "hosts": $scope.target, "arguments": $scope.arguments, "token": "34095ut0935ug9q8t9q8tfidfjoisdf" }
})
.then(function(response) {
$scope.output = ""
$scope.scanstats = response.data.nmap.nmap.scanstats
$scope.scanresult = response.data.nmap.scan
},
function(response) { // optional
$scope.output = response.statusText
});
/*
$http({
method : "GET",
url: 'http://' + $location.host() + ':8800/api'
}).then(function mySuccess(response) {
$scope.output = response.daNmapta;
}, function myError(response) {
$scope.output = response.statusText;
});
*/
};
if ( $routeParams.target != null ) {
$scope.target = $routeParams.target
$scope.scanFunc()
}
});
</script>
</body></html>
And here is the scan.html:
<h1>Scan</h1>
Target: <input type="text" ng-model="target"/></br>
Arguments: <input type="text" ng-model="arguments"/></br>
<button ng-click="scanFunc()">Scan</button></br>
<p>{{output}}</p>
<p>{{scanstats}}</p>
<p>{{scanresult}}</p>
Switching between the “tabs” works well:


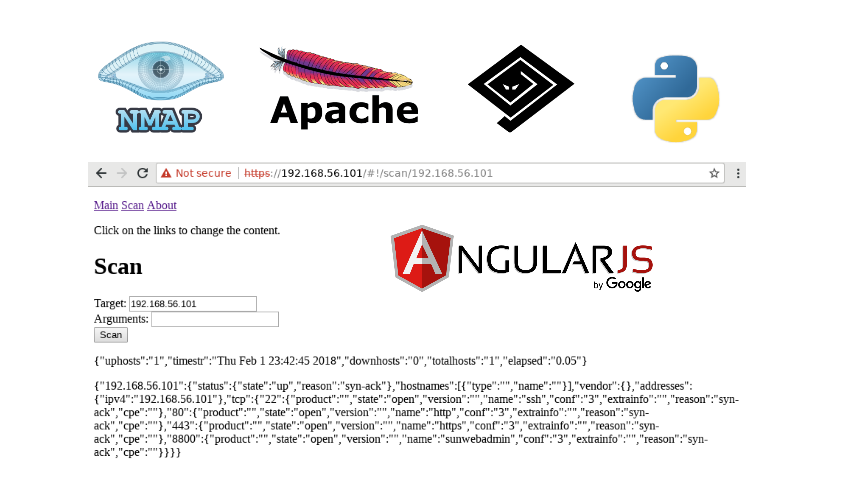
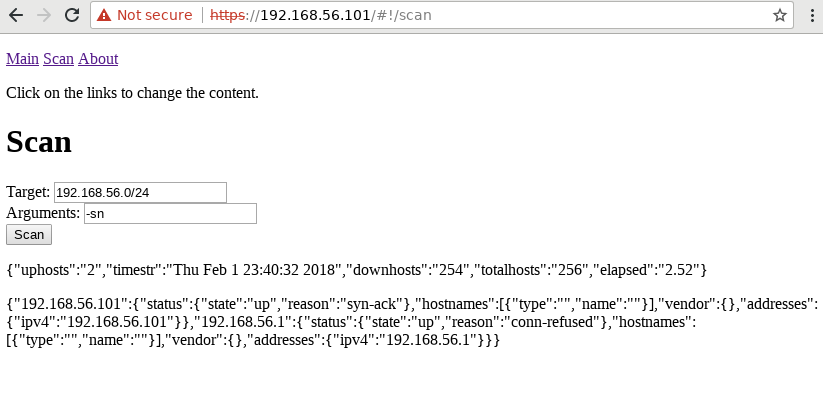
Now let’s scan something:
And if we set target id in URL, it will be written in Target input and scan will be launched automatically:

In conclusion
In Chrome, everything works well. Go to https://localhost:443, add the certificate to the exceptions one time and that’s it. The browser does not care that certificate of API service was also self-signed.
But in Firefox, you need to go to https://localhost:8800/api either (yeah, service should understand get requests) and add it to the exception as well. Otherwise, the browser will silently ignore all the requests from web application to API service. Adding each port to the exceptions is certainly a nonsense.
So, having one port for the web application and API seems to be right thing. Like Tenable Nessus that has “new restful api and the html5 gui all work on https port 8834“.
In my case I could host the web application at Twisted server or, on the other hand, I could use something like gunicorn to run both my web application and API service on Nginx.

Hi! My name is Alexander and I am a Vulnerability Management specialist. You can read more about me here. Currently, the best way to follow me is my Telegram channel @avleonovcom. I update it more often than this site. If you haven’t used Telegram yet, give it a try. It’s great. You can discuss my posts or ask questions at @avleonovchat.
А всех русскоязычных я приглашаю в ещё один телеграмм канал @avleonovrus, первым делом теперь пишу туда.
Pingback: Making Vulnerable Web-Applications: XXS, RCE, SQL Injection and Stored XSS ( + Buffer Overflow) | Alexander V. Leonov