
An introduction to Rapid7 Nexpose API. Another nice thing about Nexpose is that this vulnerability scanner has an open API. And even free Nexpose Community Edition supports it.
It’s a really generous gift from Rapid7. That means that you can use Nexpose to scan your environment, easily manage it from your scripts and make any vulnerability assessment and remediation logic you need.
I haven’t found manuals about using Nexpose API to automate basic vulnerability management tasks and decided to write my own. Hope somebody will find it useful. All examples will be in form of curl requests.
Working with Nexpose API is nothing more than sending xml Post-requests to the https://[Nexpose Host]:3780/api/[API Version]/xml and receiving xml responses.
In Nexpose 4.0 and later two version of API are supported: API 1.1 and API 1.2. You can think that API 1.2 is a newer release of 1.1. No, it’s not. API 1.2 just provides some extended functionality. For controlling Nexpose both versions of API should be used simultaneously. But API 1.1 will be enough for basic tasks: creating and editing sites, scanning, getting the results.
1. Authentication
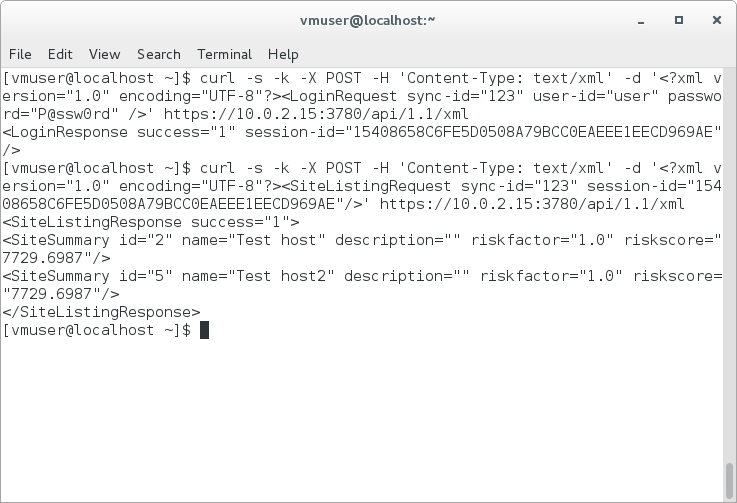
First of all, you need to authenticate with your Nexpose credentials (e.g. user/P@ssw0rd) and get session-id. You will use this session-id later in all other request. Sync-id is just label you can use to differ applications that use the same credentials.
For API 1.1:
$ curl -s -k -X POST -H 'Content-Type: text/xml' -d '<?xml version="1.0" encoding="UTF-8"?><LoginRequest sync-id="123" user-id="user" password="P@ssw0rd" />' https://10.0.2.15:3780/api/1.1/xml
<LoginResponse success="1" session-id="5DE9612B1BF992F8EBFB974FE80FCA21D10F063E"/>
For API 1.2:
$ curl -s -k -X POST -H 'Content-Type: text/xml' -d '<?xml version="1.0" encoding="UTF-8"?><LoginRequest sync-id="123" user-id="user" password="P@ssw0rd" />' https://10.0.2.15:3780/api/1.2/xml
<?xml version="1.0" encoding="UTF-8" standalone="yes"?>

<LoginResponse session-id="0F7F1180E869A0D1A1A62C233B39EDF64F6CA96D" sync-id="123"/>
2. Sites
In last article about Nexpose Community Edition I have created a scanning entity (site) to scan test target host. Let’s get a list of sites available in Nexpose:
$ curl -s -k -X POST -H 'Content-Type: text/xml' -d '<?xml version="1.0" encoding="UTF-8"?><SiteListingRequest sync-id="123" session-id="5DE9612B1BF992F8EBFB974FE80FCA21D10F063E"/>' https://10.0.2.15:3780/api/1.1/xml
<SiteListingResponse success="1">

<SiteSummary id="2" name="Test host" description="" riskfactor="1.0" riskscore="7704.0254"/>

</SiteListingResponse>
Here it is. With id 2 and name “Test host”. Using this site id we can read configuration of the site, edit this configuration, scan site and delete it. Let’s get site config:
$ curl -s -k -X POST -H 'Content-Type: text/xml' -d '<?xml version="1.0" encoding="utf-8"?><SiteConfigRequest sync-id="123" session-id="5DE9612B1BF992F8EBFB974FE80FCA21D10F063E" site-id="2"></SiteConfigRequest>' https://10.0.2.15:3780/api/1.1/xml
<SiteConfigResponse success="1"><Site id="2" name="Test host" description="" riskfactor="1.0" isDynamic="0">

<Description></Description>

<Hosts>

<range from="10.0.2.4"/>

</Hosts>

<Credentials>

<adminCredentials service="ssh">E9F157[ ... ]5b9d:CN=NeXpose Security Console, O=Home01000102[ ... ]E6416F7</adminCredentials>

</Credentials>

<Alerting>

</Alerting>

<ScanConfig configID="3" name="Full audit without Web Spider" templateID="full-audit-without-web-spider" engineID="3" configVersion="3">

<Schedules>

</Schedules>

</ScanConfig>

</Site>

</SiteConfigResponse>
I skipped encrypted ssh credentials used in site configuration. If we want to edit settings of this site or copy it for new site we should use SiteSaveRequest:
<?xml version="1.0" encoding="utf-8"?><SiteSaveRequest sync-id="123" session-id="5DE9612B1BF992F8EBFB974FE80FCA21D10F063E">[SITE SECTION]</SiteSaveRequest>
If site id already exist in the system SiteSaveRequest will save new configuration to this existing site. If site id will be equal -1 SiteSaveRequest will create site with new id. But, keep in mind that name of the site in the system must be unique.
Let’s create new site with the same configuration. I just changed site id to -1 and renamed it to “Test host2”.
$ curl -s -k -X POST -H 'Content-Type: text/xml' -d '<?xml version="1.0" encoding="utf-8"?><SiteSaveRequest sync-id="123" session-id="5DE9612B1BF992F8EBFB974FE80FCA21D10F063E"><Site id="-1" name="Test host2" description="" riskfactor="1.0" isDynamic="0"><Description></Description><Hosts><range from="10.0.2.4"/></Hosts><Credentials><adminCredentials service="ssh">E9F157[ ... ]5b9d:CN=NeXpose Security Console, O=Home01000102[ ... ]E6416F7</adminCredentials></Credentials><Alerting></Alerting><ScanConfig configID="3" name="Full audit without Web Spider" templateID="full-audit-without-web-spider" engineID="3" configVersion="3"><Schedules></Schedules></ScanConfig></Site></SiteSaveRequest>' https://10.0.2.15:3780/api/1.1/xml
<SiteSaveResponse success="1" site-id="5"/>
Let’s see all the sites:
curl -s -k -X POST -H 'Content-Type: text/xml' -d '<?xml version="1.0" encoding="UTF-8"?><SiteListingRequest sync-id="123" session-id="5DE9612B1BF992F8EBFB974FE80FCA21D10F063E"/>' https://10.0.2.15:3780/api/1.1/xml
<SiteListingResponse success="1">

<SiteSummary id="2" name="Test host" description="" riskfactor="1.0" riskscore="7704.0254"/>

<SiteSummary id="5" name="Test host2" description="" riskfactor="1.0" riskscore="0.0"/>

</SiteListingResponse>
3. Scans
Ok, now we have a new site with id 5 and we can scan it.
curl -s -k -X POST -H 'Content-Type: text/xml' -d '<?xml version="1.0" encoding="utf-8"?><SiteScanRequest sync-id="123" session-id="5DE9612B1BF992F8EBFB974FE80FCA21D10F063E" site-id="5" ></SiteScanRequest>' https://10.0.2.15:3780/api/1.1/xml
<SiteScanResponse success="1"><Scan scan-id="7" engine-id="3"/></SiteScanResponse>
Scan started. How to check status of the scan?
curl -s -k -X POST -H 'Content-Type: text/xml' -d '<?xml version="1.0" encoding="utf-8"?><ScanStatusRequest sync-id="123" session-id="5DE9612B1BF992F8EBFB974FE80FCA21D10F063E" scan-id="7" ></ScanStatusRequest>' https://10.0.2.15:3780/api/1.1/xml
<ScanStatusResponse success="1" scan-id="7" engine-id="3" status="running"/>
Scan is running. Waiting for some time and sending the same request.
<ScanStatusResponse success="1" scan-id="7" engine-id="3" status="finished"/>
3. Reports
Ok. When the scan is finished we can generate the scan report. We can do it with ReportAdhocGenerateRequest. We need to set format, in this example is simple Nexpose report formst “ns-xml”, set filters for the vulnerability data. In this example I want to see vulnerabilities found in the last scan, so I placed a filter for scan id 7.
curl -s -k -X POST -H 'Content-Type: text/xml' -d '<?xml version="1.0" encoding="utf-8"?><ReportAdhocGenerateRequest sync-id="123" session-id="5DE9612B1BF992F8EBFB974FE80FCA21D10F063E"> <AdhocReportConfig format="ns-xml" > <Filters> <filter type="scan" id="7"/> </Filters> </AdhocReportConfig></ReportAdhocGenerateRequest>' https://10.0.2.15:3780/api/1.1/xml
--AxB9sl3299asdjvbA

Content-Type: application/xml; charset=UTF-8; name=response_xml
<ReportAdhocGenerateResponse success="1"/>

--AxB9sl3299asdjvbA

Content-Type: text/xml; name=report.xml

Content-Transfer-Encoding: base64
PE5lWHBvc2VTaW1wbGVYTUwgdmVyc2lvbj0iMS4wIj4KPGdlbmVyYXRlZD4yMDE2MDEzMVQxNjIy

Mjk0MzM8L2dlbmVyYXRlZD4KPGRldmljZXM+CjxkZXZpY2UgYWRkcmVzcz0iMTAuMC4yLjQiIGlk

[...]

MTMyMy50eHQ8L2lkPgo8L3Z1bG5lcmFiaWxpdHk+CjwvdnVsbmVyYWJpbGl0aWVzPgo8c2Vydmlj

ZXM+Cjwvc2VydmljZXM+CjwvZGV2aWNlPgo8L2RldmljZXM+CjwvTmVYcG9zZVNpbXBsZVhNTD4=

DQo=

--AxB9sl3299asdjvbA--
We get something encoded in base64. Some dirty bash scripting and we can see actual xml report.
curl -s -k -X POST -H 'Content-Type: text/xml' -d '<?xml version="1.0" encoding="utf-8"?><ReportAdhocGenerateRequest sync-id="123" session-id="5DE9612B1BF992F8EBFB974FE80FCA21D10F063E"> <AdhocReportConfig format="ns-xml" > <Filters> <filter type="scan" id="7"/> </Filters> </AdhocReportConfig></ReportAdhocGenerateRequest>' https://10.0.2.15:3780/api/1.1/xml | sed 's/\r//g' | egrep -v "^[ \t]*$" | egrep -v "^(--|<|Cont)" | base64 -d -i
<NeXposeSimpleXML version="1.0">

<generated>20160131T162326642</generated>

<devices>

<device address="10.0.2.4" id="-1">

<fingerprint certainty="1.00">

<description>CentOS Linux 7.2.1511</description>

<vendor>CentOS</vendor>

<family>Linux</family>

<product>Linux</product>

<version>7.2.1511</version>

<device-class></device-class>

<architecture>x86_64</architecture>

</fingerprint>

<vulnerabilities>

<vulnerability id="linuxrpm-CESA-2015-2657" resultCode="VV">

<id type="cve">CVE-2015-7201</id>

<id type="cve">CVE-2015-7205</id>

<id type="cve">CVE-2015-7210</id>

<id type="cve">CVE-2015-7212</id>

<id type="cve">CVE-2015-7213</id>

<id type="cve">CVE-2015-7214</id>

<id type="cve">CVE-2015-7222</id>

</vulnerability>

<vulnerability id="generic-ip-source-routing-enabled" resultCode="VE">

<id type="cve">CVE-1999-0510</id>

<id type="cve">CVE-1999-0909</id>

<id type="bid">646</id>

<id type="url">https://dl.packetstormsecurity.net/advisories/nai/nai.99-09-20.windows_ip_source_routing</id>

</vulnerability>

[...]

</vulnerabilities>

<services>

</services>

</device>

</devices>

</NeXposeSimpleXML>
So, we have created a new site, scanned it and got a scan report. More information you can read in Nexpose API Guide.

Hi! My name is Alexander and I am a Vulnerability Management specialist. You can read more about me here. Currently, the best way to follow me is my Telegram channel @avleonovcom. I update it more often than this site. If you haven’t used Telegram yet, give it a try. It’s great. You can discuss my posts or ask questions at @avleonovchat.
А всех русскоязычных я приглашаю в ещё один телеграмм канал @avleonovrus, первым делом теперь пишу туда.
Pingback: VM Remediation using external task tracking systems | Alexander V. Leonov
Pingback: Qualys Vulnerability Management GUI and API | Alexander V. Leonov
Pingback: Automated task processing with JIRA API | Alexander V. Leonov
Pingback: Rapid7 Nexpose in 2017 | Alexander V. Leonov
Hi,
I keep getting Empty reply from server when i use the curl requests given above, tried with both api1.1 and 1.2. Any other setting has to be done before api works?
Found answer for the issue, the issue is there only when you try with Mac, tried multiple options including supplying the ssh key in p12 format, it dint work.
So for now running the command on linux directly.
Also one small issue i lost time in is failing to realize some of the apis are on 1.2 not 1.1 like EngineConfigRequest
It looks like SiteSaveRequest for creating new site will only work non-Dynamic sites i.e if the attribute isDynamic=”0″ if not, it fails with Null pointer exception.